- Butterflies
- Art Business
- Art History
- Art Schools
- Artwork from Life
- Calligraphy
- Classical Art
- Color Theory
- Colored Pencil
- Composition & Design
- Digital Art
- Drawing & Sketching
- Egg Tempera
- Fantasy Art
- Figure drawing
- Figure Models
- Illustration
- Oil Painting
- Paint Along With Skye
- Pen & Ink
- Underpainting Technique

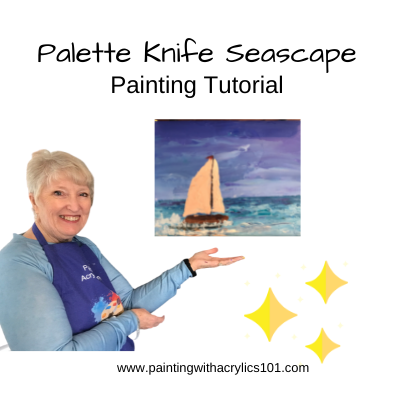
Sailboat Acrylic Painting Tutorial using Palette Knife
Audible Free 30-day Trial: http://www.audible.com/angelafineart Learn to paint a simple sailboat seascape with palette knives in this acrylic painting tutorial by Angela Anderson. Easy and fun lesson using palette knives to create a modern nautical canvas.
Materials Used: Heavy Body Acrylic Paints: http://goo.gl/r9mZPZ Titanium White Carbon Black Burnt Sienna Ultramarine Blue Cerulean Blue Phthalo Blue Teal Cadmium Yellow Medium Cadmium Red Medium Unbleached Titanium Acrylic Synthetic Brushes from The Brush Guys: http://bit.ly/angelafineartbrushes 5% discount code: “angelafineart” ITALY PAINT KNIFE 1-5/8 X 3/8 ITALY PAINT KNIFE 3-1/4 X 1/2 RYAN ITALY PAINT KNIFE Loew Cornell 3 inch Painting Knife
You can help support this channel on Patreon and receive traceables and other exclusive rewards here: https://www.patreon.com/angelafineart
Please subscribe https://www.youtube.com/subscription_center?add_user=angelafineart and give a thumbs up if you enjoyed this video. Thank you for watching!
Social Media Contacts: Patreon: https://www.patreon.com/angelafineart Email: [email protected] (send photos here or facebook) My Website: http://www.angelaandersonfineart.com/ Google +: https://plus.google.com/+angelafineart Facebook: https://www.facebook.com/angelaandersonfineart Thankful Art Group: https://www.facebook.com/groups/thankfulart Angelooney: https://www.facebook.com/groups/AngelooneyWinterPaintIn My Blog: http://angelaandersonart.blogspot.com/ Pinterest: https://www.pinterest.com/angelafineart/ Twitter: https://twitter.com/angelafineart Instagram: https://instagram.com/thankfulart Snail Mail: P.O. Box 12171, Russellville, AR 72812 (I’d love to hear from you!)
Copyright info: Videos produced by Angela Anderson (angelafineart) are intended for private use only by non-profit community, home and school groups. Please contact me for commercial/retail use licensing information. Feel free to embed the videos as is, but please do not alter, remove watermarks, re-upload or otherwise change the original video. Thank you.

How To Paint a Seascape – Samuel Earp Artist

Seascape Oil Painting Time Lapse "The New Dawn"
You might be interested in.

Seascape Painting Real Time Tutorial – Acrylic Step by Step Lesson

Sunset waves – Acrylic painting – Real time demonstration

Acrylic Seascape Painting | Windy Crashing Wave

Plein Air: how to paint a seascape in oils by Roos Schuring

Painting a Seascape in oils

How To Paint A Stormy Ocean Scene

Ocean – Sun’s rays through the clouds – Oil painting.

Pastel Landscape Painting Demonstration by Nathalie Jaguin

PAINTING TUTORIAL Acrylic Ocean for Beginners | Katie Jobling Art

Painting With Acrylics : How to Paint a Beach

David Dunlop Fog Painting at Prouts Neck

PanPastel Seascape Set – Painting Tutorial – Joanne Barby

Marine oil painting

How to make Watercolor seascape painting.

Ocean Painting

Acrylic Painting Moonlight Seascape – Correa Art

Acrylic Painting – Pink Clouds Seascape

How to Paint Realistic Ocean Waves – Painting Tutorial

- Plans and Pricing
- Beginner’s Painting Club
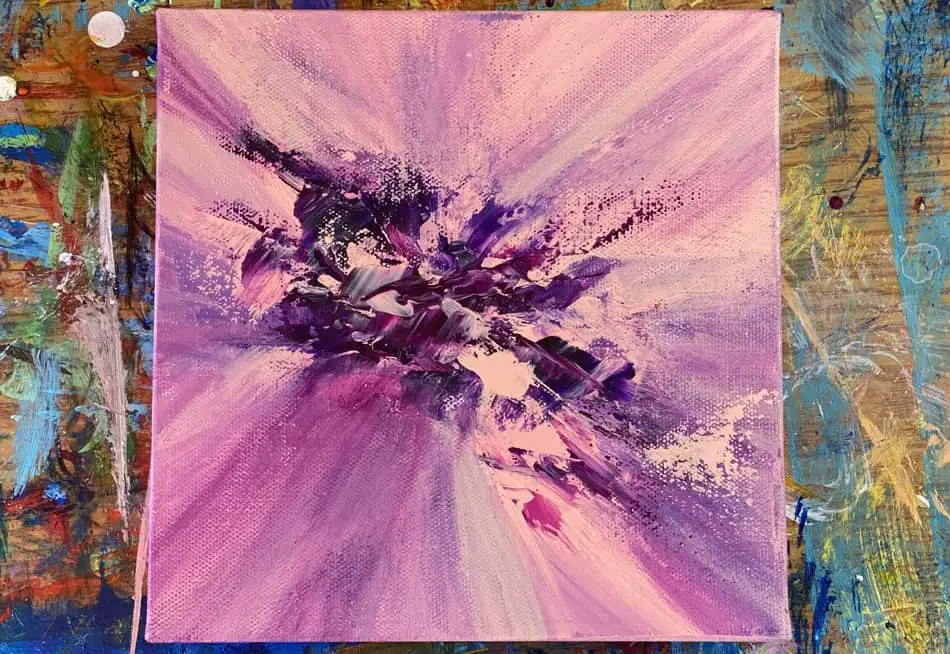
Seascape Palette Knife Tutorial
By sharon graves.
Beginning Art Lessons
Throughout February I have uploaded palette knife tutorials and this is the last one. In this video you will learn how to put in the sky, the water, the sailboat with sails, and how to seat the boat in the water.
This is a fun painting so let’s get started.
In this video I used 3 different palette knives on an 8″ x 10″ canvas panel.
Paints I Used
- Hansa Yellow Light
- Cadmium Orange Med
- Cadmium Red light
- Burnt Sienna
- Burnt Unber
- Ultramarine Blue
- Dioxazine Purple
- Turquoise Deep
- Alizarin Crimson
- Titanium White
I can’t encourage you enough not to get frustrated or discouraged. There is a learning curve to using a palette knife, but you will get it as you practice and keep working on it. That really is the only way to improve your art. You have to keep trying and things will begin to get easier and you will see real improvement.
Thanks so much for hopping in here today. I would love for you to give me a thumbs up and subscribe to my YouTube channel.
Here’s the entire Palette Knife playlist.
Like it? Share it!
Recommended articles, beginning painter bootcamp, learn to paint in 15 minutes, community art center in vevay, indiana.

Step-by-Step Guide: How to Paint a Sailboat with Acrylics
Alex Morgan
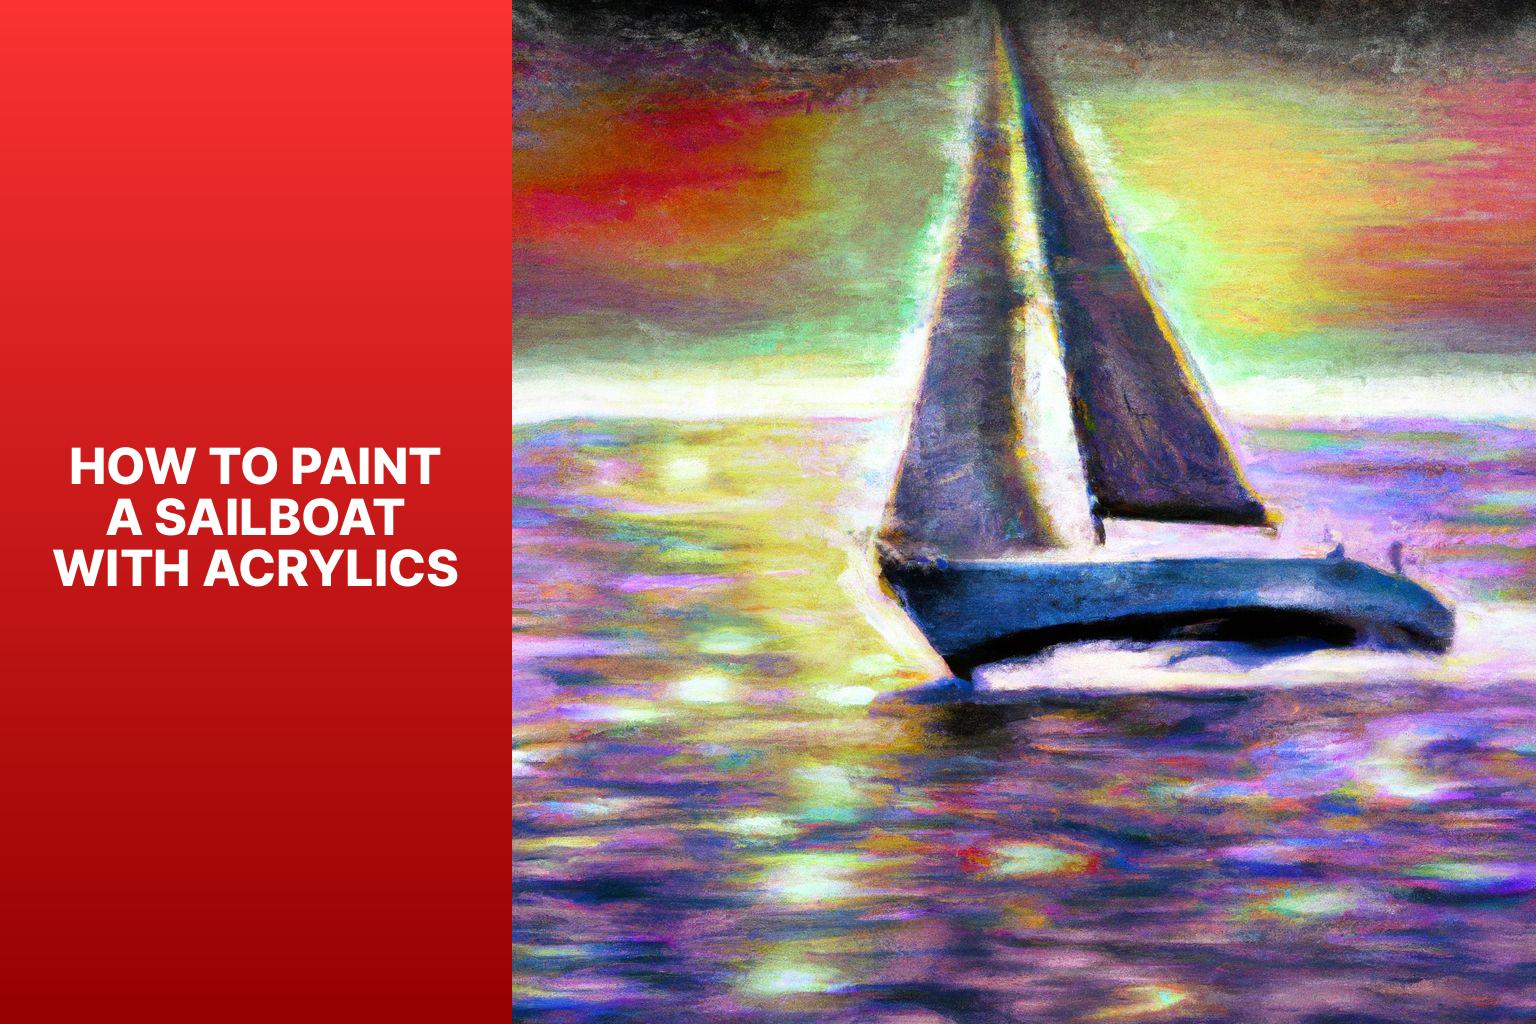
Painting a sailboat with acrylics can be a rewarding and enjoyable artistic endeavor. Whether you are a beginner or an experienced artist, this article will provide you with a comprehensive guide to creating a stunning sailboat painting using acrylic paints.
To begin with, you will need specific materials and tools to ensure a successful painting process. These include acrylic paints in various colors, a set of brushes suitable for acrylic painting, a palette for mixing colors, a canvas or painting surface, a water container for cleaning brushes, a palette knife for texture, and a reference image or sketch of a sailboat.
Before you start painting, it is essential to prepare the surface properly. This involves cleaning the surface to remove any dust or debris, and then applying a layer of primer or gesso to create a smooth and even base for your paint to adhere to.
To achieve the desired result, it is important to understand and practice basic techniques for painting with acrylics. This includes learning how to mix colors to create different shades and tones, how to layer and blend colors to add depth and dimension, and how to create texture and detail in your sailboat painting.
Once you are familiar with the techniques, you can follow a step-by-step guide to painting a sailboat. This includes sketching the sailboat outline, blocking in the background colors, adding base colors to the sailboat, adding details and highlights, and refining the painting to ensure a polished and professional look.
To complete your sailboat painting, don’t forget the finishing touches and sealing the artwork to protect it and enhance its longevity. We will share some tips and tricks to help you master the art of painting a sailboat with acrylics, allowing you to express your creativity and create beautiful marine-inspired artworks. So gather your materials and get ready to set sail on your artistic journey!
Key takeaway:
- Using acrylic paints and appropriate tools is essential for painting a sailboat. Acrylic paints are versatile and easy to work with.
- Properly preparing the surface by cleaning and applying primer or gesso ensures a smooth painting surface.
- Understanding basic techniques such as color mixing, layering, blending, and creating texture and detail is important for painting a realistic sailboat.
- Following a step-by-step guide helps in achieving a well-executed sailboat painting.
- Finishing touches and sealing the painting enhance its longevity and protect it from damage.
- Tips and tricks such as using reference images or sketches and refining the painting contribute to a successful acrylic sailboat painting.
Materials and Tools Needed for Painting a Sailboat
Are you ready to set sail on a creative painting journey? This section has all the juicy details about the materials and tools needed to paint a stunning sailboat with acrylics. We’ll dive into the vibrant world of acrylic paints , the magic touch of different brushes , the perfect palette for mixing colors, the ideal canvas or painting surface, the essential water container and palette knife , and the importance of having a reference image or sketch. Get your creative gears ready, because we’re about to embark on an artistic adventure !
Acrylic Paints
When painting a sailboat with acrylic paints , it is crucial to choose the right type of acrylic paint . Consider the following factors when selecting acrylic paints :
– Quality : Opt for high-quality acrylic paints for vibrant and long-lasting colors.
– Color range : Look for brands that offer a wide range of colors, including various shades of blue for painting the sky, water, and sails of the sailboat.
– Opacity : Consider the opacity of the acrylic paints . Some colors are more opaque, allowing for solid coverage, while others are more transparent, allowing for layering and glazing techniques.
– Drying time : Check the drying time of the acrylic paints . Faster drying paints are great for quickly building layers, while slower drying paints allow for more blending and wet-on-wet techniques.
– Brand reputation : Research and choose acrylic paints from reputable brands known for their quality and consistency.
Pro-tip : Before starting your painting, it’s recommended to do a small color swatch test to see how the colors appear on your chosen canvas or painting surface. This will help you make any necessary adjustments before committing to the final artwork.
When painting a sailboat with acrylics, the right brushes are crucial for achieving desired results. Here is a list of brushes to consider:
1. Round brushes: Perfect for creating fine details like rigging and small waves. They come in various sizes, from small for intricate work to larger for broader strokes.
2. Flat brushes: Ideal for creating straight lines and sharp edges. Great for painting sails, the horizon, or other flat surfaces on the sailboat.
3. Fan brushes: Excellent for creating texture like foliage or water splashes. Can also blend colors and create soft, feathery strokes.
4. Filbert brushes: Versatile brushes for both fine details and broader strokes. Particularly useful for painting the hull and larger areas.
5. Detail brushes: Perfect for adding intricate details and highlights. Allows for precise control in adding fine lines, textures, and highlights.
Fact: Using the right brushes not only makes painting a sailboat easier but also enhances the overall quality of your artwork. Experimenting with different brush shapes and sizes can help achieve different effects and add depth to the painting.
When painting a sailboat with acrylics , a palette is essential for effectively mixing and organizing colors. A palette serves as a flat surface where you can arrange and blend paints.
Canvas or Painting Surface
Choosing the right canvas or painting surface is crucial for a successful sailboat painting with acrylics. The size and material of the canvas are important factors that affect the outcome of the painting.
A larger canvas allows for more details and a grander composition, while a smaller canvas is more manageable and quicker to complete. The most popular canvas materials are cotton , linen , and polyester .
Cotton canvas is affordable and suitable for beginners. Linen canvas , though more expensive, offers a smoother surface and better longevity. Polyester canvas is a synthetic option that is resistant to moisture. Regardless of the material you choose, it is important to prime the canvas with gesso or primer before painting.
This creates a smooth and stable surface for the acrylic paints, resulting in better color vibrancy and a longer-lasting artwork. When selecting a canvas or painting surface, consider your artistic vision and preferences to create a stunning sailboat painting with acrylics.
Water Container and Palette Knife
The sub-topic “ Water Container and Palette Knife ” in the article “ How To Paint A Sailboat With Acrylics ” can be represented in a table format:
Using a water container is essential in acrylic painting to keep your brushes clean and prevent paint from drying. The container should be filled with clean water and changed when dirty to ensure a constant supply of clean water for rinsing and thinning paint.
The palette knife is a versatile tool for mixing colors directly on the palette. Its flat blade is perfect for scraping and lifting paint, allowing for experimentation with color combinations and creation of various textures in artwork. The palette knife can be used to apply paint directly to the canvas for precise and controlled brushwork.
By having a water container and palette knife in your painting toolkit, you’ll be equipped to efficiently and creatively work with acrylic paints, bringing your sailboat painting to life.
Reference Image or Sketch
When painting a sailboat with acrylics, having a reference image or sketch is crucial for accuracy and capturing the essence of the subject. The reference image serves as a visual guide, helping artists understand the structure, proportions, and details of the sailboat.
To create a reference image or sketch, start by selecting a clear and high-resolution photograph of the sailboat. It should showcase the desired angle and composition for the painting. Then, use a pencil or grid method to transfer the main outlines and important features onto your canvas or painting surface.
The reference image or sketch acts as a roadmap throughout the painting process. It helps artists determine the placement of the sailboat, the position of the sails, the shape of the hull, and other details. By referring to the image or sketch, artists can ensure accuracy and achieve a realistic representation of the sailboat.
Remember to use the reference image or sketch as a guideline rather than strictly copying it. Allow yourself to add your own artistic interpretation and style to make the painting unique. Experiment with colors, textures, and brushwork to bring the sailboat to life on your canvas.
With a well-prepared reference image or sketch, artists can confidently paint a sailboat with acrylics, capturing its beauty and spirit in their artwork.
Preparing the Surface for Painting
Preparing the surface is a crucial step in painting a sailboat with acrylics . In this section, we’ll discover the necessary techniques to ensure a smooth and long-lasting finish. First, we’ll explore the importance of cleaning the surface thoroughly. Then, we’ll dive into the significance of applying primer or gesso before starting the actual painting process. These essential steps will set the foundation for a successful sailboat painting adventure. So let’s get our brushes ready and make that canvas shine!
Cleaning the Surface
When preparing to paint a sailboat with acrylics, it is essential to follow these important steps for cleaning the surface:
1. Begin by using a soft brush or cloth to remove any dust or debris from the surface. This step is crucial for ensuring proper adhesion of the paint.
2. In case there are stains or dirt that cannot be removed using a brush, gently clean the area with mild soap and water. It is important to avoid harsh chemicals as they may cause damage.
3. Prior to painting, it is necessary to eliminate any peeling or flaking paint. This can be done by carefully smoothing the surface using sandpaper or a scraper.
4. After the cleaning and preparation process, it is recommended to apply a layer of primer or gesso. This will create a smooth surface, enhancing color saturation and durability.
Remember to take your time and handle the surface gently during the cleaning process to prevent any damage. Properly cleaning and preparing the surface guarantees a beautiful painting that will last for a long time.
Applying Primer or Gesso
Applying primer or gesso is necessary for preparing the surface before painting a sailboat with acrylics . It creates a smooth base for the paint, improving the quality and durability of the artwork.
To apply primer or gesso:
- Clean the surface: Remove dust, dirt, and grease using a soft cloth or brush.
- Choose the right primer or gesso: Use acrylic gesso , which dries quickly and works well with acrylic paints.
- Prepare the primer or gesso: Stir it thoroughly and thin with water if needed, following the manufacturer’s instructions.
- Apply the primer or gesso: Use a brush or palette knife to apply an even layer, covering the entire area to be painted.
- Allow drying time: Let the primer or gesso dry completely, which usually takes 1-2 hours, but may vary based on the product and environment.
Applying primer or gesso creates a strong foundation for your sailboat painting, ensuring vibrant colors and good adherence to the surface. It also prevents unwanted paint absorption into the canvas or other surfaces. Follow the manufacturer’s instructions for best results.
Understanding Basic Techniques for Painting a Sailboat
Discover the vibrant world of sailboat painting as we delve into the fundamental techniques that bring these majestic vessels to life. From mixing colors to layering and blending, and even creating texture and detail, we’ll explore the artistry and skill required to capture the essence of a sailboat on canvas. Get ready to embark on a creative journey as we unlock the secrets of painting a sailboat with acrylics !
Mixing Colors
When mixing colors in acrylic painting, there are techniques to achieve the desired result.
– Start with the primary colors : red, blue, and yellow. These are the foundation for all other colors.
– Use a color wheel to understand color relationships. Opposite colors on the wheel, such as blue and orange, create contrast when mixed.
– Experiment with different color ratios to create shades and tints. Adding more blue to yellow creates a green shade , while adding more yellow to blue creates a green tint .
– Gradually add small amounts of one color to another, mixing and blending until the desired hue is achieved.
– Consider the effect of adding white or black to a color. Adding white creates a lighter shade , while adding black creates a darker shade .
– Take note of the drying time of acrylic paints, as the color may slightly shift once dry. Let the mixed colors dry before making adjustments.
– Clean brushes thoroughly between color mixing to avoid contamination and achieve accurate colors.
By understanding these mixing techniques, you can confidently create a wide range of colors for your sailboat painting. Experiment and explore different combinations to achieve unique and vibrant results.
Layering and Blending
Layering and blending are pivotal techniques in the realm of acrylic painting. Employ the following strategies to attain the desired effect:
– Emphasize layering: Begin by applying thin coats of paint and gradually intensify the color and texture in order to exercise better control over the varying shades and values.
– Master the art of wet-on-wet blending: Meld hues by applying wet paint atop another still wet layer, resulting in seamless transitions and smooth gradients.
– Harness the power of dry brushing: Utilize a minimal amount of paint with a dry brush to fashion texture and highlights, which is ideal for incorporating intricate details.
– Embrace glazing: Introduce translucent layers of paint onto dry layers to yield depth and radiance, thereby permitting subtle variations in color and an atmosphere-like aura.
– Achieve blending with a palette knife: Directly mix and blend colors on the painting surface using a palette knife, imbuing the artwork with texture and dimension.
Experiment with these techniques to ascertain the most effective approach. The combination of layering and blending can augment the depth, dimension, and opulence of your acrylic paintings, thereby enabling you to create captivating sailboat masterpieces.
Creating Texture and Detail
Creating texture and detail is essential when painting a sailboat with acrylics . These techniques enhance the depth and visual interest of the artwork. To achieve texture, it is recommended to utilize methods such as dry brushing , sponging , or palette knife strokes.
Implementing these techniques effectively can add texture not only to the sails , water , but also to the boat as a whole.
One approach to create texture on the sails is by using the dry brush technique. This involves applying a small amount of paint to a dry brush and gently brushing it onto the canvas. By doing so, a rough and textured appearance is achieved, giving the impression of fabric on the sails. To replicate waves and ripples on the water, consider using a palette knife to apply thick, undiluted paint with a scraping motion.
Adding intricate details is crucial in bringing the sailboat to life. Using fine brushes and thin paint, you can incorporate intricate elements such as rigging , ropes , and various features on the boat. Paying close attention to these details will greatly enhance the realism and overall quality of the painting.
Don’t be afraid to experiment with different techniques and brushes in order to achieve the desired textures and details. Remember, practice and patience are key when mastering the art of creating texture and detail in sailboat paintings.
Fun Fact: Incorporating texture and detail in a painting can give the artwork a three-dimensional appearance, captivating viewers.
Step-by-Step Guide to Painting a Sailboat
Master the art of painting a sailboat with acrylics with this step-by-step guide.
We’ll take you through the process, from sketching the sailboat to refining the final touches.
Discover how to block in the background, add base colors, and bring your sailboat to life with details and highlights.
With these expert tips and techniques, you’ll be able to create a stunning sailboat painting that showcases your artistic skills.
Get ready to embark on a creative journey and immerse yourself in the world of sailboat artistry.
Sketching the Sailboat
To begin sketching the sailboat before painting with acrylics, follow these steps:
1. Take a blank canvas or painting surface.
2. Take a look at the reference image or sketch of the sailboat.
3. Recognize the basic shapes and proportions of the sailboat, including the hull , sails , and mast .
4. Use a pencil or charcoal to create a light outline of the sailboat on the canvas. Begin with simple shapes and lines.
5. Pay close attention to the positioning and size of various elements, such as the sails and the angle of the mast.
6. Add more intricate details to the sketch, such as windows, ropes, or flags. It is important to ensure accurate proportions and perspectives.
7. Erase any unnecessary lines or mistakes while refining the sketch. Focus on capturing the overall shape and composition.
8. Once you are satisfied with the sketch, go over the lines with a fine-tipped pen or marker to define them. Alternatively, you can use a dark pencil.
9. Review the sketch to make sure it accurately represents the sailboat and the desired composition.
10. The sketch is now ready to serve as a guide for painting the sailboat with acrylics.
By following these steps, you can create a detailed and accurate sketch of a sailboat before starting the painting process.
Blocking in the Background
Blocking in the background is an important step in painting a sailboat with acrylics. It establishes the composition and sets the tone for the rest of the painting. Here is a step-by-step guide on how to block in the background :
1. Choose the colors for the background based on the atmosphere and mood you desire. Soft blues and greens create a calm and serene scene, while bold and contrasting colors produce a dramatic and vibrant effect.
2. Apply the background colors onto the canvas with a large brush, starting from the top and working your way down. Use broad strokes to cover the entire background area.
3. Block in the basic shapes and forms of any objects or elements that will be part of the background, such as the sky, clouds, trees, or distant land .
4. Focus on capturing the general shapes and colors rather than intricate details. Use loose and expressive brushstrokes at this stage.
5. Blend the colors together where they meet to create a smooth transition. Use a clean, damp brush to softly blend the edges.
6. Step back and assess the overall look and feel of the background. Make necessary adjustments to the colors or shapes to ensure it complements the rest of the painting.
By following these steps, you can effectively block in the background of your sailboat painting and set the stage for the rest of your artwork.
Blocking in the background has been used by artists for centuries to establish the foundation of a painting. It creates depth, atmosphere, and a harmonious composition. Whether it’s a landscape, still life, or sailboat painting, blocking in the background is an essential part of the painting process, allowing artists to develop their vision and bring their artwork to life.
Adding Base Colors to the Sailboat
To effectively add base colors to the sailboat when painting with acrylics, adhere to the following instructions:
1. Begin by preparing your palette with the necessary base colors for the sailboat. This includes utilizing blue for the water, white for the sails, and brown for the wooden parts.
2. Use your brush to apply the first base color to the appropriate areas of the sailboat. For larger areas, employ broad strokes , while smaller details require finer strokes .
3. Layer each base color onto its respective area of the sailboat, ensuring smooth and even coverage. Add additional coats as needed.
4. When necessary, seamlessly blend the base colors together. This can be achieved by gently mixing the colors with either a clean brush or a palette knife, resulting in a gradual gradient .
5. Throughout the painting process, refer to your chosen image or sketch to ensure accurate color placement and shading.
6. Before proceeding to add details and highlights to the sailboat, allow the base colors ample time to dry completely .
By following these steps attentively, you will lay a solid foundation for your sailboat painting by effectively and accurately incorporating the base colors.
Adding Details and Highlights
When adding details and highlights to a sailboat painting with acrylics , consider techniques that enhance the realism and quality of the artwork.
1. Use a smaller brush size .
2. Mix the appropriate colors .
3. Apply thin layers of paint.
4. Focus on light and shadows.
5. Use a dry brush technique for highlights .
6. Add finer details with a fine liner brush .
7. Step back and assess the painting regularly.
Following these guidelines, artists can create depth and dimension in their sailboat paintings while capturing the essence of light and highlighting important elements of the subject.
Refining the Painting
To refine a sailboat painting with acrylics, the first step is to assess the sailboat’s composition and proportions. It is important to adjust as necessary in order to accurately represent the sailboat. Once the basic structure of the sailboat is in place, it is time to refine the details. This can be done by adding fine lines, curves, and shading for depth.
To make the painting more visually appealing, highlights should be added to catch the light, such as on the sail edges and hull. In order to achieve a realistic effect, it is important to blend colors seamlessly. After the sailboat itself is refined, attention should be turned to the background. Evaluate and enhance the background colors to ensure they complement the sailboat. If necessary, improve the water texture and depth to add more dimension to the painting.
To truly bring the painting to life, consider adding additional details like seagulls or waves. After all the refinements have been made, step back and evaluate the final painting. Make any touch-ups or adjustments as necessary to perfect the artwork. The process of refining the painting is crucial for capturing the beauty and intricacies of a sailboat with acrylics. These final touches will truly make the artwork special and bring it to life.
Finishing Touches and Sealing the Painting
To complete the sailboat acrylic painting, follow these steps for the finishing touches and sealing :
1. Remove any masking tape or painter’s tape used to create clean lines.
2. Inspect the painting for touch-ups or additional details. Use small brushes and acrylic paint to carefully add necessary final touches.
3. Allow the painting to dry completely before proceeding to sealing.
4. Use a varnish or sealant specifically made for acrylic paintings. Apply a thin, even coat using a soft brush. Follow the manufacturer’s instructions .
5. Let the varnish dry completely, which typically takes several hours.
6. Inspect the painting for any missed areas during the sealing. Touch up these spots with more varnish .
7. Consider applying a second coat of varnish for extra protection and a glossier or matte finish. Follow the manufacturer’s instructions and let each coat dry completely.
8. Once the painting is fully sealed and dry, you can frame or display it as desired.
By following these steps, you can add the finishing touches and seal your acrylic sailboat painting to protect and enhance its appearance.
Tips and Tricks for Painting a Sailboat with Acrylics
Here are some practical tips and tricks for painting a sailboat with acrylics:
1. Prepare your workspace by covering it with newspaper or a drop cloth to avoid paint splatters or spills.
2. Start by sketching the sailboat outline on your canvas using a pencil as a guideline.
3. Mix your acrylic paints on a palette to achieve the desired colors for the hull, sails, and details.
4. Use a larger brush to paint the background and base colors of the sailboat. Apply thin layers of paint and let each layer dry before adding another.
5. Once the base colors are dry, use a smaller brush to add details like windows , ropes , and flags . Pay attention to the intricate features of the sailboat.
6. Create depth and dimension by adding shadows and highlights . Use lighter shades for areas that catch the light and darker shades for areas in shadow.
7. To add texture to the water surrounding the sailboat, use a palette knife or dry brush technique for a more realistic and dynamic look.
8. Allow the painting to dry completely before adding final touches or varnish to protect it.
By following these tips and tricks, you can create a beautiful sailboat painting with acrylics.
Some Facts About How To Paint A Sailboat With Acrylics:
- ✅ Acrylic paint is commonly used for painting sailboats due to its versatility and quick drying time.
- ✅ Sailboat paintings created with acrylics can capture the vibrant colors of the water and sky.
- ✅ Using different brush techniques and layering, artists can create texture and depth in their sailboat paintings.
- ✅ Acrylic paints are available in a wide range of colors, allowing artists to accurately depict the details of a sailboat.
- ✅ To protect the finished sailboat painting, artists often apply a varnish or sealant to ensure its longevity.
Frequently Asked Questions
Faqs for “how to paint a sailboat with acrylics”, q: how can i cancel my contracts or subscriptions with youtube.
A: To cancel your contracts or subscriptions with YouTube, you can visit the “Verträge hier kündigen” section on YouTube. This section provides information and instructions on how to terminate your agreements with YouTube.
Q: Can I participate in testing new features on YouTube?
A: Yes, you can! YouTube offers an opportunity for users to test new features before they are widely released. Simply go to the “Neue Funktionen testen” section and follow the instructions to opt-in for testing new features on YouTube.
Q: Where can I find the guidelines and safety measures for using YouTube?
A: You can find the guidelines and safety measures for using YouTube in the “Richtlinien & Sicherheit” section. This section provides detailed information on YouTube’s community guidelines, rules against harassment and hate speech, and other safety measures to ensure a positive and secure experience on the platform.
Q: What information does the NetzDG Transparenzbericht on YouTube provide?
A: The NetzDG Transparenzbericht on YouTube offers information about the company’s compliance with the NetzDG law in Germany. It provides transparency reports related to efforts in combating illegal content and hate speech on the platform.
Q: How does YouTube work? Can you provide an overview?
A: YouTube is a video-sharing platform where users can upload, view, and interact with videos. In the “Wie funktioniert YouTube?” section, you can find a comprehensive overview of how YouTube works, including instructions on creating an account, uploading videos, and engaging with other users.
Q: Who owns the copyright for content on YouTube?
A: Google LLC owns the copyright for content on YouTube until 2023, as indicated by the “© 2023 Google LLC” statement. Users should be aware of the terms and conditions regarding copyright ownership when using YouTube.
About the author

Leave a Reply Cancel reply
Your email address will not be published. Required fields are marked *
Save my name, email, and website in this browser for the next time I comment.
Latest posts

The history of sailing – from ancient times to modern adventures
History of Sailing Sailing is a time-honored tradition that has evolved over millennia, from its humble beginnings as a means of transportation to a beloved modern-day recreational activity. The history of sailing is a fascinating journey that spans cultures and centuries, rich in innovation and adventure. In this article, we’ll explore the remarkable evolution of…

Sailing Solo: Adventures and Challenges of Single-Handed Sailing
Solo Sailing Sailing has always been a pursuit of freedom, adventure, and self-discovery. While sailing with a crew is a fantastic experience, there’s a unique allure to sailing solo – just you, the wind, and the open sea. Single-handed sailing, as it’s often called, is a journey of self-reliance, resilience, and the ultimate test of…

Sustainable Sailing: Eco-Friendly Practices on the boat
Eco Friendly Sailing Sailing is an exhilarating and timeless way to explore the beauty of the open water, but it’s important to remember that our oceans and environment need our protection. Sustainable sailing, which involves eco-friendly practices and mindful decision-making, allows sailors to enjoy their adventures while minimizing their impact on the environment. In this…
- (800) 828-4548
- Account/Sign In
- Track Orders
- Find a Store
Departments
More ways to shop, for artists.
- Artist Resources
- Featured Artists
- Blick Connect
- Project Ideas
- New Products
For Educators
- Shop School or Business
- Lesson Plans
- Art Educators Catalog
- At Home Art Lab
- Teacher News
- Partnerships
- School Discounts
- Quick Quote
Acrylic Sailboat Painting
Set sail on palette knife painting adventure! Combine a limited palette of vibrant acrylic paints and mediums, then learn tips and tricks for using a palette knife to achieve a variety of interesting textural effects!

Instructions
1. Print reference image.
2. Make a light sketch or transfer the reference image onto your canvas.
3. Set up your palette by placing colors in order from light to dark.
4. Add water using a pipette to keep acrylics open and workable while on the palette.
5. Use larger brushes to paint broad strokes. Use small round brushes for details.
6. Using the largest flat brush, paint a gradient that goes from dark to light from the top of the canvas down to the center. Then, paint a dark-to-light blue gradient from the bottom up to the center of the canvas.
7. Use Titanium White for the sail on the sailboat. Use Buff White for the reflection of the sail boat.
8. Mix paint colors with acrylic mediums using a palette knife in a 1:1 ratio. Adding more medium will make the paint more transparent with a heavier body.
9. Apply your thickened paint mixture with a palette knife, using the underpainting as a color guide. Use a brush stroke motion to create texture. Paint the water using the same technique.
10. Use a palette knife to apply Titanium White to the sails, and Buff White in the reflection. Then use a brush stroke technique to create texture.
11. Use the palette knife to blur the edges of the sailboat reflection in the water.
12. Use the edge of the palette knife to add details to the boat using Cadmium Red and Ultramarine Blue.

The Ultimate Guide To Palette Knife Painting
The palette knife is not just a tool for mixing paint on your palette. You can actually use the palette knife to create some pretty stunning effects in your paintings which are not possible with a brush. Some artists ignore the brush completely in favor of the palette knife.
This is a detailed guide to help you get the most out of your palette knife for your paintings.
The Pros And Cons Of The Palette Knife
What to look for in a palette knife, palette knife techniques, common uses of the palette knife, artists who use the palette knife, creating harmony between your palette knife and brush, general palette knife painting tips, palette knife demonstrations, want to learn more, thanks for reading.
I’ll walk you through the entire process using one of my recent paintings. You’ll see how I go from idea all the way through to reflecting on the finished painting.

Here are some of the pros and cons of using a palette knife for painting:
Pros:
- It is so easy to clean a palette knife. You literally just need one wipe with a cloth or paper towel and all the paint is gone. This is a huge advantage over brushes, which require much more care.
- It can be cheap, depending on the quality of the palette knife.
- It is great for building up a thick texture and creating a broken color effect.
- You can use the edge of the palette knife to create sharp lines.
- The bold strokes created by the palette knife can complement the more delicate strokes created by the brush.
- You can paint on top of wet layers without having to worry about the paint blending (like it does with your brush).
Cons:
- You are not able to paint with as much accuracy using a palette knife.
- It is not as versatile as a brush.
Below is what I look for in a palette knife:
- A flexible but sturdy blade.
- A comfortable handle.
- A long, straight edge.
You do not need any unusual shapes. Just a standard-shaped palette knife in a few different sizes is more than enough.
High-quality palette knives crafted with stainless blades and ergonomically designed handles.

You can use the palette knife to create thin, usually broken lines which can look very natural in a painting. All you need to do is load the edge of the palette knife with a thin amount of paint and then dab the edge on the canvas. Just make sure the paint is evenly spread across the edge of the knife. Also, you will usually only get one line per stroke, so you will need to keep reloading your palette knife between strokes.
Dragging one color into another
The palette knife can be fantastic for blending edges by dragging one color into another. What you are left with is a very rough and scattered edge. If you were to do this with a brush, you would get a much softer edge.
Scraping away paint to fix errors or add details
This is where the palette knife really shines. You can quickly scrape away paint from the canvas to clear an area where you went wrong.
You can also use the palette knife to scrape details into your painting. For example, you could scrape away a thin line of paint to imitate a tree branch. When doing this, you just need to be aware of what color will be exposed in the underpainting. Staining the canvas comes in handy here as you will get some nice earthy color exposed rather than just the glaring white of the bare canvas.
Multi-colored palette knife strokes
This is one of my favorite techniques. Just take a few different colors and mix them together but not that well. Then take your palette knife and create a thick stroke of broken color.
Scumbling over an underpainting
I usually prefer a brush for scumbling over an underpainting as I feel it gives me more control, however, you can use the palette knife for this also. You can get some very interesting results by doing this with a palette knife.
What this involves is dragging paint very loosely over an underpainting so that the paint breaks off onto the canvas. This can be useful for adding variance to water or grass.
Dabbing small bursts of color
This technique involves loading the tip of the knife in thick paint (usually some kind of vivid color) and then dabbing it onto the painting. I use this technique in the later stages of a painting when I want to add a few small bursts of color.
Below is a close-up of one of my paintings which demonstrates this technique. Notice the small bursts of vivid reds, blues, and yellows on top of a dull foundation. This is great for creating a sense of activity without actually having to render all the details.

Broken color
Because the palette knife allows you to paint layer on layer without having the paint blend together, you can achieve some beautiful broken color effects, which are not possible with a brush. The Russian impressionists take advantage of this in many of their paintings. The result is a vibrant display of color that almost seems to vibrate.
Here are some of the ways I use the palette knife in my paintings:
- To paint the highlights on rocks.
- To paint snow on a mountain.
- To build up texture in the foreground to imitate the grass, rocks, and other nature.
- To paint the leaves or bark on a tree.
- To quickly cover the canvas with paint.
- To paint lines for fences, tree branches, or sharp edges.
- And, of course, I use the palette knife to mix colors on my palette and also to clean up space on my palette if things start to get out of control.

The palette knife seems to be gaining popularity as artists realize its benefits. Here are some artists who make skillful use of the palette knife in their paintings:
- Brent Cotton
- Bato Dugarzhapov (featured in my Exploring the Masters series )
- Daniil Volkov
- Richard Schmid (particularly in his flower paintings)

I think the palette knife is best used in combination with a brush. You can get some beautiful contrasting effects by using both in your paintings.
However, you don’t want too much contrast. You want all the elements in your painting to work together, so make sure your palette knife work is somewhat in harmony with your brushwork.
A technique I frequently use is to soften the edges of any palette knife strokes with my brush or run my palette knife over visible brushwork. This can create a subtle connection between the palette knife work and brushwork.
You should also make sure there is either a dominance on palette knife work or brushwork. You probably shouldn’t use both equally throughout your painting as it may look slightly confusing.
If I use mostly palette knife work in my painting, I could incorporate small areas of visible brushwork to break things up. On the other hand, if I mostly use brushwork, I could break things up with small areas of thick palette knife strokes.
Just remember that you need all the elements in your painting to work well together. There is no point in having some beautiful strokes of color in your painting from a palette knife if they do not fit with the rest of the painting.
My painting below is a demonstration of both palette knife work and brushwork. I used the palette knife to build up that thick texture on the canvas, particularly for the sun. I used the brush to add some of the finer details.

Here are some general palette knife painting tips:
- Make sure to clean your palette knife after you have finished. If you forget, the paint will dry and your palette knife will be almost worthless (as it will have a rough edge). You might be able to save your palette knife by scraping the dried paint away with a razer, but sometimes this is just not worth the hassle.
- Don’t get too regular with your palette knife strokes. Try to mix things up in terms of stroke length, color or texture.
- You don’t need all the unusual palette knife shapes. You just need a few sizes of standard-shaped palette knives.
- The palette knife can scrape away paint just as easily as it can apply paint.
- The palette knife comes at the sacrifice of accuracy and intricate brushwork, so try to make up for it with stunning use of color.
- The palette knife is great for sharp shifts in color. For example, if you want to indicate some sunlight peering through a dark cluster of trees, the palette knife would be great for this.
Magenta Flowers, Brisbane

New Zealand, Stroll in the Park

Gold Coast, Path to the Sea

Manly Rock Wall, Moody

You might be interested in my Painting Academy course. I’ll walk you through the time-tested fundamentals of painting. It’s perfect for absolute beginner to intermediate painters.
I appreciate you taking the time to read this post and I hope you found it helpful. Feel free to share it with friends.
Happy painting!

Draw Paint Academy
About | Supply List | Featured Posts | Products
Dan Scott is the founder of Draw Paint Academy. He's a self-taught artist from Australia with a particular interest in landscape painting. Draw Paint Academy is run by Dan and his wife, Chontele, with the aim of helping you get the most out of the art life. You can read more on the About page .
Enjoyed this post? Join over 123,000 artists who subscribe to the Draw Paint Academy newsletter.
26 comments on “The Ultimate Guide To Palette Knife Painting”
Ia interested in abstact palette knife painting any artist tutorial also in pouring medium. Thanks
Very interested and helpful tutorials for my paintings. Thanks a lot!
No problem Michelle! Dan
Roxer Videl has some great tutorials on you tube
Informative,esp. for people like me who are self -taught.
This is was useful for me. Thanks a lot. Reza
I learn a lot from your informative and generous tips. Thanks a million. I live in India so signing up for the courses is difficult for me, my paintings are just hobby ideas. Art helps me de-stress, as I’m a full time carer for my disabled brother. I gift my art to friends. ☺️
You forgot to mention how frustrating they can be! Seriously good tips thanks!
Really good overview, thanks, Dan! I started with palette knives long ago, switched to brushes after a short while, and have recently just really wanted to get back to playing with paint with palette knives again; much appreciate the links, esp to videos – thanks!
Thank you Dan. Love reading about the use is palette knives. Hard to find articles that I can incorporate quickly. Information is direct and to the point. I don’t read many articles to the end but I do read yours. Short to the point and full of good information
Thank you! I love your way of teaching. I use the palette knife a lot.
Thanks Gunvor! Glad to hear. Dan
First time I knew these details about Mountain painting. thanks . Rajan. India.
No problem Rajan! Dan
A beginner.Trying out the pallet knife,thanks greatly for your tips.Very valuable information.
Thx this actually told me a lot about pallets knife painting I had no idea what it was at all until now
Hey there! I enjoyed reading this post and the way you educate us is fantastic. I had also learned Knife Painting On Chopping Board from the best courses of Penkraft’s Knife Painting. The best thing about this course is they not only provide Art Kits but, also they’re very good at teaching the art courses. Here is the website where you can see more details – https://diy.penkraft.in/
Good helpful tips Dan. Thank you. Just got some palette knives and can’t wait to get started.
I don’t need palette knives for watercolours, right? BTW, thanks a lot. Your articles help me a lot in painting.
Was very helpful to me as I have recently started using the palette knife it’s a great tool I feel so comfortable and natural using it has improved my art so much Thanks for the tips
Could you comment on best surfaces for knife painting?
it helped me alot, thanks
Very helpful but you haven’t pointed out the difference between a pallet knife and a painting knife. You are talking about painting knives, they have a stepped handle which keeps hands clear of the paint.
nicely explained will surely try knife painting soon seems very pleasing
Just took a class and you explained a lot more (and better) than the teacher we had. I’m used to a brush and acrylic paint and the class used a palette knife and oils so it was very different but I will add a palette knife to my tools.
Dan I find your information on art techniques very helpful and you are my go-to when I need to learn something new. You are so generous with your sharing of information, as a senior this is so appreciated. A fellow Queenslander at Cleveland. Thank you Laurel
Leave a Comment Cancel reply

12 Famous Night Paintings and Why They Work
March 28, 2022

How to Paint Overlapping Objects
December 6, 2021

How to Create and Sell Prints of Your Art
May 18, 2021

A Closer Look at Woman at Her Toilette by Berthe Morisot
August 5, 2022

The Ultimate Guide to Painting the Sky
July 4, 2022

7 Tests to Check the Accuracy of Your Paintings
March 6, 2023

10 Artists Who Wield a Palette Knife With Mastery (Study The Best!)
When it comes to great palette knife artists out there that you might want to study there are many to choose from. I have gone around and collected some up for us to take a look at.
All of these artists produce amazing palette knife paintings.
I’ve gathered them up from YouTube, Instagram, and even TikTok to create a resource of artists for us to refer to when we need a bit of inspiration.
With some of them being on video platforms or releasing videos of themselves at work we can also study their techniques too!
At the very minimum we can get the juices flowing to primed to create.
Related Articles:
- 10 Abstract Artists on YouTube to Study and Learn From
- 17 Abstract Artists On Instagram That Will Inspire Your Art
- Blending Techniques For Smooth Gradients (Acrylic Painting!)
What Makes a Good Abstract Painting? The Principles of Art
Abstract Acrylic Painting Techniques: Tools & Techniques For Beginners
Suraj Fine Arts
Suraj is an abstract painter from India. His channel has many videos of him making paintings with a palette knife.
While many of his videos say they are for beginners he doesn’t ever explain anything that he is doing. In fact, you rarely ever see him at all. We can however observe and attempt to copy his techniques in order to learn them. He uploads a new video like this nearly every day so have a look at his video catalog on YouTube. This is actually somewhat of a trend on YouTube right now. I think all of the YouTube artists on this list are currently taking that approach.
You can follow Suraj on YouTube, Facebook, and Instagram.
I’m hoping to break this trend in the abstract community by creating my own series of YouTube videos that helps to analyze what these artists are doing for those who have trouble learning the techniques without any explanation. Check out my channel here!
Ray Grimes Fine Art
Ray Grimes is another palette knife artist who has grown a vast following on YouTube in the past few years.
Located in the United States, he clearly loves his vibrant colors and displays a number of interesting palette knife techniques to try.
It looks like Ray has hit a nice stride of uploading twice a week. Personally, I think if you’re going to join in on this YouTube trend that this is a better cadence than uploading every day.
Either way, for what we are interested in right now this is great!
When one wants to grow as an artist I think it is a good practice to get in the habit of finding those who are already doing what you want to do and studying their work. Success leaves clues!
You can follow the work of Ray Grimes on YouTube, Instagram, and Facebook. You can buy his work on his website or on his Etsy store.
Oliver Maass
Oliver Maass is another abstract artist coming to us out of Germany!
Yet another amazing artist who produces a lot of palette knife painting videos on YouTube.
He doesn’t seem to be producing them in nearly as much volume as Suraj or Ray is but he still has plenty of content to take a look at. His style of painting and techniques are very similar to Ray’s. They both seem to do this thing where they use a palette knife to layer a bunch of colors in a swoop on the canvas. They get the textured look they are going for in a particular area with the palette knife.
Then they carefully and lightly dry brush it outwards. I love this style of painting and they aren’t that difficult to do either. You should give it a try sometime yourself!
Oliver can be followed on YouTube, Instagram, and Facebook.
If after watching some of these guys you feel inspired but you’re still not sure where to start, check out this page here on The Principles of Art that help make up a good abstract painting.
Krista Schumacher Art
Krista Schumacher is a palette knife painting artist currently residing in California.
She works in oil paints but her talent is outstanding. The vibrant colors and textures she gets are certainly results worth striving for.
Of all the artists featured so far her works are definitely something to behold. The daughter of Kathy Schumacher, who is next on our list, she has made a name for herself in her own right.
She has been featured in 16 publications, has experience as an educator, and has won 4 awards thus far in her young career!
In the video above we get a brief glimpse into her processes. Hopefully she starts releasing more just like it soon. There aren’t enough palette knife artists on YouTube demonstrating their techniques.
You can view more of her work on Instagram, Facebook, and website.
Kathy Schumacher Art
Kathy Schumacher is a palette knife artist to her core. Perhaps that is why her daughter is so good at it too.
Currently residing in Florida, her vibrant works speak for themselves.
“A paint brush gives and artist control, but with a palette knife, I am able to stay loose, merging colors and sculpting wet paint into a dynamic final product.” -Kathy Schumacher
This is the sort of insight and mindset we are looking for with this page. How do these masters of the palette knife think? How might we be able to adopt that thinking in our own works?
This minor glimpse into her thinking gives us a bit to work with.
Neither Kathy nor her daughter, Krista, have any YouTube presence so it’s hard to learn from their techniques in practice but we can at least admire their results and strive for something similar.
You can follow Kathy and her work on Instagram, Facebook, and her website.
Misun Holdorf
Misun Holdork is an abstract palette knife artist originally from Seoul, Korea whose colorful work will lift your artistic ambitions.
She currently resided in California and won first place for top 100 artists in San Diego in 2016.
The level of texture she is able to get adds a level of detail to her floral paintings that I haven’t quite seen before. It’s really awesome how she uses the paint to create a three-dimensional texture to the flower pedals.
She paints using oil paints and displays a mastery of the knife like few artists I’ve seen thus far. You can tell she has been inspired by her many travels she had when she worked in the airline industry.
Perhaps a hint of all of the tropical places she has lived in in her life.
You can follow Misun and her work on Instagram, Facebook, and her website.
Leonid Afremov
The late Leonid Afremov is one artist whose paintings you may have seen around if you have spent any time in the art nooks of the internet.
His body of work is prolific and his talent is among the best on this list. Fortunately we do have some videos like the one above of the man himself at work!
He was a Russian-Israeli who spent his life making the world more beautiful with his eye capturing oil paintings.
He embodies the definition of what a palette knife artist is and can be.
Unfortunately he passed away in August of 2019 but before he did he had an autobiography written that is quite special.
Not only because there are limited copies to buy but also because it boasts an Augmented Reality feature allowing the pictures in the book to be brought to life digitally on your phone or iPad. This speaks to the geek in me eager to see an Augmented Reality filled world so I had to mention it!
Even though Leonid is no longer with us anymore his relatives appear to be keeping his Instagram active. You can still check out his work on his Instagram, his website, and his Facebook account.
Joelle Blouin
Joelle Blouin is a French Canadian artist that paints exclusively with palette knives only.
The exact kind of artist we want on this list, she too works with oil paint creating colorful cubist inspired styled paintings.
She had her first gallery opening in 2008 and since then has expanded from Canada to the United States. Showing her work in galleries in both countries.
Named one of the top 40 artists to watch by Art Business News Magazine, I can’t say I disagree with their assessment.
She has dubbed her style as “Urban Cubism”. I’m not big on labels like this but I certainly like her urban cubist flare and am feeling inspired to attempt this style myself!
You can check out her work on Instagram, her Website, and the Signature Gallery that hosts her work. She also has a minor presence on Pinterest.
Lisa Elley is a palette knife artist whose journey originates in New Zealand. Through her journey, Lisa has found her way to the San Francisco bay area where she now makes her impressive works of art.
She has a style that is very similar to Misun Holdorf’s in that she does a lot of floral palette knife paintings that have a thick amount paint on them creating a level of texture to the flowers she paints.
When comparing the two different artists you can see even though their paintings are inspired by the places they have traveled to and experiences that they have had to make their works distinctly different from each other.
As artists aspiring to improve our palette knife skills perhaps this is a detail we can try ourselves? Not just drawing inspirations from our own personal travels but to layer the paint on thick and add that extra texture.
One of the most interesting things about Lisa is her use of TikTok. She is the only palette knife artist on this list utilizing TikTok which was where I originally found her work.
It’s certainly an account for the TikTok case studies I plan to do later on. It’s mind boggling the sorts of things that can rack up the views and get distributed on TikTok.
You can follow Lisa and check out her work on her Instagram, TikTok, her website, or even Ugallery.
Paintings by Dusan
Shortly after I initially published this article, this channel started popping up in my YouTube recommendation feeds.
Of course, since I had just written this article on palette knife painting artists I had to check out his content. I’m glad I did!
Dusan is an artist from Perth, Western Australia.
He has a vast catalog of videos showing him making a palette knife painting from start to finish complete with relaxing background music. Just like the video above, he shows how he wields his pointed palette knife to make these beautiful abstract landscapes.
This is a common style of art video that I feature a lot on this site. While they don’t explain what they are doing we can still learn a lot by watching and analyzing their demonstrations.
If that is something you have trouble with discerning yourself through observation, no worries, that is part of what my mission with this site and my own channel are seeking to resolve and help with.
That said, after discovering the brilliant artwork of Dusan had to come back to add him to this list!
If you’re feeling inspired to get started with abstract painting but aren’t sure what sort of tools you should get I wrote a great article on tools and techniques for beginner abstract painters.
Check it out next by clicking here!
Marc Spagnuolo
Hey there! Thanks for reading my article! I'm Marc the creator of this website. I'm a growing artist and web creator seeking to share what I'm learning in the hopes that it helps someone out there like you. I hope you found this information useful. If you're interested in learning more about me and my story click on my name or on my picture!
Related Articles
When I first started abstract painting I was totally lost on what it was that makes up a good abstract painting. Through trial and error, I stumbled on some of the principles of art on my own and...
As an abstract painter, I have picked up a few techniques in the past year that I can share with you. I am always on the hunt for new techniques to try and new tools to add to my collection though....
Palette Knife Painting: A Tutorial for Artists
When it comes to painting with thicker paint, you don’t have to stick with using a brush. You can also use a palette knife to apply the paint to the canvas.
Palette knife painting is a fun, immediate, and expressive way of adding colour to your artwork. By choosing a palette knife as a tool to apply paint, you can achieve thick texture in your works.
In this guide, you will find all the essential information you need to start palette knife painting. Learn about the benefits, essential tips and techniques, plus get inspired by some talented painters who use palette knives as their applicator of choice.
Disclaimer: Fine Art Tutorials is a reader supported site. When you make purchases through links on this site, we may earn a small commission at no extra cost to you.
What is palette knife painting?
Palette knife painting is a type of painting that is done using a palette knife instead of a brush. This type of painting can create thick, interesting textures and patterns that are not possible with a brush.
The advantages of painting with palette knife

With a palette knife, artists can cover their surface much more quickly than with a brush. Scoop up some paint with the knife and spread it across the surface to cover the white of the canvas. Get a large, flat palette knife to speed up your painting process.
Another advantage to painting with a palette knife is that artists can achieve thick texture on the canvas. By using viscous mediums that hold their shape, painters can create three dimensional looking peaks.
Palette knives are cheap, often cheaper than quality stiff oil painting brushes, plus they’re easy to clean and last longer. To clean a palette knife, all you have to do is wipe paint from the knife with a paper towel. Brushes can degrade over time, especially if you wash them in solvents. However palette knives will stand the test of time.
Palette knives are a multi purpose tool. It’s likely that if you work with acrylics or oil paints that you own a few palette knives already. You can also use them for mixing colours on the palette.
How do you paint with a palette knife?
Painting with a palette knife is easy and intuitive. Some artists prefer to load the paint onto the knife and then apply it to the canvas. Others may use the knife to scrape away layers of paint to create interesting effects. Experiment and find what works best for you!
What are some tips for palette knife painting?

Here are a few tips to help you get started with palette knife painting:
- Start with a small canvas. This will help you get used to the techniques and avoid wasting paint.
- Use thicker paints. This will make it easier to load the paint onto the knife and create interesting textures.
- Use a variety of knives. Different knives will create different effects. Experiment to find the ones you like best.
- Mix up your palette knife strokes. Vary long and short strokes, thick and thin paint and types of texture to create a sense of depth in the painting.
- Interchange using a palette knife and brush. You don’t have to use just one tool throughout the painting process. Grab a brush to blend edges, or create fine details. Another great way to use brushes alongside palette knives is to complete a painting with brushes, then paint one or several impasto strokes to create emphasis in the painting. Use the salience of texture against an untextured painting to draw the viewer’s eye into a focal point .
- It’s difficult achieving accurate lines and fine details with palette knives, so let go and apply the paint expressively!
- Clean up straight after painting . If you let paint harden on a palette knife, it can be tricky to remove.
- Practice, practice, practice! The more you paint with a palette knife, the better you will become at it.
Painting mediums suitable to use with palette knives
Painting mediums that work fantastically with palette knives are oil paints and heavy body acrylic paints , like Golden Heavy Body . It’s the thick paints that work best with stiff tools like palette knives. Runny paints like watercolour, gouache or soft body acrylics aren’t suitable for applying with palette knives, as you need a soft, flexible absorbent applicator like a brush to hold the paint and spread it across the surface.
Artists add additional mediums to their paint to thicken texture even further. Mix oil paint with cold wax to add body and thicken the paint to help it retain texture on the canvas. On top of these attributes, cold wax will make paint appear more matte and dry faster.
The Winsor & Newton Impasto medium thickens oil paint and makes it dry quicker. This medium dries to a glossy finish and is made from alkyd resin.
There are mediums that can be mixed in with acrylic paint too, for the purpose of palette knife painting. For example gel mediums with add thickness and body to the paint and modelling paste will add even more thickness.
Palette knife painting techniques
Now that you know the advantages of painting with a palette knife and what type of mediums to use, let’s look at some specific techniques you can try out.

The first technique we’re going to look at is impasto . Impasto is a painting technique that involves using thick paint to create texture on the canvas. This type of painting is often done with a palette knife, however artists sometimes use stiff brushes too.
To create an impasto painting, start by loading your palette knife with paint. Then, apply the paint to the canvas in a thick layer. You can use different strokes to create different effects. For example, you can use a stabbing motion to create short peaks of paint, or a dragging motion to create furrows. Mix up your painting strokes to create variety and interest.
You can also build up layers of paint to create even more texture. Just make sure that each layer is dry before you add the next one on top.
Sgraffito is another interesting technique that can be done with a palette knife (or any other sharp object). To create a sgraffito painting, start by applying a layer of paint to your canvas. Once the first layer is dry, apply a second layer on top.
While the second layer is still wet, use your palette knife to scratch through the wet paint and reveal the layer underneath. You can create different patterns and designs by varying the pressure you apply and the direction of your strokes. Use the edge, or tip of the palette knife to etch details into the paint.
Once you’re happy with your painting, leave it to dry completely. Then, you can varnish it to protect the surface.
Mix paint on the canvas

Instead of mixing paint on the palette, load your knife with two or more colours. Then, paste it onto the surface, watching the colours swirl together. Many impressionist painters and Post-Impressionist painters did this, as pigments sitting next to one another unmixed appear brighter and can add more variety to a painting. When the artist steps back to view the painting as a whole, the colours can appear to mix optically.
Blending with a palette knife

To soften edges between colours on the surface, make sure your palette knife is clean and drag the edges of the colours together until they overlap. To create a smooth gradient with a palette knife, mix transitional shades of colours before blending.
Scrape thin layers with a palette knife
Add a small amount of paint to the edge of the knife, hold the knife at a 45 degree angle and scrape the paint across the surface. This techniques only works on flat surfaces, as opposed to surfaces with lots of texture on already. It would work great to add a thin layer of paint over an underpainting for example. If the paint is thin enough and you’re painting with a transparent, or semi transparent pigment, the colours from the previous layer of the painting would show through. Therefore, this technique can work to alter previous layers of colour.
Create a textured ground
With acrylic paints and modelling paste , you can paint with a palette knife to create wonderful texture on the surface, leave it to dry, then paint over with regular thin acrylics and a brush. This is a great way to establish texture in the first layer of the painting, then you have the option to paint with thinner details and glazes over the top. The modelling paste layer has tooth to it, so it acts as a ground over the gesso canvas.
Alla prima is a technique usually used with oil paints, whereby the painter completes a painting in one sitting. Wet paint is layered on top of wet paint, instead of waiting for layers to dry to create separate colours. This technique can be used with palette knives. Start the painting with thinner layers and slowly build up the thickness of the paint. Mix your colours on the palette and paint intentionally. Try to apply the colour directly to the surface in the place you want it to appear, instead of using multiple layers to alter colours.
Get creative with the palette knife tool. There are a variety of gestures and techniques you can use to be expressive with the applicator. Use it to scrape away paint from the surface to create interesting marks and patterns, or use the edge of the knife to make fine, precise lines. Make up your own gestures and techniques, afterall, the fun of art is in experimenting!
The best palette knives for artists
There are lots of different kinds of palette knives you can get, the shape, size and material of the knife will affect the final outcome of the painting.
Look for palette knives with a flexible yet sturdy, stainless steel blade and a handle that makes gripping easy.
Liquitex painting knives

With a 36 knives made available to artists, Liquitex make their sturdy steel blades in a range of shapes and sizes.
Choose from large diamond shaped knives that will cover large areas of the canvas, or small knives for detail work. With the no. 12 knife you can paint impasto strokes with ease and precision.
RGM palette knives

RGM are another brand that makes quality palette knives for mixing and painting with. Their set of spatula knives are easy to hold and perfect for the impasto technique. Their range of New Age knives come in unique shapes, perfect for creating interesting texture on the canvas. RGM blades are made from flexible stainless steel, making them the perfect tool for texture work and spreading paint across the canvas.
Subjects to paint with a palette knife
Artists can paint any subject they please with a palette knife, however there are certain subjects that especially suit being painted with the tool.
Cityscapes and architecture palette knife paintings
Cityscapes and architecture make excellent subjects for palette knife painting. Use the edge of the knife to draw straight angular lines. Etch into wet paint to create the impression of brick work.
Landscape palette knife painting

Landscapes are another subject that suit being painted with textured effects. Swirl white paint onto blue for broken cloud effects, use the sgraffito technique to scrape away one tone of green from another to create variety of grass tones. Rocks are another subject that work well with the palette knife, create jagged edges and dark crevices with one sweep of the knife. The impression of organic and natural subjects can be painted without much thought or effort with a knife.
Paint a seascape with palette knives
Seascapes also lend themselves well to being palette knife paintings. Swirls of white and blue can create dramatic stormy skies, while the knife can be used to scrape away at the wet paint to make crashing waves.
Portrait painting with palette knives
Portrait paintings usually have a soft appearance, however you can create a sense of contrast by painting with a palette knife.
Palette knife painting flowers

One of the most popular subjects to paint with a palette knife are flowers. The round, soft petals can be easily blended with the applicator to create a beautiful effect.
Step-by-step palette knife painting video tutorials
Want to see some palette knife painting in action? These video tutorials will walk you through the process step-by-step, so you can try it for yourself.
This video runs through some unique textures and gestures you can make with palette knives. Palette knives are a versatile tool that can make a range of marks. Learn to make lines and blend colour with your knife.
Paint a spectacular mountain range, with large snowy mountains, distant trees and winter light. Use a large spatula palette knife to work quickly on a large canvas. You don’t have to spend much time working on details to create an effective piece, but by adding a few details here and there, you can create a sense of depth and immersion in the scene.
What styles of art suit palette knife painting?
Expressionist, impressionist and abstract painting styles are all suited to being created with a palette knife. The gestural nature of the applicator lends itself well to these styles of painting .
Famous artists who have used palette knives in their painting include Vincent van, Jackson Pollock and Willem de Kooning.
Now that you know all about palette knife painting, why not give it a try yourself? Get creative and experiment with the different techniques you can use. Most importantly, have fun!
If you’ve found anything on this site especially useful, you can make a donation to me through PayPal. I take a lot of time to research and write each topic, making sure each tutorial is as detailed as possible and I make all my content freely available. Any small donation (even the price of a cup of coffee!) can help me to cover the running costs of the site. Any help from my readers is much appreciated :).
Follow the link in the button below to support this site.
1 thought on “Palette Knife Painting: A Tutorial for Artists”
יפה מאוד טכניקה מעניינת אפשר לראות ביצוע של תמונה מלאה תודה ,נפלא רותי כהן
Leave a Reply Cancel reply
Your email address will not be published. Required fields are marked *
Save my name, email, and website in this browser for the next time I comment.
Acrylic Palette Knife Painting Techniques – Part 2 of 4
- By Will Kemp
- acrylic painting
- 36 Comments
A step-by-step Palette Knife Acrylic Painting – Video Course Part 2
In this painterly, impressionistic palette knife study, I am posting a weekly video on my YouTube channel so that you can follow along at home.
It’s free to subscribe to the blog to receive updates so you can keep up with the painting progress.
The reference photograph and full material list can be found on Part 1 here.
The photo can be ‘right clicked’ and ‘Save image as’, so you can use it as a reference, print it out and follow along with the video below…
Part 2 of 4
So once we’ve established the darks using the Burnt Umber, and the lights using Titanium white, we can now start to build on these colours. The second stage is to introduce some blues into the painting.
This helps to create a visual balance between warm and cool, the browns being warm, the blues cool. Painting in this way can be very effective and a great way to discover how to mix neutrals.
Pro tip: Have a look at ‘Simple Still Life Tutorial Using Only 2 Colours’ for a painting completed using Burnt sienna, Ultramarine blue and Titanium white.
Common fears when using a palette knife
- It will break on me – I’ve never had a palette break or snap on me, the metal used has a great flex to it, so it is surprisingly resilient.
- Am I going to cut myself with the ‘knife’? – Not if you’re careful. If you use a painting knife with a rounded bottom it is very hard to cut yourself. I personally prefer the angled diamond shape for mixing and painting and if you use it daily, over a long period of time, the edge can become sharp.
Okay, I have to admit it, I have cut myself with a painting knife before, not whilst painting, but by cleaning. When you pull the knife through a piece of kitchen roll to remove the paint, just be careful not to pull the knife next to the palm of your hand. It wasn’t a bad cut, a bit like a paper cut, but it still smarts!
You can always use a plastic palette knife but I’ve found the lack of flex and spring makes for a less enjoyable painting experience.
Also, any flat surface can double as a palette knife, if you’re a keen baker you can find some lovely wide knives that can be used for large-scale work.
In my abstract paintings, which focused on the industrialization of the British landscape, I used tools from the building trade instead of a palette knife – trowels, plaster floats, I even tried a shovel!

Will Kemp, If I could do it all over again, Oil on Canvas, 2002

These were quite large paintings (about 5ft by 4ft) and I initially painted a picturesque idyllic English scene, and then ‘blotted the landscape’ by dragging bright, vivid colours through the painting.

Will Kemp, Wait till the cows come home, Oil on Canvas, 2003

So don’t feel you have to use a specific tool, experiment to find what suits your own style of work.
Notice on the detail above how I even scratched into the paint using a palette knife to ‘draw’ a bridge. This technique is called Sgraffito and is most commonly used in pottery to make decorative patterns in the unfired clay, so go for it!
Large-scale knives don’t always have to to be used on large sale abstracts though. In my recent Venice paintings, (most of the paintings are painted with a brush) key thicker areas of paint were applied with the palette knife.

Will Kemp , Soft Waterways Venice I, Oil on Board, 24 x 24 inch, 2012

Will Kemp , Venice detail, Oil on Board, 24 x 24 inch, 2013
So let’s get started again on our palette knife study with the blues, and build up our painting in texture and colour.
How to paint with a palette knife – Free acrylic video Course |Part 2
This video below shows the next steps of this palette knife landscape tutorial.
Make sure to subscribe (it’s free) to keep updated, you’ll get email updates when the next video is posted.
Next week, for Part 3, we’ll start to bring in some bright oranges to the foreground, so the cooler blues in the background mountains start to recede.
If you want to brush up on your colour theory, you should have a look at my Simple Colour Mixing Course.
You might also like: 1. Acrylic Palette Knife Painting Techniques – Free Video Course Part 1 2. Acrylic Palette Knife Painting Techniques – Free Video Course |Part 3 3. Acrylic Palette Knife Painting Techniques – Free Video Course |Part 4
Join the Art School Newsletter (it's Free)
Sign up now to get the latest posts, news about products & art inspiration, straight to your inbox.
- First name *
- I respect your privacy and take protecting it very seriously - privacy policy
You Might Also Like

Golden Heavy Body vs Open Acrylics Paints Review

5 Little Lessons from Painting a Large Painting in a New Space

How to Choose a Paint Starter Set for Beginners
This post has 36 comments.

Dear Will, the end result is that you are master colorist painter if even you keep a palette knife or a tool or whatever else you use to paint, the word is Fantastic, harmonius, makes you travel away.

Hi Mary, thanks very much.
Cheers, Will

Dear Will, Thanks loads for sharing your talent and inspiring so many of us. I enjoy viewing your highly instructive videos and reading your clear and concise articles on painting.
Hi Ransome, you’re welcome, great to hear you’re finding the tutorials clear and instructive.

Thanks for this part 2 Will. Really getting a bead on how to loosen up and blend colours together.
Will have you ever used water mixable oil paints? If so are you pro or con?
Thanks again.
Hi Sherrill,
Glad you enjoyed part 2.
Water mixable oil paints can be a good place to start if you don’t want to use solvents when painting but want a longer working time (drying time) than acrylics. As for brushes, with water mixable oils you want a brush that is a bit stiffer than a watercolour brushes but not quite as thick as a hog hair brush, due to longer exposure to water a brush with a mix of synthetic and natural bristles would work well. Winsor and newton have developed some brushes specifically with water mixable oil paints in mind that you might find useful, they are called ‘Artisan range of brushes.
I have used the water mixable Oils but found they didn’t have the pigment strength or quality that artist quality Oils have. They do have the advantage of an easy clean up but lack the qualities of Oil paint I love so much.
Hope this helps,

Dear Will As a South African poor novice painter, I can’t thank you enough for your videos. To-day I will start painting with a pallet knife. Fingers cross.
Good one Connie, enjoy it!

Estimado Will: yo en óleo utilizo , blanco de zinc para las mesclas , el blanco de titaneo lo dejo para la etapa final, solo o con amarillo de nápoles por ejemplo porque noto que matea un poco mi pintura. En acrilicos opera igual? gracias
Dear Will: I use in oil, zinc white for mixtures, the target of titanium white, I leave for the final stage, alone or with naples yellow for example, because I notice that my painting mattes slightly. Does it work in acrylics like this ? thanks
Hola Angelica,
El uso de zinc blanco y negro para las mezclas de titanio para las fases finales en las pinturas de aceite es un buen enfoque – debido al tiempo de secado lento de blanco de titanio.
Todas las pinturas al óleo se mate, cuando se oxida petróleo.
Con acrílicos, titanio seca blancos en la misma proporción que cualquier otro color, por lo que se puede utilizar desde el primer momento.
Espero que esto ayude,
Hi Angelica,
Using Zinc white for mixes and Titanium white for the final stages in oil paints is a good approach – due to the slow drying time of Titanium White.
All oil paintings will matte, when the oil oxidizes.
With acrylics, Titanium white dries at the same rate as every other colour, so can be used from the very start.

Hi Will, Thank you so much for this series! I’m new to your work, been painting for years but I feel like I’ve struck gold with your vibrant paintings as well as your easygoing teaching style. Much appreciated.
Hi Lisa, you’re welcome. Looking forward to hearing how your painting turns out.
Thanks, Will

Hi Will, love the way you make the marks with the knife. The acrylic looks juicy, like oils. Two questions: What do you think of painting first in acrylics on canvas. Then using oil glazes over the top? Secondly, Do you prefer oils or acrylics? Thanks for the generous sharing.
Hi Lesley, thanks for dropping by, painting oil glazes over acrylics can be okay, you just have to make sure the acrylic isn’t on too thick. Otherwise the oils don’t have a tooth to grab onto, so can make an unstable paint surface film.
I wouldn’t say I prefer one paint over the other, it really depends on the subject and the effect I’m trying to achieve with the painting, for example, I paint my portraits in oils due to the subtle skin tones I’m trying to create. For an expressive palette knife study acrylics would be the preferred choice.

Just want to thank you Will for sharing your paintings with us. I absolutely love the colours you have used on your abstract paintings and I am amazed at the “tools” you have used and the size of the canvasses. It must take you so long to do paintings this size. I particularly like “wait till the cows come home” The way you have incorporated the beautiful , peaceful countryside with the industrial side. It is sad though to see what is happening to your beautiful country pastures etc and I can tell you it is happening over here in Australia as well. I was shocked a couple of weeks ago when we went for a drive into the country and we came across this massive building site in the middle of nowhere. All the land was being carved up for massive homes, roads everywhere etc etc and a small park in the middle of it!!!!. Your feelings really show through in your paintings Will thanks again. Isabel
Thanks Isabel, really pleased you appreciated the abstracts and their story.

I love the demos and all your articles. Hope to take a course with you soon.
Hi Mridula, thanks very much, great to hear you’re enjoying the tutorials.
Dear Will, I started a message to you a few minutes ago and I either lost it while looking elsewhere on your site, or it went off before I finished it. I have no idea.!!!!! I wrote telling you that I am having trouble with my paints, when laying on the paint using my pallete knife the paint has no texture to it, it just lies flat . The consistency of the paints are like cream. I am new at using acryclics and I am wondering if our weather has anything to do with this. It is very hot over here at present, 38 degrees Celcius today and has been hot for days, could this affect them? I paint in our garage in the morning and evenings not in the hottest part of the day. The garage has no airconditioning. I keep them on a wet pallete (your video) and keep them in the fridge when not in use. I am also wondering if I am making the pallete too wet.! Would it be ok if I added some kind of medium to the paints to thicken them. When I used to use oils with a pallette knife the paint sat up nice and thick. I am using Atelier Interactive artists acrylics. I would appreciate some advice as I have no idea what to do. Sincerely Isabel
The hot weather would dry the paints out more quickly, but not thin them out. I think the thinning of the paints is due to the stay-wet palette. If the stay-wet palette has a lot of water in it, overnight the water that’s held in the ‘blotting paper’ section of the palette will be sucked up by the acrylic overnight and thin the paint mixture down.
If the paints are in the palette for a day or two then the acrylics could have easily become more cream like in consistency. Try using some paint straight from the tube and see if it holds the shape.
If you are still having trouble you can mix in a heavy gel that will add stiffness to the paint.
Thank you very much Will. The paint had been on the palette overnight but I think I will try a gel as I also tried the paint straight out of the tube. I will let you know how I get on. Cheers, Isabel
You’re welcome Isabel, let me know how you get on with the gel.

Thank you for these splendid videos. I am trying to do knife work over an unfinished painting of blossom against sky (done with a brush and Golden liquid acrylics). It was dull and I thought a knife treatment would liven it up. It has become a mess! And now of course there are ridges everywhere and can’t be painted over. I guess I will have to ditch it. Can you offer guidelines on subjects/sizes that are unsuitable for knife work please. I am particularly keen on flowers but not landscapes!
Hi Jill, thanks for dropping by, sorry to hear the blossom painting didn’t liven up as intended. In terms of subject matter, any subjects will work with palette knife painting, from portraits, flowers to still lifes. It’s just a balancing act depending on tne level of detail/size of canvas you’re working on.
Thanks for the reply Will. I will consider the size of marks more before rushing in too enthusiastically next time. A lesson learned I hope! By the way, where and when is this next exhibition of yours?
Hi Jill, yes, the scale of canvas can make a big difference when working with palette knives. The exhibition was a private exhibition through my publisher that was held this past weekend, first news back and the paintings have sold really well!

Hello Will,
Thank you so much for your very clear, simple to follow, down-to-earth and inspiring tuts, which allows all us painters out here to keep up with your demonstrations. So often, mistakes and corrections are left out, which mostly leaves beginners feeling rather inadequate, so I find your way of teaching very refreshing.
I generally paint in oils over an underpainting of acrylics. Very seldom do I complete a painting in acrylics because I find the way I handle acrylics leaves my paintings flat and chalky. They lack the layered depth and luminosity achievable from oils. I’ve never tried any of the mediums available and wondered if any of them will help, or if I should simply change my paint application.
I’m currently working on an acrylic painting for the ‘everyone counts’ campaign, and have again managed to achieve my too chalky look. I would really appreciate some advice.
Much appreciated, Suraya
Hi Suraya, thanks for your kind comments, really pleased you’re finding the tutorials and videos helpful in your painting.
To answer your question:
They lack the layered depth and luminosity achievable from oils. I’ve never tried any of the mediums available and wondered if any of them will help, or if I should simply change my paint application.
The luminosity you see in oil paints is the actual oil that is used to bind the dry pigment. The longer the oil has to dry the more matte the surface will become, you will often see this is a painting where an area of oil painting is matte which is called ‘sinking in’ it is most noticeable in blacks.
Different brands of acrylics dry to a different level of gloss or matte. For example, New Masters from Old Holland have been developed to dry with a semi-gloss finish.
To achieve the gloss effect on your acrylics you just need to apply a layer of varnish that either has a gloss of semi-gloss finish. You first need to apply an isolation coat ( which will be gloss) then you can judge if you like that level of finish and continue with a gloss varnish or semi-gloss varnish ontop.
The isloation coat means the varnish can be removed and re-applied in the future without disturbing the paint surface.
So you don’t need to change your paint application, just the finish to your acrylic paintings.

Is it possible to use palette knife on paper?
Yes it is possible, try using a palette knife with a rounded edge to help prevent accidentally cutting through the paper. Numbers 26 and 13 from the RGM line would be a good choice.

Hi Will, The trouble i faced while trying a random landscape in acrylic medium is the line is defined at the junction of sky and mountains and water.. By the time I would try work on the sky and then water the junction line of sky would get defined and not merge…I don’t get much time to paint every day so every time I refuse I get stuck in merging the junctions… Kindly guide…
Also the abstract painting you have posted above are d one in oil paints… Can they be done in acrylic??
Acrylics would dry too quickly for the technique if you’re coming back the next day to the painting. Have you tried working with oils?

Hello Will-
I can’t tell you how much I have learned and grown from watching your videos! About a year ago, I knew nothing, except what I learned at one of those “Wine and Paint at the Pub” classes (where I ruined a pic with that horrible green!). Anyhow, you are a wonderful teacher and you really have a gift! Painting has brought me so much joy and relaxation in a stressful world and I try to paint what I know I’ll really love.
Anyhow…. I am going to go buy a palette knife this week and try something new again. I think I need new shades, so I may invest in a tube of something plum to make decent purples. Do you have a favorite one I should try? Right now I only have a tube of crimson red and can’t get those lovely purples in your “Monet” painting.
Thanks, Will! Monica
Hi Monica, thanks your kind words about the videos on the site. So pleased that they helped with your painting education! A nice plum colour is Cobalt Violet (Hue) , but it can be hard to track down some brands, other nice purples are Dioxazine Purple (more blue) or Quinacridone Magenta – thinner but lovely for glazes. You can see what can be achieved with different reds and blues from this purple mixing video I made,

I was very interesting in your work and tried to imagine how you use your extraordinery knowledge and I have been founding it is as I expect what master as it could be I would be happy if you make new course about composition and how colours and their warms or cools we would use in our work so that our paintings would see nice for eyes and be best balanced.
You can show as more of yours works , they are very inspirative
Thanks Will Vanessa
Thanks Svetlana, hope you’re enjoying the course. Will
Leave a Reply Cancel reply
This site uses Akismet to reduce spam. Learn how your comment data is processed .
- New? Start Here
- Shop All Courses
- FAQ’s & Contact Will
- Free videos
- 7 Painting Principles
- Student Success Stories
- Art Tuition Bundle Offers
IMAGES
VIDEO
COMMENTS
thick acrylic painting create this fun sailboats on the water painting - watch how it unfolds - just placing color upon color in this demo.Subscribe for more...
Enjoy watching this sailboat painting tutorial using palette knife and acrylic paints. You can see a lot palette knife painting techniques and impasto painti...
In this tutorial I'm going to paint Abstract Sailing boats using acrylic paints and palette knife. I'm using easy palette knife techniques so you can follow ...
Learn to paint a simple sailboat seascape with palette knives in this acrylic painting tutorial by Angela Anderson. MENU; Home ; Select Category - Acrylics ; Aesthetics ; Airbrush ; ... Sailboat Acrylic Painting Tutorial using Palette Knife. 100% 90.38K Views. 1.84K Likes. 2019-04-15. Seascape.
Seascape Palette Knife Tutorial. Throughout February I have uploaded palette knife tutorials and this is the last one. In this video you will learn how to put in the sky, the water, the sailboat with sails, and how to seat the boat in the water. This is a fun painting so let's get started. Watch The Video.
- Achieve blending with a palette knife: Directly mix and blend colors on the painting surface using a palette knife, imbuing the artwork with texture and dimension. ... To add texture to the water surrounding the sailboat, use a palette knife or dry brush technique for a more realistic and dynamic look. 8. Allow the painting to dry ...
Then, paint a dark-to-light blue gradient from the bottom up to the center of the canvas. 7. Use Titanium White for the sail on the sailboat. Use Buff White for the reflection of the sail boat. 8. Mix paint colors with acrylic mediums using a palette knife in a 1:1 ratio. Adding more medium will make the paint more transparent with a heavier ...
You can use the palette knife to create thin, usually broken lines which can look very natural in a painting. All you need to do is load the edge of the palette knife with a thin amount of paint and then dab the edge on the canvas. Just make sure the paint is evenly spread across the edge of the knife.
Materials you will need: Palette Knife. Medium size, Diamond-shaped, cranked (angled) handle. I demonstrate with an RGM 45. Brush. Size 4 black hog brush filbert (from Jackson's Art) Support. 8 x 10 MDF Board primed with 2 coats of acrylic gesso & 1 coat of coloured ground of Raw Umber & Titanium white. Kitchen roll.
Seascape oil Painting in Black And White,Sailboat painting,Abstract Palette Knife Wall Art,Oversized Painting,textured abstract painting, (55) $148.00. FREE shipping.
Audible Free 30-day Trial: http://www.audible.com/angelafineartLearn to paint a simple sailboat seascape with palette knives in this acrylic painting tutoria...
Press the blade into the thickly-painted surface to create texture. Press the thin edge of the knife down to create fine lines. Use just the tip of the blade to produce small dots. Scratch into the paint using a pointed blade to reveal the layers underneath. To clean your knife, simply wipe it onto a cloth.
Kathy Schumacher is a palette knife artist to her core. Perhaps that is why her daughter is so good at it too. Currently residing in Florida, her vibrant works speak for themselves. "A paint brush gives and artist control, but with a palette knife, I am able to stay loose, merging colors and sculpting wet paint into a dynamic final product."
Mix up your palette knife strokes. Vary long and short strokes, thick and thin paint and types of texture to create a sense of depth in the painting. Interchange using a palette knife and brush. You don't have to use just one tool throughout the painting process. Grab a brush to blend edges, or create fine details.
Part 2 of 4. So once we've established the darks using the Burnt Umber, and the lights using Titanium white, we can now start to build on these colours. The second stage is to introduce some blues into the painting. This helps to create a visual balance between warm and cool, the browns being warm, the blues cool.
Abstract ship yacht sail boat art original painting palette knife texture (216) $ 131.98. FREE shipping Add to Favorites NEW, Harbor Lights, Large Original Contemporary Square Painting, Abstract Boats, Rustic distressed finish, Palette Knife Textured, 40x40inch (85) $ 548.83. FREE shipping ...
By Emma Taggart on April 30, 2018. Moscow-based artist Anastasia Ablogina creates expressive palette knife paintings that capture the majestic beauty of the world's largest mammal, the whale. Using thick daubs of acrylic paint, each textured whale painting is full of energy, illustrating their powerful movements as they glide through the sea ...
In this tutorial I'm going to paint Abstract Sailing boats using acrylic paints and palette knife. I'm using easy palette knife techniques so you can follow ...
Easy sailboats abstract painting for beginners using palette knife and acrylic paints..PLAYLIST ⬇️https://www.youtube.com/playlist?list=PL1Ybw1vOiMGexR8Bfaaa...
Aug 14, 2019 - Oil painting Boats No. №2. Impressionism 30h40cm canvas, palette knife. Spice-Art Kristina Korchazhkina из города Moscow - доставка по России. The painting "Boat" (No. №2), in the style of modern impressionism made in rich colors. Will cheer you up on cloudy days and can serve as an interesting gift. Materials: oil…
When we first wrote about Moscow-based artist Anastasia Ablogina back in 2018, we focused on her textured palette knife paintings that capture the majestic beauty of whales. The talented artist is still creating work inspired by the world's ocean giants, but her portfolio has also expanded to feature an entire range of animals, from foxes and rabbits to owls and sea turtles.
Nov 1, 2018 - Oil painting Boats No. №2. Impressionism 30h40cm canvas, palette knife. Spice-Art Kristina Korchazhkina из города Moscow - доставка по России. The painting "Boat" (No. №2), in the style of modern impressionism made in rich colors. Will cheer you up on cloudy days and can serve as an interesting gift.
Just learning to paint with a Palette Knife and thought I would share some of my efforts.This is a rendering of Sail Boats I saw someone else here on YouTube...