
- Consultation & Design
- Installation & Service
Boating Tech Talk
- Case Studies
- Testimonials
- PYS Merchandise
- PYS Donation

- Resources Videos Top Tips For Re-Wiring a Sailboat Mast

Top Tips For Re-Wiring a Sailboat Mast
Transcript is auto-generated.
hello everyone jeff cote here with
boatingtechtalk.com
all right we have another question from
a fellow boater richard
richard has a corbin 39 center cockpit
pilot house catch a sailboat 39 feet
center cockpit all right so this is a
boat he says jeff we're preparing our
boat for a live aboard cruising
and what are your top tips for rewiring
a mast ours is removed and i'm preparing
to replace all the wires oh richard what
great question because i just did the
exact same thing
on my sailboats mast so this is a i saw
the question coming into my inbox i was
why not talk about this so when your
mast is off your boat and some of us
obviously take down their mass more
regular than others but here in the
pacific northwest
because most of the boats stay in the
water all throughout the year
it's pretty uncommon for us to take our
or d-mast of a sailboat so because it's
pretty uncommon to do that that means
that it rarely gets done
and so given the opportunity especially
if you're not planning on doing it again
or your frequency is every 5 10 15 or 20
or 30 years
besides obviously in my case you know
looking at all
the standing rigging all the fittings
and all the things that a rigger would
on the mat so in my instance you know
they looked at
obviously repainting you know redoing
all the metal fittings you know
making the right penetrations in the
mass all that stuff but then again
that's more sort of a rigor right
so um that you'll want to have do that
or you'll do it yourself but regardless
that's a skill on itself
here today i'm talking about the
electrical or the communications part
of what you do when your mass is down so
the first thing in my case especially if
your mass hasn't been touched in 20 30
years and my boat is in 1990 so nobody
had done this in since 1990 so we're
talking over about 30 years
i basically took every single piece of
wiring out of that mast
why because when the mass is down a
running wire in a mass is a joke
and wires compared to the cost of doing
when the mass is
upright is again a joke so took the
opportunity to literally clear out all
the coaxial cable to the vhf replace vhf
30 year old replaced anchor light
replaced steaming light replaced
spreader lights replaced all of it
why because now's the time everybody's
working at literally the best
sort of level which is at hip height you
put the mat
on us on a horse right i'm not sure what
name is in english sorry for my lack of
translation here folks
but you've got the mass on the ground
you're working at hip
level this is perfect this is a great
occasion to run
all new wires this is also in my mass
was an opportunity
to run a second conduit right so now we
had a one conduit that went all the way
to the top of the mass
then we had another conduit that was
running sort of from the bottom of the
mass to where the radar was going to be
installed because yes i decided to
install my radar on the mast
and so literally had the opportunity of
running a new conduit for the mast
inside so i have two conduits which was
again a new opportunity i don't think
you could ever do that with the mass
being upright and then having sure that
all the connections are done properly
now's your opportunity right why not and
then for me
and again this is some people are going
to say oh it's stupid no it's overkill
oh you don't need to do that and i'm not
disagreeing with you
i'm telling you about what i would have
done on my math which i just did
literally a month ago
right and it's not to say that i'm right
and someone else is wrong we don't need
make things polarized there's no right
or wrong here jeff cote's opinion
is take the opportunity when the mass is
down especially if it hasn't happened in
decades or ever and if your mass is 20
years old or 30 years old and the
wiring in that boat or in that mass is
when the mass is down take it all out
and remove everything on that mass even
if it's working
because you don't have to wait for
something to fail to change it
right and i do the same thing with my
engine i don't change my hoses when they
break i change my hoses based on a
recommendation that i've heard from
mechanics and i do a lot of
preventative maintenance and this would
be preventative maintenance
and what's more important think about
this than having a good vhf connection
so that you can reach the outside world
when you need to that's pretty up top of
a really good anchor light that works
because sometimes you're in an anchorage
that actually has
traffic at night and then you want
visibility what about a steaming light
that allows that alerts other boats when
you're underway knowing that you're
under power what's more important than
actually a deck light at night so that
when you actually are fixing your anchor
or something and it's terrible that you
want to see what you're doing
or a spreader light maybe you're
installing a radar that's one of the
reasons i did it now you're installing a
radar you're making sure the bracket
all those reasons are good reasons to
not have to worry
and when we're out boating my philosophy
has always been
take care of what you can sooner rather
because i can guarantee you that once
we're on the water things start failing
and the things that you didn't replace
are probably the things they're going to
start failing so you got to get yourself
ahead of the curve so
great question richard i love it and i
hope i don't upset too many people by
telling people to do a lot of
preventative maintenance with their mass
but i truly believe that it's worth
every penny
because being on the water is about
having a trouble free experience as much
as possible
mine aren't trouble free but i do reduce
the risk and the best way to do that is
preventative maintenance
so thanks for asking and thanks for
thank you for watching this pys video if
you've got further questions please
ask them below or send us an email via
the contact forms on our website
and don't forget to subscribe
thanks again for watching

How Do I Know if My Boat’s Electrical Has a Bad Ground?

Why Would the Reverse Polarity Light Be on When I Run the Generator on a Mooring Buoy?

Day Two at the Vancouver Boat Show with Jeff Cote

What Type of Battery Should I Use for My Thrusters?
Related Products

BLUE SEA 3116 SMS Surface Mount System Panel Enclosure - 120 AC/30A ELCI Main - 3 Blank Circuit Position

BLUE SEA 8068 DC 13 Position Panel

BLUE SEA 8110 Mini Clamp Multimeter - AC/DC
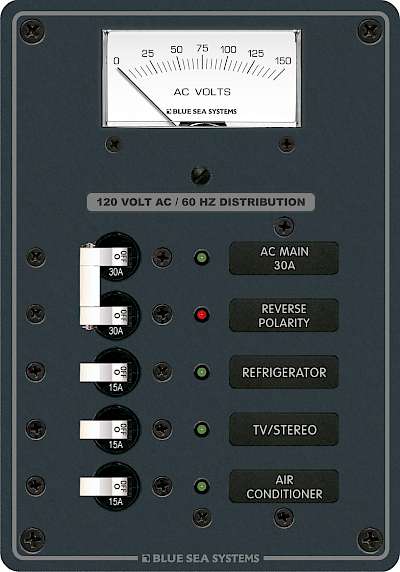
BLUE SEA 8043 Traditional Metal Panel - AC Main + 3 Positions, AC Voltmeter
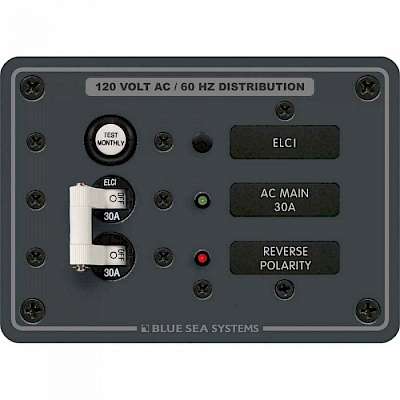
BLUE SEA 8100 ELCI Main 30A Double Pole

BLUE SEA 8077 AC Main 30A
Related content.
Boating Tech Talk Help me Troubleshoot my Galvanic Isolator?

Videos Maretron Digital Switching - Part 1 of 3 - Unboxing and Product Review

Videos Boat Watermakers 101

Videos Why Would the Reverse Polarity Light Be on When I Run the Generator on a Mooring Buoy?

Videos How To: Marine Electrical Seminar - Troubleshooting Solar, Generators & Fuel Cells - Episode 12 of 12

Videos How To: Marine Electrical Seminar - Fuses & Cricuit Breakers - Episode 17

Videos DC Only Boat To Cruise Around The World?

Videos Boat Show 2019 - How To - Choosing & Installing An Inverter/Charger
Boating Tech Talk Battery Type Indicator on a Freedom Inverter/Charger?

Videos Where Is the Best Place to Install an Inverter On my Boat?

Videos Boat Show 2018 - DIY Marine Electrical Connections

Videos I Am Installing an Inverter/Charger on My Boat, Why Do I Have to Install a Switch on the DC Side?

Videos How To: Marine Electrical Seminar - DC Panel - Episode 15

Videos How Do I Know if My Bow Thruster Is Getting Charged?

Videos Charging a 2nd Battery with a Combiner on a Boat

Videos How To: Marine Electrical Seminar – Inverter - Episode 4

Videos Maretron Digital Switching - Part 2 of 3 - Unboxing and Product Review

Videos Boat Show 2018 - Choosing and Installing an Inverter/Charger on a Boat

Videos Live Stream with Jeff Cote - March 21, 2021

Videos How To: Marine Electrical Seminar - AC Panel - Episode 14

Copyright © 2024 Pacific Yacht Systems.
Contact Us 604.284.5171
Shipping & Returns | Privacy Policy | Terms of Use | PYS Partners

- New Sailboats
- Sailboats 21-30ft
- Sailboats 31-35ft
- Sailboats 36-40ft
- Sailboats Over 40ft
- Sailboats Under 21feet
- used_sailboats
- Apps and Computer Programs
- Communications
- Fishfinders
- Handheld Electronics
- Plotters MFDS Rradar
- Wind, Speed & Depth Instruments
- Anchoring Mooring
- Running Rigging
- Sails Canvas
- Standing Rigging
- Diesel Engines
- Off Grid Energy
- Cleaning Waxing
- DIY Projects
- Repair, Tools & Materials
- Spare Parts
- Tools & Gadgets
- Cabin Comfort
- Ventilation
- Footwear Apparel
- Foul Weather Gear
- Mailport & PS Advisor
- Inside Practical Sailor Blog
- Activate My Web Access
- Reset Password
- Customer Service

- Free Newsletter

Catalina 270 vs. The Beneteau First 265 Used Boat Match-Up

Ericson 41 Used Boat Review

Mason 33 Used Boat Review
Beneteau 311, Catalina 310 and Hunter 326 Used Boat Comparison

Tips From A First “Sail” on the ICW

Tillerpilot Tips and Safety Cautions

Best Crimpers and Strippers for Fixing Marine Electrical Connectors

Thinking Through a Solar Power Installation
Polyester vs. Nylon Rode

Getting the Most Out of Older Sails
How (Not) to Tie Your Boat to a Dock
Stopping Mainsheet Twist
Fuel Lift Pump: Easy DIY Diesel Fuel System Diagnostic and Repair
Ensuring Safe Shorepower

Sinking? Check Your Stuffing Box

The Rain Catcher’s Guide

What Do You Do With Old Fiberglass Boats?
Boat Repairs for the Technically Illiterate
Boat Maintenance for the Technically Illiterate: Part 1


Whats the Best Way to Restore Clear Plastic Windows?
Giving Bugs the Big Goodbye

Galley Gadgets for the Cruising Sailor

Those Extras you Don’t Need But Love to Have

What’s the Best Sunscreen?
UV Clothing: Is It Worth the Hype?

Preparing Yourself for Solo Sailing

How to Select Crew for a Passage or Delivery

R. Tucker Thompson Tall Ship Youth Voyage

On Watch: This 60-Year-Old Hinckley Pilot 35 is Also a Working…

On Watch: America’s Cup

On Watch: All Eyes on Europe Sail Racing

Dear Readers
- Sails, Rigging & Deck Gear
Revive Your Mast Like a Pro
Each spar section has unique signs of trouble to look for during inspection..
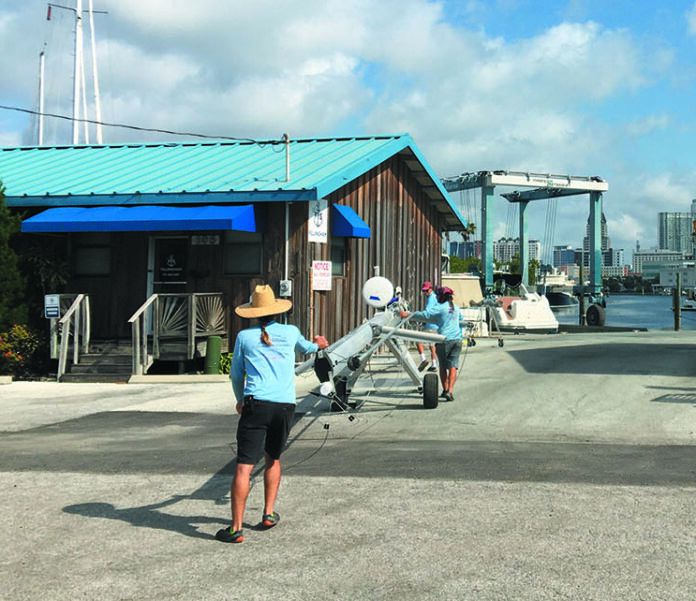
Unobtainium is the metal at the top of every Naval Architect’s wish list. It’s a perfect marine material; light, strong, stiff yet flexible—it’s as inert as gold, but costs only pennies per pound. Sadly, like the search for El Dorado, this metal quest remains more alchemy than chemistry.
For now, aluminum, especially the alloy 6061-T6, is the solid performer. It singlehandedly upstaged spruce as the mast material of choice, and for decades it’s done its job admirably. The alloy isn’t perfect, but by understanding its vulnerabilities, and mitigating those negative characteristics, the functional lifespan of an aluminum spar can be measured in decades not years.
Yes, carbon fiber spars are in many ways the next step forward. But for those intent on being cost effective and not in the hunt for a few tenths of a knot increase in boat speed, aluminum remains the cost effective alternative. In a future issue we’ll focus on carbon’s influence on spars, hulls, rigging, and sails.
Most metal masts are made from long, cylindrical billets of aluminum alloy. Each tube section is created using a powerful ram to force a heated billet (400-500 C) through a set of dies that squeeze and shape the billet into the cross section and wall thickness of a specific spar. Lots of lubricating release agent and 15,000 tons of ram pressure are used to reshape the malleable aluminum.
Billet residue is captured and recycled, while the tube shape undergoes quenching as it moves off on the runout table. The next stop in the line involves a process that draws (pulls) and straightens the tube section.
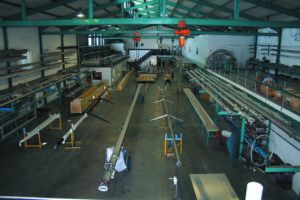
Once fully cooled, it goes through a T6 heat tempering process that elevates tensile strength from 35,000 to 45,000 psi. Lastly, spars can be anodized, painted, powder coated, or left uncoated. Some masts are extruded in half sections and machine-welded together lengthwise.
There are other aluminum alloys that are better suited to welded hull construction or used for metal casting purposes, but 6061-T6, containing small amounts of silicon, magnesium, and other trace elements, delivers the strength, stiffness and lightness that’s vital when it comes to making spars.
The “T6” alloy is weldable, but doing so anneals and weakens the area that’s welded. This is one of the reasons why, when splicing two sections together, a doubler is added internally that overlaps the junction. Excess heat buildup during the plug welding process that joins the sections is kept to a minimum. Some manufacturers mechanically fasten the junction using machine screws or heavy duty pop rivets.
Unfortunately, aluminum isn’t quite the sequel to tomorrow’s Unobtainium . Aluminum, like steel alloys, show a proclivity to oxidize. But in the case of most steel alloys, oxidation is an ongoing process that only reaches completion when the object in question has become an unrecognizable pile of rust.
Bare aluminum, on the other hand, reveals a very different oxidation curve. A shiny new piece of aluminum develops a speckled, gray, oxidized coating that actually becomes a protective layer, preventing further oxidation. Ironically, this means that the ugliest looking mast in the marina, that non-anodized, unpainted one with the aesthetic appeal of dirty socks, is about as well protected from further deterioration as the spar on the gold-plater with the automotive finish. This is the reason why most commercial mariners restrain from painting the deck and topsides of their aluminum workboats.
The root cause of this aesthetic injustice is the way moisture, especially salt water, finds every microscopic void or coating imperfection and causes aluminum to oxidize around voids and spread beneath the paint layer. By the time blisters appear and paint begins to flake, the sub surface is covered with aluminum oxide and starting to pit.
There are several ways to tame the effect of chloride-rich seawater. But when it comes to a failing painted surface, thorough prep work is essential. Modern epoxy primers help hold corrosion at bay, and single and two-part urethane coatings seal the surface. Hard-anodized or powder coated spars are even better protected, but cost more and are more complicated to refinish when they finally fail.
GALVANIC CORROSION
Galvanic corrosion is aluminum’s second major nemesis, and it stems from an electrical interaction rather than oxidation. Metals are rated on a galvanic corrosion scale that places less reactive (more noble) metals at one end and more reactive (less noble) ones at the other end.
Platinum, beryllium and magnesium lean against one of the bookends of this scale. Magnesium, a plentiful element, is strong and light, 35 percent lighter than aluminum, but way too reactive in the marine environment. Platinum and gold sit at the opposite bookend of reactivity and are so inert that all other metals become anodic in their presence. The metals that lie in between these are relatively ranked according to their behavior in an electrolyte such as seawater.
When it comes to marine applications, there aren’t many platinum thru hulls, but silicon bronze is a pretty good compromise between cost and corrosion resistance. It’s rank on the galvanic scale is toward the more noble end and it behaves as a cathode to less noble metals like zinc, brass, and aluminum, which become anodes in the proximity of more noble metals.
Unfortunately, when dissimilar metals are in direct contact, all it takes is a little rain or morning dew to set up a temporary galvanic cell. Salt spray finds all the nooks and crannies on a sailboat and as the water evaporates it leaves behind crystalized sodium chloride (NaCl). Each raindrop, wave splash or drop of dew rehydrates the electrolyte. And as every galvanic cell demonstrates, wherever two or more dissimilar metals are immersed, a current flows and the less noble material (anode) corrodes causing electrons to flow toward the more noble metal (cathode). The net result is pitting and eventual destruction of the anode.
This prolonged, double-barrel assault on an aluminum spar is most noticeable in areas where dissimilar metals make contact.
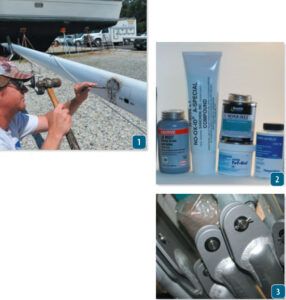
There’s an old superstition about putting a couple of silver or copper coins under the mast step, just before stepping the spar. It may have been a good luck charm in the days of iron men and wooden masts. But today, placing a copper penny or silver eagle in a wet mast step completes a highly reactive galvanic cell and creates a corrosion experiment of the first order. The right answer is to do everything possible to separate dissimilar metals. Putting a Delrin strip or dielectric PTFE tape between the hardware and the mast wall really helps.
When installing larger stainless steel hardware on a mast, it’s easy to cut out a gasket from a sheet of 30 mil thick Teflon. Also be sure to use Tef-Gel or a similar dialecrtic grease or sealant on all screw threads.
MAST INSPECTION
Once the mast has been unstepped, positioned horizontally on horses and the headsail furling gear removed, it’s time to take a close look in all the nooks and crannies where things can go wrong. I prefer a bottom up approach and group the mast into four related subsets: base, column, spreaders, and masthead. If the mast is going to be painted, postpone this DIY inspection until all the rigging and hardware has been removed. In either case, scrutinize the spar, hardware and rigging attachment points, especially where high loads are focused.
It helps to have a good magnifying glass, a pick, knife and small scraper on hand to expose and inspect oxidized areas. Place a piece of contrasting color masking tape on each point of concern as you progress toward the masthead. Once the inspection is complete, use a digital camera or smartphone to document the more serious issues. These snapshots provide a record of the location and extent of all corrosion, deep pitting and any cracks emanating from fasteners or hardware. Also record all dents or other impact damage and any sign of ongoing abrasion. Serious damage can be caused by misled wire running rigging and the cycle loading wear linked to variations in tension. Naturally, all standing and running rigging should be thoroughly inspected at this time— a topic of a future article.
AT THE BASE
Keel-stepped masts aboard many cruisers and racers are hidden below the cabin sole and reside in a wet, corrosion prone, bilge ambiance. And it’s another reason why, when a mast is unstepped, the entire support structure, step and the heel fitting deserve a close look. Check for signs of corrosion and make sure the hardware that fastens the heel fitting to the grid or other transverse and fore-and-aft support is in good shape. This structure supports compression loads and also must respond to changes in backstay tension and side loading, not to mention the shock loads of a beat to windward in heavy seas. This is also the time to do what I call spar-oscopy. Take a compact LED flashlight and tape it to the end of a long, thin PVC tube or bamboo fishing pole that will be used to look at the mast interior.
This jury-rigged light on a pole, allows you see signs of internal corrosion and gives you a chance to locate abrasion points where halyards have been misled or are rubbing on hardware. A narrow spot beam will illuminate much of the inner wall of the mast, and if the running rigging has been replaced with thin messengers and the spreader “dog bones” (cross connecting supports) have been removed, you will have a clear sight line up the spar. This is a good time to sort out any halyard overlaps.
Riggers also look for an ailment called “elephant foot.” It’s a descriptive name for the partial crumpling of the spar near the base of the mast, It’s caused by over-compression and/or a wall section that is too thin. This wrinkling is usually just above the mast step, and it indicates a condition just shy of complete failure. It can be linked to prolonged ponding to windward with excessive backstay tension and overpressuring mast jacks. In some cases a new section can be spliced into the spar. By if it’s an older mast and other significant signs of deterioration are present, it may be time to opt for a new spar. Don’t bet the farm on an “it hasn’t failed yet” assumption; hire a skilled rigger to advise on the tough calls.
At first glance, the mechanical challenge linked to stripping hardware from a mast seems rather simple. All you need are a couple of screwdrivers and you’re ready to go. Unfortunately, the gods of galvanic corrosion have placed another obstacle in the sailor’s way.
The threads of those stainless steel screws attaching hardware to base plates or to the mast wall itself have become so corroded they are likely to be screwdriver-proof. Part of the blame goes to original hardware installers, who gave little attention to coating threads with an anti-seize compound and the effect it would have on future maintenance.
So after some years or decades, when it’s time to see what lies underneath the hardware, my first step is to clean all oxidation, paint and grime away from the screw slots and make sure that the chosen screwdriver fills the entire slot. A snug fit is the goal. Then, if a good counter clockwise twist fails to elicit any rotation, it’s time to add a wrench to the screw driver and deploy a good deal more torque.
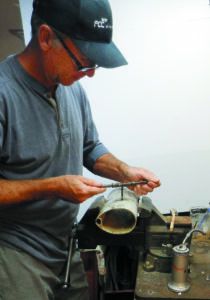
If this also fails to loosen the bugger, I go to plan B before I ruin the screw slot. Step one is to use a pick to scrape away oxidation around the screw head perimeter. The next step is to douse the area with a penetrant such as PB Blaster, CRC’s Ultra Screwloose, Knocker Loose Plus, Gasoila Free-All or a similar product (see Inside Practical Sailor blog post, “More Boat Tips: Unsticking Stuck Nuts and Bolts”).
Before once again applying torque to the problem, I spend some time using a drift pin and a small ball-peen hammer to tap each chemically soaked fastener. Afterwards I add more penetrant around each screw head. Instead of immediately reverting to a brute force approach, which more often than not leads to a broken fastener or a damaged screw slot, I let the penetrant do its thing and return the next day with my portable impact driver and assortment of screw driver bits. The small Makita impact tool applies a pulsing torque. Combined with a little penetrant and a lot of patience, I’ve found this tool to be very effective on stubborn fasteners. Screw diameters of ¼ inch or less are not hard to snap so use pulsing torque is far better than more leverage and brute force.
If the screw slot is damaged it’s time to switch gears and be ready to drill out the head of the screw and pull the hardware off the remaining stud. A stud remover fitted to a socket wrench works better than vise grips when it comes to backing out a headless screw. But it requires a half-inch or more of the screw stem to be exposed.
The secret to drilling off the damaged head of a screw involves the use of a drill bit made for stainless steel. Place it in the chuck of a low-speed drill that delivers ample torque at slow speeds. Those using a dull bit and a high-speed drill are likely to work-harden the stainless steel screw head, making it even harder to drill. Applying cutting oil that both cools and lubricates a bit will make drilling more effective.
ALONG THE COLUMN
A sailboat mast is like a long electrical fuse: one bad spot and the show is over. Critical failures are usually linked to standing rigging failures and can occur at toggle or tang attachment points, on the spar itself or at spreader tips and roots. Upper shroud tang fittings, near the masthead, need a close look. Check clevis pin holes for elongation and Tball or stem ball cups for deformation.
Sight along the open spans of the spar, where no hardware is attached. It should be free of abrasion marks and signs of halyard shackle damage. It’s surprising how many painstakingly applied paint jobs are ruined by halyard slating cause by poorly set halyards. During this part of the inspection also check exit sheaves, winch bases/pads, mast steps, the bow light, radar bracket and other attached hardware.
The gooseneck fitting and boom vang points of attachment are highstress areas and prone to developing stress cracks. Just below this union, forces converge at the mast partners, the reinforced area where a keelstepped spar passes through the deck. Check here for stress-related damage as well as corrosion issues. If you find signs of extensive pitting or stress cracks, a cosmetic repair can be more harm than help. Have a local rigger with a good reputation take a close look at what you have uncovered.
The mainsail mast track should be straight and the slugs, slides or cars that run in or on them should slide freely. Take an extra slide or car and hand test the track, identifying any points where friction increases. Problems are often caused by burred or dented metal, oxidation in an internal track or misalignment at track joints. Most of these issues are easy to resolve while the spar is horizontal and access is optimized. In-mast or in-boom furling systems each have an inspection and maintenance routine outlined by the manufacturer. Maintaining optimum reliability revolves around following these guidelines. Care should be taken to avoid keeping paint and primer from hampering track function.
Search for causes of abrasion, eliminate the dings and dents from halyard shackles by solving lead problems. And be on the lookout for hairline cracks emanating from fasteners on the leading edge of the mast. Modern spar design accounts for backstay tensioning that induces bend in the mast to adust headsail shape. This bending results in an intentional tension increase on the spar’s leading edge, adding new stress to a column already in compression. Small cracks emanating from fasteners on the leading edge of the mast can be enlarged as the mast is intentionally bowed.
Every sailor who’s painted anything on their boat has plenty of tips to share. But when it comes to useful insider advice, pay more attention to the pros who have learned what works over many years. The good news is that although paint brand allegiance may vary, generic mast prep and painting techniques have a high degree of correlation.
When it comes to the first step in the prep process, every expert sings the same refrain. Remove the hardware if possible, especially if there’s any sign of blistering or paint failure around the edges. If there’s no sign of any corrosion at all, and the fasteners are likely to snap rather than release, carefully prep and tape around the hardware.
Sand, wire brush or sand/soda blast all areas where corrosion has pitted or left the surface covered with white aluminum oxide. Take a close look at the heel of the mast and the mast step itself. Both need to be free of corrosion and not damaged by metal loss or physical damage. The same goes for the area where spreaders, stays and shrouds attach. The masthead fitting also deserves close scrutiny. Inspect the aluminum around where the sheave axle(s) attach. A corroded aluminum masthead truck, with deterioration around the support for headstay or backstay toggles, can spell disaster. This corrosion inspection is a good time to catch pending problems.
In most cases, OEM painted spars hold up quite well, especially those that have been carefully prepped, epoxyprimed and LPU top coated. Eventually, weathering causes the gloss to disappear, but the paint retains excellent adhesive quality. If you’re facing such a challenge and there’s little or no sign of physical damage or corrosion around hardware, there’s nothing wrong with simply renewing the top coat.
In such cases, begin with a wash and/ dewax cleanup, sand with 220/320, remove dust, tape off hardware, solvent wipe and apply of two coats of the same (or similar type) topcoat, scuff-sand between coats.
However, if there are dings, scrapes or areas where corrosion has damaged the coating or areas where paint adhesion is failing, a decision must be made between spot repairs and complete mast redo. The latter involves removal of most or all of the hardware and stripping off every bit of the old paint. A spot repair approach is much less labor intensive, but if corrosion is rampant, spot repairing can be counterproductive.
During the prep process it’s essential to clean and degrease the surface before doing any sanding or other abrasive work. I prefer to use the solvent/cleaner of the paint manufacturer I’ve chosen. Clean cotton rags work best, and by meticulously wet wiping the surface you eliminate contaminants that can be forced into the substrate during sanding.
In the case of a repair and recoat effort, once the corrosion and flaking paint have been removed, feather in the adjacent painted mast surface with 60- 80 grit paper to achieve a toothy grip for the epoxy primer that follows. When doing a spot repair, this taper zone becomes an important test of one’s ability to feather an edge and hide the old to new paint junction. Seamless blending of the primer sets the stage for a successful, smooth transition spot repair. If, as you sand the boundary, the old paint continues to flake rather than allow you to feather the edge, It time to switch gears and consider removing all the paint.
An important step in painting aluminum is to get an epoxy primer on a freshly sanded and clean surface as soon as possible. When painting an entire spar, It helps if you can set up a way to hang the mast at waist level so it can be rotated in order to access all surfaces efficiently.

PRODUCT UPDATE
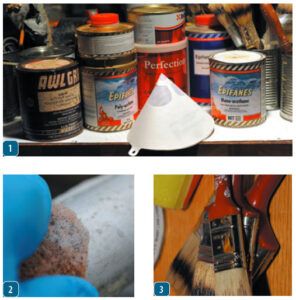
Interlux recommends doing the degrease wipe down with their 202 Solvent Wash prior to sanding. Then prime the spar using their InterProtect 2000E/2001E, thinned 15-20% with their brush or spray reducer. It’s a user friendly epoxy primer and easy to sand. Two coats makes the 60-80 grit sanding marks disappear. Both single-part Bright Sides and two part Perfection deliver a smooth glossy finish. The former is easier to apply and the latter is more durable and long lived.
Pettit offers a complete lineup of aluminum paint and prep products. Their approach kicks off with a solvent clean and a medium grit emery cloth sanding. When the residue has been removed, a thin coat of #6455 Primer should be applied. Two hours later, EZ Prime #6149 is applied and when it’s cured and sanded with 220 (repeat if necessary). Finish with two coats of Easypoxy.
Awl Grip recommends an initial cleaning with their surface cleaner T340 followed by a vigorous Scotchbrite scrubbing with Deoxidine and a thorough rinse to remove all residue. When dry prime with 30-Y-94 and within 3-6 hours, without sanding, apply 545 epoxy primer. Sand 220/320 and top coat with Awl Craft 2000.
If the spar was previously anodized precede the above with a 10-minute wash using a 33% solution of natrium hydroxide. Don’t let the solution dry on the spar. Immediately water-rinse and follow the prime and paint process above.
Spreader junctions are like a dangerous highway intersection, a point where competing forces interact and where there are no traffic lights to tame the flow. Rigging tension on the windward side of a sailboat cause compression loads to increase in the windward spreader(s) and decrease in the leeward spreader(s). Discontinuous standing rigging optimizes wire/rod diameter in each panel section, but it also complicates spreader tip hardware. All too often, spreader boots or a well-meaning taping effort, ends up looking like a response to an ankle injury. Even worse it creates a moisture-holding corrosion bath that enhances galvanic corrosion and oxidation. The goal is to avoid going overboard with padding and tape and making sure that water will not collect around spreader tip hardware.
Spreader bases are another realm of serious concern due to cycle loading, multidirectional forces and dissimilar metal contact. Swept back spreaders, especially those that eliminate the need for a backstay, cope with even greater loads. So when the rig is un-stepped, check how the spreader attachment was engineered. Was a doubler added to the mast wall and/ or were cutouts installed and hardware added to connect spreader pairs? In either case, corrosion in key load path areas can greatly decrease the spar’s ability to cope with the fluctuating loads. It’s no surprise that masts often break just above a set of spreaders.
AT THE MASTHEAD
Once launched, it’s hard to see what’s going on at the masthead. This means that when the spar is down it’s time to get a really close look at the mast truck and its associated fittings. Begin by disconnecting the standing rigging and checking the geometry of every hole that supports a clevis pin. The rule of thumb is: round is good, elliptical is bad. This goes for the tangs that connect upper shrouds to the spar as well as the holes in a welded aluminum masthead fitting. The loss of an upper shroud while beating to windward usually brings down the mast, so extra attention in this area is time well spent.
Carbon spar manufacturing mimics the engineering pioneered in the aerospace industry. They have become an essential component In the most competitive ranks of sailboat racing and caught on with cruising sailors who own lighter, more performance oriented sailboats.
Most spars are built on metal mandrels by carefully aligning layers of prepreg unidirectional and multi-axial carbon fiber from masthead to heel. Intermittently, a debulking process is used to squeeze the layers together, and after the laminate schedule has been carefully aligned, it’s placed in an autoclave. Here the epoxy prepreg in the carbon material becomes viscous and cures under controlled heat and air pressure. These materials are expensive, the labor is time-consuming and the quality control must be rigorous.
One of the major advantages of carbon mast building is the ability to engineer the layup to coincide with the load paths and stresses in the structure. Finite element analysis has helped identify how and where forces are transferred through the tube section. Weight is saved by only adding material where it is needed.
A cruising boat designer may opt for extra reinforcement that increases the safety factor by raising the breaking point of the material. Racing sailors have validated the performance uptick associated with carbon spars. Carbon/epoxy laminates do not suffer from corrosion but they are anything but immune to UV light. It’s one of the reasons a white primer and LPU topcoat is the sensible finish.
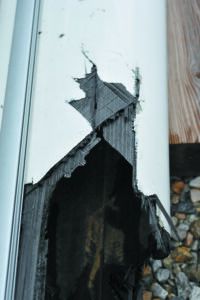
Minor impact damage and abrasion from poorly led running rigging is fairly straight forward to repair. But damage linked to sailing loads that cause major cracks in the laminate or interlayer delamination is another story altogether. In these cases, the spar builder or a composites shop engineer has some tough decisions to make. The big challenge is when a high-tech laminate bundle fails it’s very difficult to scarf in a new section that will handle all the loads in a manner that’s equivalent to, let alone, better than new. Some insurance companies put restrictions or higher premiums on coverage of carbon masts.
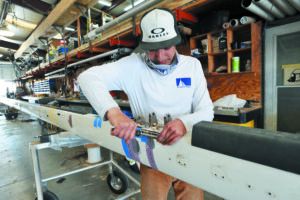
RELATED ARTICLES MORE FROM AUTHOR

Working with High-Tech Ropes
Leave a reply cancel reply.
Log in to leave a comment
Latest Videos

Hans Christian 41T – Boat Review

Seven dead after superyacht sinks off Sicily. Was the crew at...

What’s the Best Sailboats for Beginners?

Why Does A Sailboat Keel Fall Off?
Latest sailboat review.
- Privacy Policy
- Do Not Sell My Personal Information
- Online Account Activation
- Privacy Manager
Visit our Popular Forums
- Monohull Sailboats
- Multihull Sailboats
- Powered Boats
- General Sailing
- Antares Yachts
- Fountaine Pajot
- Lagoon Catamarans
Cruising Business
- Boat Classifieds
- General Classifieds
- Crew Positions
- Commercial Posts
- Vendor Spotlight
Life Aboard a Boat
- Provisioning: Food & Drink
- Families, Kids, & Pets Afloat
- Recreation, Entertainment, & Fun
- Boat Ownership & Making a Living
- Liveaboard's Forum
Seamanship, Navigation & Boat Handling
- Seamanship & Boat Handling
- Training, Licensing, & Certification
- Health, Safety, & Related Gear
- Rules of the Road, Regulations, & Red Tape
Engineering & Systems
- Const. / Maint. / Refit
- Product / Service Reviews
- Electronics: Comms / AV
- Electrical: Batts / Gen / Solar
- Lithium Power Systems
- Engines & Propulsion
- Propellers & Drive Systems
- Plumbing / Fixtures
- Deck Hdw: Rigging / Sails
- Aux. Equipment & Dinghy
- Anchoring & Mooring
Photo Categories
- Member Galleries
- Life Onboard
- Sailing in the Wind
- Power Boats
- Cruising Destinations
- Maint. & Boat Building
- Marine Life
- Scuba Diving & Divers
- General Photos
Recent Photos

Listing Categories
- African Cats
- view more »
- Crew Wanted
- Crew Available
- Enhance Your Account
- Meet the Mods
- Meet the Advisors
- Signup for The Daily Cruiser Email


COMMENTS
Next, install the fixtures permanently using a sealant as an isolation barrier. Pull out any remaining slack at the butt of the mast. Trim all of your cables to a neat and even length. Leave enough slack for service lengths. Finally test all of the light fixtures through the mast and label the cables accordingly.
In this episode I show you step by step how I install conduit in sailboat masts.. *****DISCLAIMER Just because I showed you how to do it does not make you an...
You don't want conduit loose in the mast - particularly if you have internal halyards. You could pre drill the conduit.. mark the mast and drill the first hole and secure the conduit... the other holes should align with your marks. Assemble the conduit... tape to the outside of the mast. Drill the holes through the pvc conduit and though the mast.
270 posts · Joined 2006. #4 · Apr 1, 2014. would standard pipe insulation work instead of a plastic conduit, start at the bottom and slide the insulation up the mast and tape the insulation together at each of the butt ends with the wire inside. The insulation might lower or eliminate the noise of the wire hitting the mast.
Pop a new rivet into the conduit and move on to the next rivet. repeat the process until the conduit is secure again. Fill the off line holes with short aluminum rivets to complete the repair.u000bu000bIf you are very lucky the conduit will be loose at the bottom of the mast and still attached at the top.
Does anyone have a suggestion for securing a PVC conduit inside the mast for wires? If I rivet in place is there an easy way to hold the conduit in place while I drill the hole? Craig Tern #1519
Seminar: Basic Marine Electrical. Boating Tech Talk. Boating Tech Talk. Pacific Yacht Systems can design and install exactly what you need, so that you feel safe and enjoy your boat to its full potential. We offer design, installation, service, and support for marine electronics and electrical services.
Apr 1, 2014. #12. Many of you will find that your mast sections have a "T" or "C" shaped part of the extrusion that accepts a PVC conduit and holds it in place for the entire length of the conduit. Isomat, Sparcraft, Spartan, the MORC Sections from Dwyer, some Kenyon extrusions accept the conduit.
My mast has two slots which run full length beside the internal sail track. I ran 1" round PVC conduit from the mast base to 6" short of the masthead. It is held in place with a series of mast slides attached to the conduit every 12" by double cable ties attached at 45° angles. The conduit is bolted at the base through the mast track.
Depending on the size of the wires and the conduit to be used, these holes could be between 1/2 inch and 1 inch. If there is an internal conduit, install the wiring as detailed in Step 3. If there is no conduit, go to Step 2. Insert a PVC conduit into the mast through the hole at the top. Drill holes through the mast and conduit about every 4 ...
Images: 3. Re: Installing a Conduit in an Aluminum Mast. Use 1" or 1-1/4" PVC pipe riveted every couple feet or so along the forward face of the mast. Since it's not really load-bearing, you can use aluminum rivets. Make sure you cut the pipe in two near the location of your steaming and fore-deck lights so the wiring can exit easily.
Mark for the u-bolts and drill. Put the u-bolts over the conduit and into the holes. Glue the u-bolts to the conduit (your choice of glue). Roll the mast so the holes are now down. Pick up the whole mess and slide it inside the mast with the u-bolt legs toward the center.
Start about 1.5 inches away from the end of the fish and tightly spiral-wrap the electrical tape toward the end until youre about a half-inch past the wire end. Fold the excess tape down over the wire end and spiral the tape in the other direction. Now, bend each end of your newly wrapped wire about 10 degrees.
Not yet having my mast off I assume that the VHF and wind instrument cables travel thru a pvc conduit. Does anyone know if those cables are free or fastened? I would like to run my new wind instrument by going aloft and using the old cable to pull the new one down. Doug 1990 C30
A sailboat mast is like a long electrical fuse: one bad spot and the show is over. Critical failures are usually linked to standing rigging failures and can occur at toggle or tang attachment points, on the spar itself or at spreader tips and roots. Upper shroud tang fittings, near the masthead, need a close look.
Re: Electrical cable In mast. Drop a strong string down the mast with a small ring or some split shot fishing weights on it. From the base use a stiff wire with the end bent into a hook to fish the string out. From there you can pull your new cable and just abandon the old cable. 07-05-2019, 10:16.
Mast base electrical plug had some corrosion, but more disturbing was that all the wires reveal green corrosion after being stripped. It looks like the original wiring, 32 years old. I think I need to rewire the mast and also replace the panel to mast wiring. So questions arise. Does the mast wiring run in a conduit on a Newport 30 mast?
SBO Weather and Forecasting Forum Jim & John. If you have running rigging in the mast then thin walled PVC conduit would be recommended to keep electrical lines separate from wet halyards. Attach the conduit to the the inside of the mast away from the fairlead of the halyards and not in line with the sail tracks.
Some choices: 1) Feed the cables down through the mast step if possible. 2) Use a smaller diameter VHF connector, such as a TNC connector. 3) Use a bulkhead connector instead of a grommet for the VHF, see photo showing the mast cable for my previous boat with bulkhead connectors on both ends: Attached Thumbnails. __________________.
The last boat we installed a conduit in was a Pearson 33'. The mast was to be painted so we stripped the mast and installed the conduit. That took four hours. At 75.00 per hour, plus the conduit and rivets that came to about 300.60. Add in the crane fee, 150.00 each way, that comes to about 660.00.
The conduit appeared to be a very light wall 1/2" pipe. All but 2 of the pop rivers mounting the conduit had broken thru the conduit. I replaced it with PVC conduit, I think that it was 3/4" sch 40. I ran my wiring harness and antenna coax thru it. Those pop rivers protrude into the conduit and eat up some of the space, so bigger is better.
6,058. Visit site. Should the only option be for external conduit, then an alumin (i)um protective conduit seems the easiest way, secured by blind fasteners, As mentioned, PVC conduit will degrade under UV, and break off eventually. Such alumin (i)um will need its own coating of protection - possibly spray-on. Should the mast be hollow, then it ...
2,242. Beneteau 323 Manistee, MI. Jan 17, 2020. #9. I have 3 water tight deck connections at the mast base (lights, wind vane, VHF). There is an access panel beneath the deck stepped mast and the cables are connected in one of the "water tight" junction boxes there. The VHF actually has its own through deck connecter.