BoatNews.com

The lifeline on a boat, all you need to know to use it safely
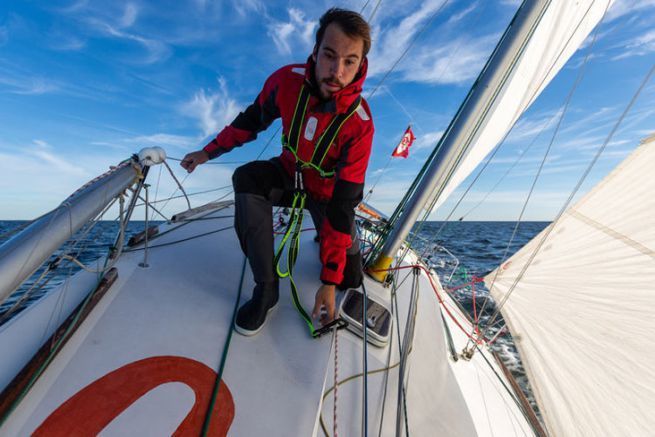
The lifeline is the link between the sailor and his boat and is the point of attachment of the harness lanyard when moving around the deck. It must therefore be accessible, practical and solid. Here's how to install it for maximum safety.
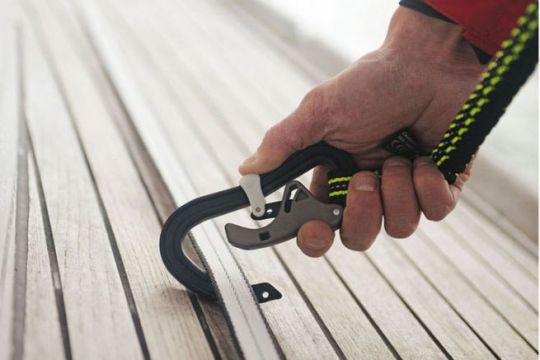
As its name suggests, this line is a way of watching over the life of the sailor. It is a line (strap, cable, rope ...) stretched from the stern to the bow of the boat . The crew member who has to move towards the mast foot or the foredeck hangs the carabiner of his harness lanyard on it. This way, without unhooking, he will be able to stay connected to the boat all along his displacement.

Most common on sailing boats
Even if a harness and a lanyard are compulsory on a motorboat (regardless of the number of crew members when sailing offshore...), lifelines are more common on sailing boats. On the latter, when sailing offshore, one harness and lanyard is required for each crew member on board. The harness can be integrated (and it is advisable) in the life jacket.

The strap to avoid rolling under the feet
While lifelines were once made of cable, they are now largely replaced by flat webbing models. This is because on the deck, a cable runs under the boot while the strap does not interfere, thus improving safety.

How to install a lifeline?
Often the lifeline runs all the way along the planking from the rear cleat to the front cleat. This is not necessarily a good idea. If a crewmember falls overboard, he or she is hanging by the harness lanyard from the lifeline. If the lifeline is close to the edge of the boat , then the crew member is in the water, being towed by the boat , a very uncomfortable situation. The lifeline should be installed as close as possible to the boat's centreline. It will be well tensioned so that it doesn't float in the wind or give slack in the waterfall. But not too taut either, otherwise we wouldn't be able to get the carabiners through it. There's no need to take her to the bow either. The crew member who has to go as far as the forestay benefits from the full length of his lifeline.
Ideally, we will run the lifeline on top of the deckhouse, from each side, to arrive at a single point in the middle of the front beach. This way, a crew member leaving the cabin will be able to moor there even before having put one foot in the cockpit.
Strong mooring points
The lifelines support between 2 and 3 tons before breaking. Reinforced fixing points are therefore required that will hold at least this load. The anchorage points will therefore be reinforced with through bolts and a counterplate under the deck.
For the webbing to have its full strength, it should not be assembled with knots. Seams are preferable. Sailmakers can do this very well at a lower cost.

Regular maintenance
Like all fibres, lifeline straps do not like UV light. They deteriorate over time. Manufacturers advertise a 2 year life span if you do not stow your lifelines when you are not sailing. What we don't recommend: Because in addition to wearing out prematurely, straps laid flat on deck mould green foam type dirt.
In winter, it is advisable to rinse the lifelines with plenty of water (in order to desalinate them), dry them before storing them away from light and humidity. But in any case, changing your lifelines at least every 5 years is not a luxury. And if you don't, at least have your sailmaker check the seams.

Models adaptable to the length of the boat
You can order your lifeline from your sailmaker with a precise calculation of its length or opt for adjustable models. Plastimo and Wichard offer some very efficient models, adjustable in length.
Please verify you are a human
Access to this page has been denied because we believe you are using automation tools to browse the website.
This may happen as a result of the following:
- Javascript is disabled or blocked by an extension (ad blockers for example)
- Your browser does not support cookies
Please make sure that Javascript and cookies are enabled on your browser and that you are not blocking them from loading.
Reference ID: 97a6874a-1646-11ef-8568-f91644434e12
Powered by PerimeterX , Inc.
Replacing Your Lifelines
Published by rigworks on april 8, 2016.
Question: What are my options for replacing worn lifelines?
From the Rigger: There are more choices than ever when replacing worn lifelines…
Most lifelines are made of wire, usually uncoated 1×19 grade 316 stainless steel which is well suited for stationary applications such as lifelines. Diameters vary depending on the size of the boat. We generally use 1/8 ” wire for boats under 30’ and 3/16” for boats 30’ and longer, although there are exceptions (J-105s for example prefer 5/32”). Of course, you can go heavier, but the extra weight can be prohibitive.
Boat owners are moving away from the vinyl covered 3/16” wire that has been the industry standard for years. In fact, the 2016 Safety Equipment Requirements no longer allow coated wire on coastal and ocean racing sailboats (there is a list of the 2016 racing SERs associated with lifelines at the end of this article). But if you don’t plan to race, you may still prefer the feel and appearance of coated wire. Vinyl coated wire’s primary advantage is that it is attractive and comfortable to handle. It can, however, discolor and crack over time, is susceptible to heat, and makes it difficult to inspect the wire underneath.
Synthetic lifelines made of low stretch Dyneema are becoming a popular alternative to wire. Dyneema, made of High Modulus Polyethylene (HMPE), is stronger and much lighter than steel. It is easy to install, can be spliced, doesn’t rust, and is easy to handle. Although it is more susceptible to chafing, chafe points can be protected with extra layers and/or tape. When converting from wire to Dyneema, be especially conscious of existing burrs on your stanchions, a common cause of chafing. We recently installed Dyneema lifelines on a 38’ catamaran, and the customer was very happy with the results.
Regardless of whether you choose wire, coated wire, or Dyneema, we recommend that you always purchase high quality 316 grade fittings, including your turnbuckles, pelican hooks, gate eyes, toggle jaws, deck toggles, etc. We recommend Hayn, Johnson or Arco fittings which operate smoothly and withstand high loads. We also suggest taping or pinning your fittings whenever possible. Sailors end up in the water as a result of fitting failures. Don’t scrimp here!
Your connections can be hand crimped, machine swaged, or spliced (in the case of Dyneema lines). Hand crimping is the least expensive “do-it-yourself” option but not our first choice. Hand crimping often leaves a bulky joint and can be susceptible to pulling free under load. We often see poorly/under-crimped connections which are definitely not safe. A proper swage is the strongest option. Unlike hand-crimped connections that may simply break free, a tired swage connection will generally reveal hairline cracks prior to failing, giving you time to replace them. As for splicing those Dyneema lines, we do that here at Rigworks!
Finally, stanchions are often the weak link in your lifeline system. Tall and narrow, they are susceptible to bending, especially when used to catch the boat as you dock or to tie off sheets and halyards. Delamination and cracking at the base are also quite common. Use grade 316 stainless steel 1” diameter stanchions to reduce the likelihood of bending. Always check welds on bales and bases for rust which can be a telltale sign of cracking. Be sure that each stanchion is properly braced and bolted into a reinforced area of your deck and/or into a backing plate.
Of course, this is only the tip of the iceberg. Stanchion height and placement, line spacing (both horizontally and vertically), tension, deflection, toerails, etc. all need to be carefully considered. For professional installation or to discuss your own lifelines, email us at [email protected] or call us at 619-223-3788. We always look forward to hearing from you!
If you race, please read on…
Here is a list of the 2016 Safety Equipment Requirements that apply to lifelines for both coastal and ocean racing. For full list of 2016 SERs, visit the US Sailing website at http://www.ussailing.org/safety/equipment-and-requirements/
- A boat’s stanchion and pulpit bases shall be within the working deck. Stanchions used with High Modulus Polyethylene (HMPE) shall have rounded openings to reduce chafe.
- Bow pulpits may be open, but the opening between the vertical portion of stanchion pulpit and any part of the boat shall not exceed 14.2″ (360mm).
- Lifelines may be either uncoated stainless steel wire or HMPE line with spliced terminations or terminals specifically intended for the purpose. A multipart-lashing segment not to exceed 4″ per end termination for the purpose of attaching lifelines to pulpits is allowed. Lifelines shall be taut (see below). When HMPE is used, the load-bearing portion (core) shall meet or exceed minimum diameter requirements.
- When a deflecting force of 9 lbs (40N) is applied to a lifeline midway between supports of an upper or single lifeline, the lifeline shall not deflect more than 2” (50mm). This measurement shall be taken at the widest span between supports that are aft of the mast.
- When a deflecting force of 9 lbs (40N) is applied midway between supports of an intermediate lifeline of all spans that are aft of the mast, deflection shall not exceed 5” (120mm) from a straight line between the stanchions.
- The maximum spacing between lifeline supports (e.g. stanchions and pulpits) shall be 87″ (2.2m).
- Boats under 30′ (9.14m) shall have at least one lifeline with 18″ (457mm) minimum height above deck, and a maximum vertical gap of 18″ (457mm). Taller heights will require a second lifeline. The minimum diameter shall be 1/8″ (3mm).
- Boats 30′ and over (9.14m) shall have at least two lifelines with 24″ (762mm) minimum height above deck, and a maximum vertical gap of 15″ (381mm). The minimum diameter will be 5/32″ (4mm) for boats to 43′ (13.1m) and 3/16″ (5mm) for boats over 43′ (13.1m).
- Toe rails shall be fitted around the foredeck from the base of the mast with a minimum height of 3/4″ (18mm) for boats under 30′ (9.14m) and 1″ (25mm) for boats over 30′. An additional installed lifeline that is 1-2″ (25-51mm) above the deck will satisfy this requirement for boats without toerails.
- Trimarans are exempted from the lifeline requirement where there is a trampoline outboard of the main hull, except that a lifeline must run from the top of a bow pulpit to the forward crossbeam at the outboard edge of the bow net or foredeck. Catamarans with trampoline nets between the hulls are exempted from the lifeline requirement. All catamarans are exempted from the need for pulpits and lifelines across the bow.
Related Posts
Ask the Rigger
Do your masthead sheaves need replacing.
Question: My halyard is binding. What’s up? From the Rigger: Most boat owners do not climb their masts regularly, but our riggers spend a lot of time up there. And they often find badly damaged Read more…
Standing Rigging (or ‘Name That Stay’)
Question: When your riggers talk about standing rigging, they often use terms I don’t recognize. Can you break it down for me? From the Rigger: Let’s play ‘Name that Stay’… Forestay (1 or HS) – Read more…
Selecting Rope – Length, Diameter, Type
Question: Do you have guidelines for selecting halyards, sheets, etc. for my sailboat? From the Rigger: First, if your old rope served its purpose but needs replacing, we recommend duplicating it as closely as possible Read more…
Updating a classic fiberglass cruising yacht.

How to install Dyneema lifelines
I replaced the aged stainless steel cable lifelines on my boat with Dyneema synthetic lines. The total cost was around $600 and I learned how to eye splice a single braid rope. It took a total of about 8 hours to install the lines. The most challenging part was to make the lines the right length given the changes in length introduced by the splicing process.
Introduction
One of the items noted on my boat-purchase survey was the advanced age of the stainless steel cable lifelines. Vinyl-coated cable lifelines are no longer cool with the American Boat & Yacht Council (ABYC), but my Ericson was delivered with them. The problem is that the vinyl covers the stainless steel metal and allows it to rust, like for decades, thus weakening the lifelines.
—-> Brief interjection: I heard an interesting discussion of child car seats on the Freakonomics radio show / podcast recently, the upshot being that child car seats, frequently installed incorrectly, from a statistical basis do about as well protecting children as adult-sized seat belts. We like to think child car seats help us out, but they don’t, really. Similar – lifelines. Do they really keep us safer? This topic is somewhat open to debate, and if anyone internet-questions lifelines, he/she is bound to have loads people chime in about that one time under duress when lifelines saved their bacon. But what about all the times that someone trips over a lifeline at the doc? Or is sent overboard because the line is only 24” off the deck, a perfect fulcrum point to destabilize an adult homo sapien? I googled hard (as in 4-5 times) to find an official insurance study justifying the use of lifelines. I could not find one. Joshua Slocum did not have them. Well, I have a 6 year old, I should keep them…←–
Back to replacing lifelines. I replaced my standing rigging with synthetic lines from Colligo. I wanted to do the same with my lifelines (swap out cable for rope) and I thought I could figure it out all myself.
Design Considerations :
My boat has a total of 8 lifelines (fore and aft, starboard and port, upper and lower) and 2 gates (Port and Starboard). I bet yours has something similar. Each lifeline consists of a static end point, a second ‘dynamic’ end point that can be tensioned, and a line in between. On my boat, the tension end-point was the outermost (attached to the bow and stern pulpits) and had a closed-body turnbuckle to keep the line taut. Here is a view of the starboard bow pulpit:

Here is a view of the gate:

I needed to choose components with which I could replicate the existing lifeline structure. I looked to the University of YouTube to see if there were any clever tips to be learned, and found these guys:
I like their effort and that the guy rebuilt a Yanmar motor in the cockpit of his catamaran, so he has my respect. They use some fittings from Colligo and use synthetic line lashings to tension their lifelines.
Dyneema is a brand-name for ultra high molecular weight polyethylene (UHMWPE) fiber monofilaments. For sailing, it is used it to make ropes/lines. It’s also good for making bulletproof armor:
It’s strong, light, smooth, and it doesn’t stretch. It comes in 12 strand single braid lines (ropes) that are very easy to splice. Because the rope is so slippery, the splicing has to be done properly.
Anyone taking on this project needs to learn how to do a locking brummel splice. This is an eye splice that does not move. There are a multitude of how-to-eye-splice videos on YouTube, but I mostly relied on this one:
To tension my lifelines, I could have purchased the Colligo lashing fittings. Here’s a page with some information from Colligo:
https://www.colligomarine.com/colligo-tech-synthetic-lifelines
Instead of lashing I wanted instead to use turnbuckles in the same way I had used turnbuckles for my standing rigging.
Based on my design plan, my shopping list was as follows:
- 130 feet @ ¼” Amsteel Blue (A Samson rope product , made with dyneema fibers) from Defender at $1.07 per foot from Defender . 8@ jaw-jaw ¼” 316 stainless CS Johnson turnbuckles from West Marine @ $35 per. @$280
- 4@ 316 stainless 3/16” thimbles from Defender $1.59 each
- 2@ CS Johnson Gate hooks with splice eye from Defender $55 each
- 1@ Samson splicing kit from Defender $43.
Total cost: Approximately $580.
Building the Lifelines
I watched the how-to-eye-splice video several times. The trick, if there is one. is to figure out the ‘mobius loop lock’ that ensures your splice can’t slide out and that the fibers lay properly oriented.
For each line, the fixed connection end requires no measuring. I attached my lower lines to my gate posts using a ‘luggage tag’ loop with the line running through the eye splice I had created. The fixed side of the upper lines would be integral to the gate, so those I terminated with my four stainless thimbles:

The other end of the line, that attaches to the turnbuckle or lashing is a bit trickier. One wants the line to be just long enough so that the tensioner can be attached, but still have enough operable room to add tension.
So just set your fixed point line and see how much rope you need, right? Not that simple. The challenge is that as you bury the line back into itself as part of your eye-splice, the exterior sleeve of the splice has to expand the weave of the rope, and so the line shortens overall. To compensate for this factor, one needs to plan for his non-spliced loop to be longer than the desired end length.
How much longer? I was targeting a 20” splice bury, and I found that the splice and the bury would shorten the line by about 2.5”-3”.

This process is further complicated when you taper the line. One wants to taper the buried line to help the fibers lay flat and for aesthetics. It’s really easy to taper the line – you just pull out a few of the 12 strand bundles and snip them at staggered distances from the end of the line.

But, (surprise!) now the tapered sheath portion of the splice is not as stretched out as it was with the full line and your line elongates as your splice moves out.
I had to take a number of splice mulligans (to mix terminology from two leisure sports.) Eventually I got all of my lines to a satisfactory length and tension.

The gates remained. These were a bit different in that the short length of the line between the end points would not permit me to do a 20” bury at each end as the buried ends would overlap. I did a modified eye splice with more interweaving of the buried end back and forth into the line.

One might point out that pinning an eye-splice into a jaw-jaw turnbuckle leaves a tight bend radius on the line and could be a weak point for the line. The Colligo guys say that a bend radius should be 5:1. I think this means the radius of the thimble or terminator should be 5 times the diameter of the line. Colligo sells lashing-style fittings that meet this 5:1 standard.
Fair enough. One can buy turnbuckle tensioning bolts that are designed to be spliced into , and they do not have anything like the same bend radius. Truth be told I found these turnbuckles after I purchased and installed my jaw-jaw connectors. If I were to do it over, I would buy these splice-end ones.
Another point is that the lines may suffer chafe. The general argument for Dyneema is that it shows chafe readily by becoming fuzzy and thus with a minimum amount of inspection, chafe should be evident.
Consider a back-of-the envelope scenario calculation.
Suppose a sailor weighing 225 lbs slips on his foredeck and falls to the lifelines.
The acceleration of his fall means his impact weight is much higher. How much higher? [Scientific Wild Arse Guess] – 10 times, so 2,250lbs hitting the lifeline structure.
What happens?
The load is transferred to the whole system, including the lines, connections, stanchion posts, stanchion feet, and pulpits. There is some elasticity as the stanchion posts deflect (bend).
What fails first? Is it the spliced dyneema line rated at 8600 lbs? Is it the turnbuckle rated at 4200 lbs? Is it the single machine screw that holds the stanchion post into the stanchion base? The bolts holding the stanchion base into the hull? The welded stainless loops attached to the bow and stern pulpit?
I think it is difficult to say in practice, though I am confident that the dyneema are an improvement over the existing rusting coated lines they have replaced.
Finally, I would add that Defender has some CS Johnson Synthetic Lifeline-specific hardware kits you may want to check out to see if they suit your specific needs, as you design your system.
Similar Posts

Rehabbing a 1983 Dilly boat trailer for a Coronado 15

Yanmar Engine Panel Warning Light Diagnostics
- New Sailboats
- Sailboats 21-30ft
- Sailboats 31-35ft
- Sailboats 36-40ft
- Sailboats Over 40ft
- Sailboats Under 21feet
- used_sailboats
- Apps and Computer Programs
- Communications
- Fishfinders
- Handheld Electronics
- Plotters MFDS Rradar
- Wind, Speed & Depth Instruments
- Anchoring Mooring
- Running Rigging
- Sails Canvas
- Standing Rigging
- Diesel Engines
- Off Grid Energy
- Cleaning Waxing
- DIY Projects
- Repair, Tools & Materials
- Spare Parts
- Tools & Gadgets
- Cabin Comfort
- Ventilation
- Footwear Apparel
- Foul Weather Gear
- Mailport & PS Advisor
- Inside Practical Sailor Blog
- Activate My Web Access
- Reset Password
- Customer Service

- Free Newsletter
Pearson Rhodes 41/Rhodes Bounty II Used Sailboat Review

Hallberg-Rassy 42 Used Sailboat Review

How to Perform Your Own Pre-Buy Inspection

Beneteau 323 Used Boat Review

How Does the Gulf Stream Influence our Weather?

Can You Run a Marine Air-Conditioner on Battery Power?

Preparing Yourself for Solo Sailing

Your New Feature-Packed VHF Radio

Practical Sailor Classic: The Load on Your Rode

Anchor Rodes for Smaller Sailboats

Ground Tackle Inspection Tips

Shoe Goo II Excels for Quick Sail Repairs

What Oil Analysis Reveals About Your Engine

An Unusual Sailboat Shines a Light On A Sustainable Future

Is It Time to Get an Electric Dinghy Motor?

Bottom Paint 30-Month Update

Battle of the Teak Cleaners — Snappy Teak-Nu vs. Star Brite

New Seacocks for the Offshore Sailor

Bottom Paint Care

Are E-bikes Worth the Extra Weight and Cost?

How to Handle the Head

How to Select Crew for a Passage or Delivery

Preparing A Boat to Sail Solo

Re-sealing the Seams on Waterproof Fabrics

Waxing and Polishing Your Boat

Reducing Engine Room Noise

Tricks and Tips to Forming Do-it-yourself Rigging Terminals

Marine Toilet Maintenance Tips

Learning to Live with Plastic Boat Bits
- Safety & Seamanship
Offshore Log: Check Your Lifelines, Save Your Life
Quality hardware, regular inspection and maintenance, and awareness of the lifeline limitations will help keep you aboard..

Last month we looked at portable safety equipment designed to keep you aboard your boat, or retrieve you if you go overboard. This month, we look at the permanent system which is intended to keep you aboard: the lifelines and rails.

Lifelines, stanchions, and pulpits are an integral part of any boat’s crew-overboard prevention system. The weakest link in the lifeline chain is, almost inevitably, the lifeline wire. We’re not sure when vinyl-coated stainless steel lifeline material was developed, but it is certainly the standard material for lifelines on every cruising boat.
Unfortunately, vinyl-coated 7×7 stainless steel wire is a poor choice for lifelines. In fact, it is such a poor choice that it is strongly discouraged as a lifeline material by the Offshore Racing Council in their Special Regulations, the code of safety standards applied to racing yachts.
The reason is simple: the vinyl coating, which looks nice and increases the diameter of the wire to make it more comfortable to grab, can trap water, which then wicks along the wire. This can lead to accelerated corrosion of the wire, dramatically decreasing its strength. The corrosion will not necessarily be visible, as it can be hidden under the vinyl coating.
Generally, water migrates along the wire anywhere there is a breach in the vinyl coating. By definition, the coating must be cut off at the ends of the wire when terminal fittings are applied. In addition, the coating can be chafed through by sheets, fender pendants, awning tie-downs, and anything else that comes in contact with your lifelines.
Coated lifeline wire is generally made from type 302/304 stainless. Type 304 is the same material used in 1×19 wire commonly used for standing rigging. For uncoated standing rigging, type 304 stainless offers adequate corrosion resistance, although it is less corrosion-resistant than type 316 stainless. But type 316 stainless steel wire has its own shortcomings: it is both significantly more expensive and weaker than type 304 stainless wire of the same diameter.
On the typical 40-footer, the upper lifeline is made of vinyl-coated wire with a base wire diameter of 3/16″, and an outside diameter of 5/16″. The lower lifeline is often smaller in diameter: 1/8″ coated wire, with an OD of just under 1/4″.
The two wires combined typically retail for about $2.20 per running foot, or $176 for the wire for our 40-footer.
Switching to bare type 316 wire of the same base diameter would increase the wire cost by only about $25. However, bare wire of this size is hard on the hands, and the lower strength of type 316 wire would make lifelines of this size marginal in strength. Instead, for lifeline use you could increase the bare wire diameter to 1/4″ for the upper wire and 3/16″ for the lower wire. This would add about $100 to the cost of the wire for our 40-footer.
You also have to consider that the end fittings for larger diameter wire are somewhat more expensive.
Going up in diameter both improves the feel of the wire and gives you an additional safety margin. Your basic 3/16″ coated lifeline wire has a breaking strength of 3,700 pounds. Bare type 316 wire 1/4″ in diameter has a breaking strength of 6,900 pounds, a comfortable increase.
Large-diameter lifeline wire—over 3/16″—must be machine swaged. Machine swaging generally produces a stronger end fitting than hand crimping, since the machine swage grips the wire over the entire length of the fitting. Hand crimp fittings should be reserved for field use when machine swaging is not available.
Type 316 wire is commonly available in 1×19 construction, the same relatively inflexible wire type used for standing rigging. For lifeline wire, this lack of flexibility is not really significant. The deflections your lifeline wire takes at each stanchion are generally no greater than those your standing rigging must make at spreader ends, so you’re not really stressing 1×19 wire when using it for lifelines.
We have seen many, many coated wire lifelines that could be broken—usually where the wire enters the end fitting—merely by flexing them back and forth a few times. It doesn’t take a lot of imagination to imagine how dangerous this is.
If you must have coated lifelines, we would recommend replacing them if they are more than five years old. Some insurance companies insist on lifeline replacement every 10 years, but this is too generous.
With new coated lifeline wire, we would protect the interface between the wire and any end terminal by using adhesive-lined heat-shrink tubing over the joint, installing this before the lifelines are ever exposed to any moisture. Do not use heat-shrink tubing without adhesive, as this may still allow moisture penetration.
White adhesive-lined heat-shrink is available, but we have no feel for how long it will last when exposed to the weather. Be aware, too, that any chafing through the coating at any point on the wire will allow moisture in. Taping over a chafed spot in the wire may actually make things worse by trapping water.
On lifelines equipped with any form of pelican hook on the gates, always tape the hook closed when sailing to prevent accidental opening. This should be part of your routine before any passage: examine lifelines for wear or corrosion, tighten stanchions in their bases, and tape gate fittings closed.
Wire Tension Aboard racing sailboats, there’s an unfortunate tendency to leave the lifelines as slack as possible in order for crew on the rail to project their weight outboard. This is unsafe. A slack lifeline can throw you off-balance when you grab it. Lifelines should be tight, so tight that they deflect no more than about two inches between stanchions when a force of about 11 foot-pounds is applied at mid-span between stanchions. As a loose guideline, this is about the force you can easily apply by pressing down firmly with one finger on the lifeline without using your body weight.

While small turnbuckles are usually used to tension lifelines, we prefer to use a multi-purchase lanyard of small-diameter low-stretch line, such as Yale Cordage Pulse, a Spectra-cored, polyester-sleeved line. This lanyard should not exceed a span of about four inches between the end of the lifelines and the pulpit when the lifelines are fully tensioned.
Be sure to match the number of turns of line to the strength of the wire. Eight turns of 1/8″ Spectra braid has a raw breaking strength of about 4,800 pounds, but this strength is reduced by bending the line tightly around the terminal eyes on the lifelines and pulpits. A couple of extra turns of line will provide adequate margin. Finish it off with a series of half-hitches, and bury the tail.
In the past, we used Kevlar cord in this application, but it is far more susceptible to fatigue than Spectra, and is therefore not a good choice. Likewise, we would not use nylon or polyester lanyards due to their substantially lower strength for the same diameter.
The Spectra lanyards we installed on Calypso’s lifelines two years ago still look good, but we’ll replace them when we replace our coated lifeline wire with bare wire later this year.
Stanchions and Bases It goes without saying that lifeline stanchions and bases must be strong. Fortunately, the 24″ stanchions that were the industry standard for many years are beginning to vanish, replaced by taller models.
Stanchions and pulpits do not scale down effectively, because people do not get shorter just because they own smaller boats. We would recommend that upper lifelines and pulpit rails be at least 28″ off the deck on any boat used in exposed waters.
Taller stanchions are more susceptible to bending than shorter stanchions, since the lever arm of the stanchion is substantially longer. To reduce this problem, when Tops in Quality made Calypso’s 29″ stanchions, they inserted a solid fiberglass reinforcing rod into the stanchion from the lower lifelines to the base. This is heavy, but it greatly increases the stiffness of the lower part of the stanchion.While stanchion bases may be either cast or welded, the generally thicker base pad of cast stanchion bases is usually more resistant to bending, which means less likelihood of leaks as well as generally stronger construction.
Whether cast or welded, stanchions bases should have strong bracing bails. These bails can be used as fixed safety harness tether attachment points, as well as lashing points. We would not recommend attaching highly-loaded deck gear such as snatch blocks to stanchion bases unless they are extremely rugged or the loads are light.
Stanchion bases and pulpits must obviously be strongly through-bolted, with substantial backing plates. The deck itself, of course, must also be strong enough for the loads the stanchions and bases will exert. Examine the deck area around stanchion bases for cracks. Gelcoat cracks must be viewed with suspicion. Even if the cracks are only cosmetic at this stage, they suggest excessive local loading.
Installing bigger backing plates will help distribute load over a larger area of deck. There should be absolutely no local flexing of the deck around a stanchion base when you apply load to the lifelines or top of the stanchions.
Stanchions must be secure in their bases. Ideally, the stanchion would be held in place by a transverse bolt through the stanchion base tube. At the very least, there should be two set screws threaded through the base into dimples in the stanchion.
An alternative, when you have two set screws, is to replace the lower set screw with a hex cap screw that penetrates the stanchion tube itself. Once you have determined the proper position for the stanchion in the base, with the lifeline holes properly aligned with the lifeline wire, you can mark the position of the lower set screw on the stanchion tube. Remove the tube and drill a hole just larger in diameter than the new cap screw through one side of the tube at the marked location. Install the hex cap screw using a lock washer or locking compound.
Again, a bolt through the stanchion tube will positively prevent the stanchion from being pulled out of the base. The remaining set screw locks the stanchion in position so that it cannot wobble.
Socket set screws must be tightened regularly, and should be replaced any time the socket starts to get distorted. A hex cap screw of the proper length, used as a set screw and installed with a lock washer, is a better solution than a socket-head set screw.
Pulpits The same caveats that apply to stanchions apply to pulpits. Look for stress cracks on the deck, check for proper through-bolting and backing plates for the bases.
Pulpits generally have welded bases, so you don’t have to worry about set screws or other retaining mechanisms. You do, however, need to look carefully for cracked welds between the pulpit uprights and bases.
Cruisers tend to hang a lot of stuff on stern rails—man-overboard gear, barbecues, solar panels, outboard motors, and anything else we can fit on—and a lot of rails simply aren’t strong enough for these loads. You may find that you need to add diagonal bracing or other forms of support for a stern rail.
In many cases, it may pay to have a completely new stern rail fabricated of larger-diameter tubing, with larger base supports or stiffening struts.
Solid Rails One trend we’re seeing on boats set up for long-range cruising is the replacement of wire lifeline systems with solid (tubular) rails similar to those found on powerboats. If you can imagine your entire deck surrounded by a continuation of the bow and stern rails, you get the picture.
We’ve also seen hybrid systems, where the stern rail essentially is carried forward with additional stanchions, so that the entire cockpit is enclosed by railings. Forward of the cockpit the boat has a conventional wire lifeline system.
The additional security given by solid railings enclosing the cockpit is enormous. The hard part is sorting out sheet leads and clearances so that nothing fouls on the railings.
While we can’t bring ourselves to the point of installing solid railings around the entire deck, a solid stern rail system that extends forward of the cockpit would be a rational choice on any cruising boat.
Conclusions The lifeline system is the primary safety installation on your boat. It is also likely to be a weak point on almost any boat, particularly if more than a few years old. Vinyl-coated lifelines look nice and feel good, but they can hide corrosion. If you have old vinyl-coated lifelines, consider replacing them, preferably with bare wire, and keep searching your lifeline system for weak links. It only takes one component failure to send someone over the side.
When someone you love is in the water and you’re sailing away from them, it’s too late to decide that a few hours and dollars spent on prevention would be better than any cure.
Also With This Article Click here to view “Mail Call.”
RELATED ARTICLES MORE FROM AUTHOR

Emergency Steering? You Can Jury-Rig a Drogue For That
Leave a reply cancel reply.
Log in to leave a comment
Latest Videos

What Is The Best Folding Bike For Your Sailboat?

The No Expense Spared Antigua 60 Cruising Sailboat Soolaimon

How To Buy Sails – With Joe Cooper

Bavaria C42: What You Should Know | Boat Tour
- Privacy Policy
- Do Not Sell My Personal Information
- Online Account Activation
- Privacy Manager
- BOAT OF THE YEAR
- Newsletters
- Sailboat Reviews
- Boating Safety
- Sailing Totem
- Charter Resources
- Destinations
- Galley Recipes
- Living Aboard
- Sails and Rigging
- Maintenance
The Lifeline Quandary
- By Roger Hughes
- January 25, 2022

The vinyl-coated wire lifelines on my 1977 Downeaster 45 schooner, Britannia , were well past their prime. Sections of the vinyl coating had faded into a dull brown—with parts chafed and cracked, exposing the wire—and many of the chrome fittings had lost their luster. If I accidentally ran my hand along an exposed section, I’d pierce my fingers. They simply had to be replaced, not only for safety and to restore a smooth surface, but also for the appearance.
Lifelines are intended to stop someone from falling overboard, so that’s the primary consideration in any replacement. But this does raise another important question: How does a person who falls overboard get back on board: through or over the lifelines? I’d once experienced a man-overboard situation where this became an issue, so it was foremost in my thinking.
Most lifelines have pelican hooks at one end that can be released to lower the lines. Britannia ’s were the old style, with a locking ring over the release lever. When the wires were tight, it was very difficult to pry the ring back over the latch by hand, and pliers were necessary to squeeze the latch.
A new type of pelican hook, from CS Johnson Inc., has a pin, like a snap shackle, that releases the hook even with the lines under maximum tension. Lines can also be released by unwinding the tensioning turnbuckle toggle at the other end, but if the line is tight, it too can be difficult to do so by hand. I found a neat little adjustment tool at CS Johnson’s website that fits in the center small hole of a tubular turnbuckle and is much better than pliers or a bit of old wire, which I had been using for years.
If for any reason lines cannot be released, a final option would be to cut the wire, which requires long-handled wire cutters for 3/16-inch wire—but what if the lifelines are rope? That would be easy to cut, but would rope be strong enough? Questions, questions.
Wire vs. Rope?
Since I was going to replace the wires anyway, I decided to look at the pros and cons of wire and rope. Maybe there’s a better alternative to old-fashioned wire? Regarding strength, I couldn’t find any manufacturer who gave the strength of their material when used specifically as lifelines. All I could find for both wire and rope was “tensile strength” or “working load.” No account was given for stanchions either, which are integral to any boat’s lifeline system. How stanchions hold up depends on their deck fastenings, length and tube thickness. Whatever I decided to use to replace my worn lifelines, it had to be no thicker than 3/8-inch (10 mm) diameter to pass through the 7/16-inch (11 mm) holes through the stanchions. I started listing the pros and cons:
Uncoated wire can become almost untouchably hot in the Florida summers, where Brittania lives, and I don’t like gripping thin wire with bare hands anyway, so I didn’t want to consider that. Vinyl-coated wire is commonly fitted by manufacturers and sold through aftermarket suppliers. It looks smart when it’s new, but over time, water can enter at the ends and wherever chafe has exposed the wire. Eventually this causes corrosion that might not be visible under the covering. However, wire is strong, and 3/16-inch 7-by-7 strand has a working load of 3,700 pounds. (As an aside, boats with wire lifelines should preferably also have a good quality wire cutter on board to chop the wire in an emergency.)
All that said, Dyneema rope’s working load is stronger, size for size, than stainless wire. The possibility of substituting rope for lifelines therefore becomes a viable possibility. I found Miami Cordage Inc., a rope-maker, hidden in the industrial depths of greater Miami. Most recreational boaters will not have heard of this wonderful Aladdin’s cave of rope because nearly all of its product goes to the United States Navy, Coast Guard and other industrial outlets. Yet they make every conceivable type of rope, from old-style three strand to 12-strand Dyneema, which they call Ironlite. Their prices are considerably less than the regular retail outlets most sailors, including me, regularly use. Their 1/4-inch (6 mm) single-braided 12-strand has an amazing tensile strength of 8,000 pounds.
Once that overview was completed, I started digging deeper by going down a list of several categories.
Cost comparison: 7-by-7 3/16-inch vinyl-coated wire: $1.79 per foot (defender.com); Dyneema Ironlite 1/4-inch 12-strand in blue: $0.60 per foot (miamicordage.com).
End fittings: A significant additional cost in replacing existing lines are the fittings needed on each end, especially if new turnbuckles and pelican hooks are needed.
Stretch (creep): Once tensioned bar-tight with the turnbuckles, wire does not stretch further. Dyneema stretches only about 1 percent, but once stretched, it does not move much after that. Dyneema can also be set up bar-tight.
Chafe: All lifelines are subject to chafe by anything rubbing against them: sheets, dock lines, fender lines and where they pass through stanchions. Britannia ’s stanchions have a 7/16-inch-diameter flared tube in each cross-through hole that minimizes chafe at those points.
Cleaning: White vinyl-coated wire can simply be wiped with a rag and some bleach now and then, but the vinyl still fades over time. Dyneema has a shiny, slightly slippery texture that can be cleaned with soap and water.
How to Install
The next item to consider was ease (or lack thereof!) of installation. Once again, I broke it down to the potential materials.
With wire, I needed roughly 150 feet (46 m) with 16 threaded ends to replace my old wire, along with at least three new turnbuckles to replace the jammed old ones. The conventional method of attaching threaded ends to wire is to compress, or swage, the fitting to the wire. This can be done using a hand tool offered by most rigging suppliers ($42 from Defender), but it is tedious if you have a lot to do. First, the vinyl coating has to be cut back a couple of inches, exposing the wire (which in itself is not easy, and best done in a sturdy vice with a sharp box-cutter blade). Then, using a wrench to tighten the bolts on the swaging tool, five crimps are recommended on each fitting. I needed 16 fittings each with five swages—that’s 80 crimps! Even if each swage took only five minutes, it would still take nearly seven hours. Defender has a long-handled crimping tool that makes short work of swaging multiple fittings, but unfortunately the price is $279. Also, hand-swaging produces only 65 percent of the strength of the wire, but a crimping tool increases this to 85 percent.
An alternative method, which does not require swaging or any special tools, are wire Sta-Lok fittings by CS Johnson. These are easily assembled on wire using regular wrenches and actually provide 100 percent of the strength of the wire, and are approved by Lloyd’s of London for lifeline fittings.

As an option to hand-swaging, I decided to ask for a quote from the rigging services of a local marine retailer for vinyl-covered wire with end fittings professionally attached. I needed four 30-foot lengths and four 6-foot lengths. The price was nearly $800 for the wire alone. It was at this juncture that I decided to look seriously at Dyneema.
Rope can be attached to existing toggle end fittings with either a splice or even a knot, but CS Johnson has special rope/end attachments, called Splice-Line lifeline fittings, to attach Dyneema to all types of fittings such as turnbuckles and pelican hooks. The rope is spliced directly around the fitting without a thimble, and chafe is reduced to a minimum.
Single-braid Dyneema is hollow, with no center core, and much easier to eye-splice than double braided line. The 12-strand rope is first tapered by removing four pairs of strands, then the end is buried deep inside the standing part and lock-stitched. This is an easy operation with a special 14-inch-long splicing wand from Brion Toss Yacht Riggers (briontoss.com). This fid enables the tapered end to be gripped by the wand and then pulled through the core, instead of pushing it with a conventional fid. With 16 splices to make, I was very thankful to have one. The fid can also be used for other rope work.
I would need about 200 feet (61 m) of rope, allowing enough for 16 eye splices. I estimated it would still take about three hours to do them all. Miami Cordage makes Ironlite in many colors, including solid blue, which nicely matched Britannia ’s royal-blue color scheme.
Advantage Dyneema
For my project and boat, I determined Dyneema was the way to go. Here are some of the reasons why: As mentioned, 1/4-inch Dyneema is much stronger than 3/16-inch wire. Dyneema is not subject to corrosion or affected by rain or seawater, and is easily inspected for chafe.
Any section of a rope lifeline can be lowered easily between stanchions because the line slides through the stanchions and bends easily. Wire does not slide or bend readily. If necessary, rope lifelines can be cut with a sharp knife; wire needs a long-handled wire cutter.
Furthermore, rope lifelines can be replaced in a jiffy, even on a passage. A spare 50-foot length of 1/4-inch Dyneema is much easier to store than the same length of wire.
Dyneema is significantly lighter than wire rope. My complete wire lines weighed 13 pounds. The same length of Dyneema rope weighed only 2.4 pounds. I imagined the weight I’d be saving in my schooner’s 700 feet of 3/8-inch stainless-steel standing rigging—something to think about.
Finally, there was the price difference—150 feet of 3/16-inch vinyl-coated wire, 16 threaded swage ends, plus a hand-swaging tool and wire cutter runs about $650, while 200 feet of 1/4-inch Dyneema, a splicing wand and three new turnbuckles cost $292.
These prices were based on using my existing pelican hooks, turnbuckles and other fittings, but I finally decided to dive in and do the job properly with new parts. I used CS Johnson’s Splice-Line rope fittings, including new turnbuckles and beautifully crafted quick-release pelican hooks, with blue Miami Cordage 1/4-inch Ironlite Dyneema. The whole installation took two weekends to replace all the old lifelines, and I eventually got the timing down to 10 minutes for each Dyneema splice. Practice makes perfect.
There was one final thing I decided to try: Since one of the only things that can weaken Dyneema lines is chafe, I decided to enclose the sections where this might occur with plastic covers that clip completely over the rope and act as chafe guards. These are 6 feet long and only $2 each from West Marine. They still allow the rope to move freely inside and, if any of the guards show signs of chafe, it’s a simple matter to replace one section before it wears the rope itself. They also increase the line thickness to nearly 1/2-inch, which makes holding the lines much more comfortable.
Britannia ’sfinished lines now look stylish and purposeful, and I am confident that in the event of a real man-overboard emergency, I will have the least possible obstructions to get the person back on board, past the lines. It’s a win-win solution.
Florida-based sailor and handyman Roger Hughes is overhauling his 45-foot schooner, Britannia , one system and project at a time.
- More: Hands-On Sailor , maintenance , print 2022 jan
- More How To

Adding Onboard Electronics? Here’s How To Get Started

7 Boating Safety Tips for Summer Cruising

How to Prep for a Diesel You Can Depend On

Anchoring in Paradise

Now For Sale: Leopard 45

The Long Way Around

Sailing to the Land of Shrimp

Swallow Tattoos and Sailors
- Digital Edition
- Customer Service
- Privacy Policy
- Email Newsletters
- Cruising World
- Sailing World
- Salt Water Sportsman
- Sport Fishing
- Wakeboarding
- standing rigging
- rope and line
- cams, cleats and clutches
- head sail gear
- roller furling
- main sail control
- mast hardware
- eye straps and pad eyes
- fairleads and bulls eyes
- anchor and docking
- miscellaneous hardware
- Alexander Roberts
- My Wishlist
LIFE LINES All swaged sailboat, power boat and yacht lifelines are assembled right here in our rigging shop.
We use only the highest quality lifeline wire made 7x7 type 316 wire in our coated life lines never 7x19 or 1x19 wire. Our uncoated life lines are 1x19 wire, all strand polished and type 316 stainless steel
We refuse to compromise quality to save a few pennies, so you can be sure that your life lines provide years of service and safety.
- Customer Service
- Order Tracking
- Your Account
- Store Policies & Info
- Privacy Policy
- Helpful Links
- Payment Methods
Shopping Cart: 0 Items

WaterCraft 101
Your guide to fun on the water!
 1")
How Tight Should Sailboat Lifelines Be? (Need to Know!)
A lifeline is a safety device frequently found on sailboats and on construction sites. It’s composed of wire and stanchions, which are secured around the ship’s perimeter to prevent passengers from being thrown overboard or accidentally falling. But how tight should they be?
Sailboat lifelines should be tight enough so they only stretch about two inches when hit with a force of 11 pounds (4.98 kg). Lifelines must be tight to prevent falls in high wind, violent waves, and stormy weather in general. A lifeline that gives slack is useless and can not prevent falls.
Read on to learn more about sailboat lifelines and how to care for them!
Table of Contents
How To Inspect Sailboat Lifelines
Inspecting your lifeline is an essential part of sailboat safety. Here are a few things you should prioritize in your inspection:
- Coated lifelines: Check the PVC coating. Chafing, cracks, and wear at the stanchions should be repaired.
- Lock nuts: Make sure that the lock nuts are in place and aren’t loose.
- Sailboat fittings: Check for heavy rust and corrosion on the pelican hooks, gate eyes, toggles, and turnbuckles. Clean away any corrosion you find.
- Cotter rings or pins: Check that the pins and cotter rings are in place.
Tip: Securing Sailboat Lifelines
Some sailboat lifelines have a gate that will open to allow cargo to be loaded on and off a sailboat. These gates are often secured with a pelican hook. To keep the pelican hook from popping free once the sailboat is underway, secure it with electrical tape.
 3")
Here’s a YouTube video on how to make sailboat lifelines safe and secure:
In the event that your sailboat needs a replacement pelican hook for its safety rail, here are a few you can replace alongside your lifeline (each link here leads to Amazon.com):
- Heyous Stainless Pelican Hook : This pelican hook is designed for yachts. The package includes one pelican hook and one swage stud at a reasonable price. The swage stud fits 4mm (0.15 inches) wire, rope, or cable.
- Marine Part Depot Stainless Pelican Hook : These pelican hooks are for 3/16″ (0.47 cm) wire. The package comes with two pelican hooks with a classic design, and the product page guarantees “strength and security.”
- Isure Marine Pelican Hook : This pelican hook has a quick-release link. One customer gave it a positive review stating that it was a “real” pelican hook, unlike many of the other hooks marketed as “pelican hooks” on the market.
- JingYi Pelican Hook : This pelican hook is made of T316 marine grade stainless steel, and its product page boasts of “anti-fatigue strength,” meaning it won’t suddenly pop free while you’re sailing through a storm. It fits 5/32″ (0.39 cm) wire, rope, and cable, and comes with one swage stud.
Replacing Sailboat Lifelines (Wire or Synthetic)
If your sailboat lifelines need replacing, there are many options available. The standard sailboat lifeline is made of wire coated in stainless steel. Boats under 30′ (9.14 meters) take ⅛” (0.31 cm) wire, while longer boats take 3/16″ (0.47 cm) wire.
According to the 2016 Safety Equipment Requirements, coated wire is no longer allowed on ocean racing boats. If you don’t plan on racing your sailboat, however, you may still use coated wire.
Dyneema synthetic lifelines are the most popular type of coated lifelines to date. They’re stronger and lighter than steel, easy to install, can be spliced, are easy to handle, and don’t rust.
However, one downside of using Dyneema lifelines is that they’re prone to chafing. It would help if you covered vulnerable areas with tape to prevent chafing if using Dyneema lifelines.
 4")
The Average Lifespan of Sailboat Lifelines
When properly maintained, the average lifespan of a sailboat lifeline is 15 years. However, the lifespan is typically shorter if your sailboat frequents saltwater versus freshwater. Saltwater boats also have a shorter lifespan due to the damaging effect of sea salt.
As I’ve already mentioned, to extend the lifespan of your lifeline, you’ll need to inspect and maintain it on a regular basis. While the lifespan of lifelines mostly depends on the environment you’re in and how well-maintained the lifelines are, looking at the pros and cons of different lifelines is essential to know how long they would last for you. I’ll go over this in the next section.
Sailboat: Wire Lifelines vs. Rope Lifelines
When choosing lifelines for your boat, you may wonder which type you should purchase. After all, there are many variations of sailboat lifelines, including steel-coated, vinyl-coated, wire, and rope. This section will compare wire lifelines to rope lifelines and explore the pros and cons.
Wire Lifelines For Sailboats
Wire lifelines have their advantages, including being simplistic, relatively cheap to replace, and “reliably sturdy.” This means, that wire has much less stretch than rope lifelines.
However, uncoated wire lifelines can do significant damage to your hands. During the warmer months, they are unbearably hot to the touch. Also, gripping thin wire with your bare hands is painful even when the wire isn’t hot.
Due to the issues mentioned above, wire lifelines are commonly sold with a vinyl coating. But water tends to enter the ends of the coating over time, which leads to cracking and chafing in the vinyl and the corrosion of the slowly exposed wire. In the end, you will wind up replacing wire lifelines a great deal.
Rope Lifelines For Sailboats
As explained above, Dyneema lifelines are popular for good reason! They’re more robust than stainless steel wire and they’re sold at a more reasonable price than wire lifelines. This will save you the additional cost it would take when replacing your sailboat’s lifelines.
Other advantages include:
- Dyneema is immune to corrosion and will not be affected by saltwater as quickly.
- Dyneema lifelines are much lighter than wire lifelines.
- Dyneema rope lifelines are easily bent and cut with a knife. Therefore, any section of the rope can be removed at will, whereas wire lifelines require wire cutters.
- Dyneema lifelines are easier to store than wire lifelines.
- Unlike wire lifelines, Dyneema lifelines can be replaced without the hassle of tools or fittings.
The only downside to Dyneema lifelines is that they are subject to chafing.
Sailboat lifelines should be tight enough to withstand 11 pounds (4.98 kg) of weight or more without slack. No matter which lifeline you choose, it’s essential to inspect your lifeline regularly for any damage before sailing.
Additionally, you should choose your lifelines well when replacing them, for well-maintained lifelines can be the difference between life and death for you and your crewmates!

Bryan is a Las Vegas resident who loves spending his free time out on the water. Boating on Lake Mohave or Lake Havasu is his favorite way to unwind and escape the hustle and bustle of the city. More about Bryan.
Similar Posts

Sailboat vs. Powerboat: Which Is the Give-Way Vessel? Understanding Navigation Rules on the Water
Navigating the waters is an exciting adventure, whether you’re at the helm of a sleek sailboat or commanding a powerful motorboat. However, along with this thrilling journey comes the responsibility of understanding and adhering to the marine navigation rules, specifically those concerning the right of way or the “give-way” vessel. This aspect is vital to…
 9")
How Far Can a Sailboat Heel? (The Simple Answer)
Heeling is when a sailboat leans to one side, which can occur naturally or deliberately. When done deliberately, proper heeling enables a sailboat to travel faster. This, in turn, begs the question of how far a sailboat can heel? The optimal heeling range for sailboats varies by model and preference but usually sits between 10…
 10")
Why Do Sailboats Have Two Sails? (Explained)
If you’ve ever been sailing or watched a regatta, you’ll know that boats typically have two or more sails. It’s uncommon to see them with less than that. But what’s the reason behind this? Sailboats have two sails to improve the boat’s maneuverability, balance, speed, and ease of handling. The front sail is called the…
 11")
What To Do When a Sailboat Is Heeling Too Much (Explained)
Sailing is a fun activity for many people, but it comes with the innate prerequisite of being on the water rather than on stable ground. Aspiring captains must learn how to navigate and operate a boat while it rocks around in the water, which means dealing with things like heeling (i.e., leaning too far to…
 12")
Why Some Sailboats Have Two Helms (Dual Helms Explained)
While most sailboats have a single helm with a steering wheel in the center, some larger sailboats or racing boats may have two helms. So, why do these sailboats have double helms? Are there any practical benefits of two helms on sailboats? Some larger sailboats have two helms as it helps with steering from different…

DIY Dyneema Lifelines
THIS POST MAY CONTAIN AFFILIATE LINKS. PLEASE READ OUR DISCLOSURE FOR MORE INFO.
Last Updated on February 13, 2021 by Amy
While at The Boat Works , David and I had a long list of projects to tackle. One of my big ones was replacing our lifelines with fancy new Dyneema lifelines.
Table of Contents - Click to Jump
What is a lifeline?
Lifelines are wires or lines that run around the edges of your deck. These are designed to prevent you from falling overboard off your boat. The metal posts that the lifelines are threaded through are called stanchions .
What is Dyneema?
Dyneema is the brand name for UHMWPE (Ultra High Molecular Weight PolyEthylene fiber) made by DSM . Dyneema is incredibly valuable to have on your boat. The line can be used for a variety of purposes and is very high quality. We carry spare Dyneema in several sizes. One project I do frequently with Dyneema is making my own soft shackles.
Stainless Steel Wire v Plastic Coated SS v Dyneema Lifelines
Our Fountaine Pajot Helia 44 came with plastic coasted SS wires from the factory. There are several problems with this:
- Over time the plastic coating develops a sticky residue on it. Not detrimental to our safety, but gross nonetheless.
- The plastic coating breaks.
- UV damage shortens the life of your lifeline due to damage to the plastic.
- The plastic coating hides damage to the stainless steel wires.
Benefits to Dyneema lifelines:
- Stronger than stainless steel (15x stronger).
- Lighter than stainless steel (7x lighter).
- Easier to install.
- Chafe resistant compared to other fibers.
- Easier to cut in an emergency MOB situation.
We met a new Outremer last year that came from the factory with Dyneema lifelines.
Not sold on Dyneema? The Boat Galley has a post on new stainless steel wire lifeline installation.
Supplies to Replace Your Lifelines
This is what I used on our 44′ catamaran to make our Dyneema lifelines. You may need different sizes or quantities depending on your boat.
- Thick 12 strand single braid Dyneema for your main lifelines (I used 6 mm thick and approximately 65 meters long)*
- Thin Dyneema for your lashings (I used 3 mm thick and 9 meters long)
- M8 Stainless Steel 316 Eye Bolts, Marine Grade, 4 each
- M8 Stainless Steel 316 Eye Nuts, Marine Grade, 4 each
- swivel snap shackle 70 mm, 4 each
- electricians tape
- measuring tape (I use a seamstress measuring tape because of how flexible it is)
Dyneema is available from your local chandlery. We recommend going with the silver, natural colored Dyneema because we have used some dyed Dyneema in the past, but find that the color leeches off.
Cost for Making Your Own Dyneema Lifelines
The first 5 items on the above list totaled to $486.35 USD .
Splicing Your Lifelines
I created my Dyneema lifelines using a Brummel splice. When you have two loose ends, the splice is fairly easy. However, when one end is occupied (as it will be when you make your lifelines) you need a modified or Mobius Brummel to get the job done. Once you figure the splice out, it’s fairly easy.
Directions for the Mobius Brummel.
There’s a Modified Brummel Splice video on YouTube , but I found it not as easy to follow as the above link is. What tripped me up is that the person in the video switches sides partway through. When you put the loop through the hole, it needs to follow through the hole in the same direction that the tail went in the previous move. This is the “modified” part that allows you to make the Brummel with a secured end. Pushing the loop through should untwist the loop instead of putting a double twist in the line.
Do one end of the lifeline, and then thread the tail end through the stanchions. Connect the 1st, already sliced end properly to the railing, and then work out your measurements for the 2nd end. Disconnect the first end to give yourself some additional room to bury the tail of your 2nd splice.
Measuring the big Dyneema to splice the exact right length is really hard. Don’t worry, it’s better to be too short than too long. The distance will be made up with the lashings.
*Depending on the size of your shorter sections, you may need to drop down to a smaller size. The gates on the stern of our boat are so small that the long tail bury would overlap. Since the long tail is 72x the diameter, you have to either drop the diameter down or drop the tail (Evan Starzinger recommends at least 63x the diameter).
While Dyneema has negligible stretch, it will have some twist in the line since it has been coiled. Monitor your new Dyneema lifelines. As they adjust over the next few days they will work out the twist, but your eye bolts and nuts will need to be screwed back in and your lashings re-tensioned.
DO NOT use a hot knife. You don’t want the ends of the Dyneema melted, as it makes sharp edges in the long tail bury. I wrapped the Dyneema in the tape and cut through the tape using the box cutter.
Our chandlery only had eye bolts that were too long, so David cut them down using our Dremel .
Inspect the eyes of your stanchions. Our stanchion eyes are a smooth tube with rounded, gentle edges. Older or damaged stanchions might cause chafe problems on the Dyneema, so replace your stanchions or use a plastic protective covering at the stanchions. See the second post link from Rigging Doctor below.
Finished Dyneema Lifelines
More reading.
Evan Starzinger has a very technical article out about the benefits of Dyneema lifelines.
The Rigging Doctor has a post and instructions, and a 2-year update .
Dyneema’s abrasion resistance explained .
WHY CHOOSE DYNEEMA ROPE VS STEEL WIRE ROPE FOR HEAVY-DUTY RIGGING? from USA Rope & Recovery
12 Comments
I am looking at taking on this project for our FP 44′ Orana. Do you recall the size Fid you used? The link sends me to a set and I already have a few of my own. In practicing on a few different lines I can see finding the right size fid for the right line is extremely important! Also, any update on what you felt you did right and what you would have done differently?
Unfortunately I don’t, mostly because our fids aren’t well labeled. I think our lines are holding up pretty well. The trickiest part is figuring out the length for the second splice! Just remember you can always adjust the lashings.
I used New England Ropes WR2. There was excess dyneema cover after splicing or stripping the ends. I cut 2.5” lengths of the cover and slid them over lifeline before final splice. You can “glue” them in place using cyanoacrylate (crazy glue.) It does not actually glue the dyneema, but flows between the fibers and hardens, holding them in place. Good for binding ends, too.
Enjoying your blog!
This looks great. I also have a Helia 44 that needs lifelines replaced. I’m looking at either Suncor stainless and Dyneema.
What Dyneema did you use and where did you source it?
We just got it from West Marine! Super easy.
Great looking splices Amy!
How much room did you leave initially on the aft end of the lifelines? I’m assuming there is a fair amount of untwisting. How much length did the lines finally untwist?
Much appreciated! We’ll probably switch out our lifelines this year. Allen & Linda Dobbs
The amount the line untwists is hard to measure because the eye bolts untwist with it. To correct it, we simply undid the lashings and retightened the eye bolts. It helps a lot to twist the line as you walk down its entire length.
Plastic rings between the stanchion eyes and the line for chafe?
Hey Derek! Good question. The stanchion eyes are built with a smooth tube bisecting them where the lifeline goes through. The edges of the tubes are rounded and very smooth. I don’t think any plastic ring we put in there would do a better job than what is built into the stanchion. I doubt chafing is going to be an issue. If it is, we will catch it with our routine inspections.
Also, an updated post from Rigging Doctor about chafe. He states that he has had no chafe at the stanchions after 2 years: https://www.riggingdoctor.com/life-aboard/2017/3/30/dyneema-lifelines
I’m doing dyneema life lines and rigging on my cat being built. Moving off my current mono, I currently liveaboard but not a cruiser. As you said dyneema is amazing, great to have around, and useful skills to pickup around its integration. I’m still a bit skeptical on the chafe, I’d think the softer plastic is preferable even if it is less smooth. I dunno tho, either way good move. Been following you two for two years. Probably be starting my cruising just as you’re wrapping up, boat won’t be done till next spring and then I’ll do it’s delivery back to west coast.
Leave a Reply Cancel reply
Your email address will not be published. Required fields are marked *
Notify me of followup comments via e-mail. You can also subscribe without commenting.
This site uses Akismet to reduce spam. Learn how your comment data is processed .
JIB FURLING GEAR
- CDI Flexible
- Furling Accessories
- Racing Foils
- Whisker and Spinnaker
MAIN SAIL FURLING and REEFING
- Boom Furlers
- Reefing and LazyJacks
MAIN SAIL TRACK SYSTEMS
Standing rigging.
- Swage Terminals and Toggles
- Turnbuckles
- Backstay Adjusters
- Inner Forestay Tools...
- Miscellaneous Hardware
- Measuring Guide
- Hardware and Wire
RUNNING RIGGING
- Rope Clutches
- Cam and Standard Cleats
- Pad Eyes, Eye Straps
- Rachet, Snatch, Wire
- Halyard Lift
- Accessories
- rigid vangs
- tackle vangs
GROUND TACKLE
Mast climbing.
- ATN Top Climber
RADAR MOUNTS AND REFLECTORS
Welcome to rigging only.
Our www.riggingandhardware.com shop on line site is now open for business. We now have most manufacture's parts up and running. Pricing is current on the riggingandhardware.com site. Pictures and selection guides are rather lacking at this time but we are working on them and will be loading more product and manufacturers asap. As always, don't hesitate to contact us with any questions or to place an order at [email protected] or call (508) 992-0434.

Our Mission
- We now stock and swage wire up to 5/8 diameter for sailboat standing rigging and architectural wire projects. Larger sizes are available.
- We now stock and swage wire up to 5/8 diameter for standing rigging and architectural projects. Larger sizes are available.
- Metric wire and swage fittings are available for standing rigging applications. We are able to provide swaged standing rigging assemblies as well as mechanical terminals (assembled or you assemble) to meet your needs at an affordable cost. Current stock is 8-10-12mm. Note the bulk of these fittings will have imperial pin and thread dimensions.
Return Policy
Customer comments.
- We thank you and your staff for your help and advise. We are enjoying sailing more with the furler. M.&R. G., Chicago
- All arrived safely and perfectly on time. The lifelines are almost too pretty to put on the boat and it's a damn pretty boat. The shrouds and backstay are superb and a perfect fit. If anyone ever wants a referral about Rigging Only tell them to contact me. R. A. , Curator, N. C.
- Just a quick note to tell you how grateful I am. The order was waiting for me when I arrived as promised. All the parts were of top quality and the prices were more than reasonable. I am recommending the services and products of Rigging Only to all my fellow charter captains of the Virgin Islands Charter League. Capt. G. F. USVI
- Due to your excellent quality, service, and prices on my previous order I would like to get a price quote and estimated turnaround time for replacing my current standing rigging... B. S. Gurnee, IL.
- Got them on time! Many Thanks! C. S. Lacombe, LA
Contact Information
- Welcome To The Seco South Online Store
- My Wishlist
- Login / Register
You have no items in your shopping cart.
- Select category
- Anchor Rodes
- Accessories
- Cable Assemblies
- Cable Railing Kits
- DIY Cable Trellis Kits
- Lifeline Kits
- Running Rigging
- Standing Rigging

- Anchor Rodes Hot!
- Trellis Kits Hot
- Sta-Lok Fittings (Mechanical Fittings)
- 316 - 1X19 Stain steel wire
- Hunter 35.5
- Beneteau First 235
For over 35 years Seco South has manufactured lifelines for sailboats for nearly all of the leading sailboat manufacturers in the USA including Hunter, Beneteau, Island Packet, Compac, Irwin and Endeavour just to name a few. We manufacture our lifelines using only the highest quality type 316 stainless steel for all of our hardware including, turnbuckles, gate eyes, toggle jaws, and pelican hooks. We manufacture from (2) different types of wire: PVC coated 7×7 and uncoated 1×19.
For the DIY, you can purchase all the hardware individually if you have the proper swaging equipment or order our new self-attach fitting kit. The only tools required are a pair of cutters and a couple of crescent wrenches.
We offer (3) different kits:
LLK-1 Kit comes with a factory installed toggle jaw on one end of a length of cable of your choice and a self-attach toggle jaw turnbuckle you install on the opposite end.
LLK- 2 Kit comes with a factory installed gate eye on one end of a length of cable of your choice and a self-attach toggle jaw turnbuckle you install on the opposite end.
LLK- 3 Kit comes with a factory installed toggle jaw on one end of a length of cable of your choice and a self-attach pelican hook you install on the opposite end.
If you prefer to have us make your lifelines for you, please call our toll free number 888.535.SECO . All you need to do is provide us with the dimensions or you can send in your old ones for duplication.

7x7 Construction PVC-Coated Sailboat Lifeline Cable

Swage Lifeline Toggle Jaw*

Swage Lifeline Interlocking Swivel Gate Eye*

Swage Lifeline Swivel Gate Eye*

Swage Lifeline Turnbuckle
Seco south online store, quality products.
The Seco South store has been the go to source for quality marine and architectural products for more than 50 years. We have been a major supplier for many OEMs and individuals alike. Our products are crafted in the USA to the highest standards and are backed with our 100% customer satisfaction guaranty.

Build Your Own Custom Anchor Rode

DIY Cable Railing Kits

Green Wall Hub - Stainless Steel Cable Trellis Kit

Comparing box
Expert Outfitters Experienced Boaters Call 908-464-5581
- Shopping Cart

Custom Lifelines
- Shop by Brand
- Shop by Category
- Order Status

Lifeline And Stanchion Page
Everything you'll need for stanchions and lifelines. If you need fittings for your bimini and railing, click here .

- USA Made Anchor Shackle With Screw Pin
- USA Made Round Pin Anchor Shackle
- Anchor Shackle
- Bolt Chain Shackle
- Bow Shackle
- Chain Shackle
- Long D Shackle w/ Captive Pin
- Long D Shackle w/ Screw Pin
- Round Pin Anchor Shackle
- Round Pin Chain Shackle
- Special Bow Shackle w/ No-Snag Pin
- Special D Shackle with No-Snag Pin
- Stainless Bolt Anchor Shackle
- Straight D Shackle
- Straight D Shackle with Captive Pin
- Twist Shackle (Cast)
- Twist Shackle with No-Snag Pin
- Wide D Shackle
- Wide D Shackle With No-Snag Pin
- Halyard Shackle with Key Pin
- Long D Shackle Shackle w/ Key Pin
- Headboard Shackle w/ Captive Pin
- Stamped D Shackle
- Webbing Shackle
- Survival Bracelet Accessories
- Coarse Thread Closed Turnbuckle Bodies
- Fine Thread Closed Turnbuckles Bodies
- Turnbuckle Body (Forged)
- Turnbuckle Body Cast
- Nuts, Wing & Turnbuckle
- Cast Body Jaw And Eye Turnbuckle
- Forged Jaw And Eye Turnbuckle (Open Body)
- Turnbuckle (Closed Body) Jaw & Jaw
- Turnbuckle (Closed Body) Jaw & Swage
- Turnbuckle (Closed Body) Toggle & Swage
- Turnbuckle (Closed Body) Toggle & Toggle
- Turnbuckle (Open Body-Cast) Eye & Eye
- Turnbuckle (Open Body-Cast) Hook & Eye
- Turnbuckle (Open Body-Cast) Hook & Hook
- Turnbuckle (Open Body-Cast) Jaw & Jaw
- Turnbuckle (Open Body-Forged) Eye & Eye
- Turnbuckle (Open Body-Forged) Hook/Eye
- Turnbuckle (Open Body-Forged) Hook/Hook
- Turnbuckle (Open Body-Forged) Jaw & Jaw
- Turnbuckle (Open Body-Forged) Stud & Stud
- Wire Rope 1 x 19 (304)
- Wire Rope 1 x 19 (316)
- Wire Rope 7 x 19 (304)
- Wire Rope 7 x 19 (316)
- Wire Rope 7 x7 (316)
- Wire Rope Lifeline - 7 x 7 PVC (316)
- Anchor Chain (BBB)
- Commercial Chain
- Lifting Chain
- Stainless Safety Chain
- Proof Coil Chain
- High Test Chain
- Long Link Chain
- Twist Link Chain
- Single Jack Chain
- Double Loop Chain
- Cast And Forged Connecting Link
- Square Quick Link
- Long Quick Link
- Delta Quick Link
- Pear Quick Link
- Clevis Grab Hook
- Clevis Slip Hook
- Eye Grab Hook
- Eye Slip Hook
- Swivel Eye Hook
- Threaded Shank Hook
- Master Links
- Hammerlocks
- Blue Water Cleat
- Stainless Folding Cleat
- Stainless Steel E-Z Push-up Cleats
- Studded Cleat
- Herreshoff Cleat
- Trimline Cleat
- Flagpole Cleat
- Flat Top Cleats
- Lifting Eye Cleat
- Mooring Bitt Cleat
- Bow Chocks, (pair)
- Skene Chocks, (pair)
- Straight Chock
- Bimini Fittings, Deck & Rail Hinges
- Bimini Fittings, Top Caps & Slides
- Bimini Top Cap & Swivel Base
- Rail End Caps (Flat)
- Rail Fittings, Rail Ends
- Rail Fittings, 3-Way Corner
- Rail Fittings, 4-Way Tee and Corner
- Rail Fittings, 60 & 90 Degree Tee
- Rail Fittings, 90 T with Eye
- Rail Fittings, Bow Form & Elbow
- Rail Fittings, End & Center
- Rail Fittings, Rectangular Base
- Rail Fittings, Round Base
- Rail Fittings, Take-Apart Slides
- Rail Tubing
- 6 Inch Deck Access Hatch
- Hinges, Door - Equal & Unequal
- Flush Hinges For Both Doors and Tables
- Hinges, H.D. Flush Strap
- Hatch Hinges
- Hinges, Heavy Duty Offset Door
- Hinges, Strap & Butt
- Hinges, T Strap
- Hinges, Take-Apart
- Hose Deck Fills
- Teak Platforms
- White Poly Swim Platforms
- Through Hull Fittings
- Chain & Deck Pipe
- Stainless Steel Rub Rail Ends
- Stainless Steel Rub Strakes
- Stainless Fairlead and Gasket
- Brackets, 90 Degree Angles
- Door Stop & Catch
- Holders, "Holdall" Spring Clamps
- Holders, Boat Hook Holders
- Hooks, Awning & Fender
- Hooks, Cabin/Clothes
- Barrel Bolt
- Brackets, Folding Table
- Hasps, Padlocks and Locking
- Hatch, Flush Deck Latches
- Hatch, Flush Lift Rings
- Winch Handle Holder
- Utility Wall Clip
- Hawse Deck Pipes
- Transom Drain Plugs
- Floor Drain Plate/Vent
- Louvered Vents
- Antenna Mount, Adjustable Rail
- Antenna Mount, Rail/Surface
- Antenna Mount, Ratchet
- Fishing Rod Holder, Flush Mount
- Fishing Rod Holder, Removable
- Fishing Rod Holder, Side Mount
- Four Tube Fishing Rod Holder
- Stainless Steel Rod Holder, Rail Mount
- Flag/Pennant Staff, Bow Rail
- Folding Boat Step
- Lights, Navigation
- Bow/Stern Eye, U-Bolt
- Fender Hook
- Microphone Clip
- Shore Power Cable Holder
- Ski Tow Ring (Transom Mount)
- Pintles & Gudgeons, Dinghy/Keelboat
- Kong Elastic Tethers
- Machine Swage Pelican Hook With Stud
- Swage Domehead
- Swage Marine Eye
- Swage Marine Fork
- Swage Marine Toggle
- Swage Stemball & Cups
- Swage Stud Terminal
- T Terminals & Plates
- Terminal Gate Eye
- Hand Swage Gate Eye (Non-Swivel)
- Hand Swage Joined Gate Eyes (Non-Swivel)
- Hand swage Joined Swivel Gate Eyes
- Hand Swage Lifeline Adjuster
- Hand Swage Pelican Hook
- Hand Swage Short Stud
- Hand Swage Stud
- Hand Swage Swivel Gate Eye
- Hand Swage Toggle
- Hand Swage Toggle Turnbuckle
- Hand Swage Tool
- Mini Hand Swager
- Thimble, Federal Specification 304SS
- Thimble, Federal Specification 316SS
- Thimble, Heavy Duty
- Thimbles, Extra Heavy Duty
- Thimbles, Standard
- Mini Pulley Blocks w/ 1 Sheave
- Schaefer 3 Series Cheek Blocks
- Schaefer 5 Series Cheek Block
- Schaefer 7 Series Cheek Blocks
- Schaefer M-Series Foot - Cheek Block
- Clamp-on Furling Blocks
- Double Blocks
- Double Blocks with Becket
- Exit Blocks
- Fiddle Blocks
- Fiddle Blocks With Becket
- Fiddle Blocks with Cam and Becket
- Lashing Block
- Schaefer 5 Series Single Blocks
- Schaefer 7 Series Single Blocks
- Schaefer M-Series Single Blocks
- Schaefer Series 3 Single Blocks
- Single Blocks with Becket
- Seine (Snatch) Blocks
- Snatch Blocks
- Square Swivel Eye Blocks
- Rope Sheave (Bushing)
- Rope Sheave with Bearings
- Rope Sheave with Bushing
- Wire Rope Sheave with Bearings
- Wire Rope Sheave with Bushing
- Surface Mounted Block with Sheave
- Swivel Blocks w/ 1 Sheave
- Swivel Blocks w/ 2 Sheaves
- Swivel Eye Blocks w/ 1 Sheave
- Swivel Eye Blocks w/ 2 Sheaves
- Wire Rope Clip, 304 Cast
- Wire Rope Clip, 316 Forged
- Wire Rope Clips, Chair Clips
- Bimini/Webbing Clips
- Boom Bails, Heavy Duty - Forged
- Chainplates
- Clevis Pins
- Fixed Snap Shackles
- Aluminum Stop Sleeve
- Aluminum Swage Sleeve
- Cooper Stop sleeve
- Copper Swage Sleeve
- Stainless steel oval sleeve
- Zinc Plated Copper Swage Sleeve
- Suncor Quick Release Pin Style D
- Suncor Quick Release Pin Style M
- Snap Shackles, Cast Jaw Swivel
- Cunningham Hooks
- Downhaul Hooks
- Heavy Duty D Rings
- Rectangular Rings
- Reefing Hooks
- Round Rings
- Tack (Lashing) Hooks
- Triangle Rings
- Stamped Jaw Swivel Snap Shackles
- Swivel Snap Shackles
- Federal Spec. Jaw and Eye Swivel (AN100)
- Swivels, Eye & Eye
- Swivels, Eye & Jaw
- Swivels, Heavy Duty Eye & Eye
- Swivels, Heavy Duty Eye & Jaw
- Swivels, Heavy Duty Jaw & Jaw
- Swivels, Jaw & Jaw
- Threaded Pelican Hook
- Toggle Pins
- 316 Stainless Steel Rigging Toggle
- 316 Stainless Steel Rigging Toggle Traditional
- Triangular Plates
- Additional Buckles (Non-Ratcheting)
- Nylon Webbing
- Over-Center Buckle Assembly With Clips
- Stainless Ratchet Assmeblies With Flat Hooks And 1" Blue Webbing
- With 1" Webbing
- With 1.5" Blue Webbing
- With 1.5" Webbing
- With 2" Blue Webbing
- With 2" Webbing
- With 1" Blue Webbing
- With 2' Blue Webbing
- With 1" Webbing and S Hooks
- With 1-1/2" Webbing
- Ratchet Buckles
- With 1-1/2" Blue Webbing
- Webbing Assemblies
- Delta Link For Webbing
- Double J Hooks
- Web 'Star' Adjuster
- Web Adjuster Slide
- Web Shackle
- Web Threading Plate
- Welded 'S' Hook
- Webbing Kits and Hangers
- Hand Crimp Lifeline Parts
- Lifeline Wire Rope With PVC
- Suncor Quick Attach Lifeline Kits
- Lifeline Wire Rope, Uncoated
- Stanchions & Brace
- Stanchion Base (Suncor - Cast)
- Pelican Hook
- Stanchion Base (Schaefer - Welded)
- Stanchion Caps
- Stanchion Slide with Eye
- Stanchion Ring
- Stanchion & Furling Blocks
- Forged Eyebolts With No Shoulder
- Forged Eyebolts With Shoulder
- 304 Stainless Steel Unwelded Eyebolts
- 316 Stainless Steel Unwelded Eyebolts
- Metric Stainless Welded Eyebolts
- Standard Stainless Welded Eye Bolt
- Cast Lifting Eye Nut
- Forged Lifting Eye Nut
- Machine Eye Bolt
- Lag Eye Screw
- Lag Ring Bolt
- M6 Stainless Metric Shoulder Eye Bolt
- M8 Stainless Metric Shoulder Eye Bolt
- M10 Stainless Metric Shoulder Eye Bolt
- M12 Stainless Metric Shoulder Eye Bolt
- M16 Stainless Metric Shoulder Eye Bolt
- M18 Stainless Metric Shoulder Eye Bolt
- M20 Stainless Metric Shoulder Eye Bolt
- M24 Stainless Metric Shoulder Eye Bolt
- Eyebolts with Rings
- Special Eyebolts
- Asymmetrical Harness Clip
- Harness Clips with Extras
- Heavy Duty Swivel Eye Hook
- Key Lock Spring Clip
- Mooring Hook Kit
- Rounded Harness Clip
- Screw Lock Harness Clip
- Single & Double Swivel Eye Bolt Snaps
- Spring Clip & Eye (Snap Hook)
- Spring Clip & Eye Key Lock
- Spring Clip (Snap Hook)
- Spring Clip w/ Key Lock
- Spring Clip w/ Screw Lock
- Spring Clip w/ Special Gate
- Spring Gate Snap
- Stainless Key Ring
- Trigger Snap
- Unthreaded Shank Hook
- Wide Asymmetrical Clip
- Fixed Eye Snap
- Spring Clip (Wire Lever)
- Swivel Eye Snap
- Asymmetrical Spring Clip
- Double Action Safety Hook, Wichard
- Shock Cord Hooks and Hog Rings
- Anchor Base With Stud
- Heavy Duty Folding Pad Eye
- Hinged/Folding Cast Pad Eye
- Bolt-On Lashing Ring
- Weld On Lashing Ring, Bent
- Stainless Steel Anchor Base With Shackle
- Stainless Swivel Pad Eye
- Stainless Tow Pad Eye
- Stamped Diamond Pad Eye
- Swivel Pad Eye With Ring
- Weld-on Lashing Ring
- Oblong Pad Eyes & Backing Plates
- Pad Eyes, Tie-Down & Footmans Loops
- Heavy Duty/Oblong Pad-eyes
- Stamped Pad Eyes
- Standard Pad Eyes
- Eye Strap Pad Eyes, 2 Hole/4 Hole
- Folding Heavy-Duty Pad Eyes, Forged
- Round Pad Eyes
- Heavy Duty Square Pad Eyes
- Heavy Duty Diamond Pad Eyes
- Large Mast Pad Eyes
- Pad Eyes, Anchor/ Anchor With Swivel
- Pad Eyes, Lifting Ring
- Pad Eyes, Removable Eye Deck Plate
- Side Ring Pad Eyes
- Standard U-Bolt
- U-Bolt w/ Plate (Standard Thread)
- U-Bolt, Bow/Stern Eye
- Long U-Bolt
- Square U-Bolt
- Anchor Points
- Roller Pins
- Stainless Roller Brackets
- Stainless Steel Trailer Tongue
- Stainless Steel Trailer Winch
- Trailer Couplers
- Trailer Hitch Balls
- Trailer Safety Chain
- Trailer U-Bolt
- 12 Volt LED Microstar Lights
- 24 Volt LED Microstar Lights
- LED Tri Star Back Mount
- LED Tri-Star Microstar Light
- LED Tristar Light With Stalk
- Microstar Transformers
- Cutting Tools (Wire Rope & Bolt/Chain)
- Johnson Crimping Tools
- Passivating Fluid
- Stainless Steel Shackler & Bottle Opener
- Steritool Stainless Screwdrivers
- Swage It Swaging Tool
- Stainless Adjustable Wrenches
- Stainless Steel Locking Pliers
- Stainless Steel Spanner Wrenchs
- Hand Riverting Tools
- Steritool Stainless Steel Open End Wrenches
- Anchor Roller, Replacement Wheels
- Anchor Swivel
- Anchor Swivel Multi-Directional
- Anchor Swivel Replacement Pins
- Folding Grapnel Anchors in Various Colors
- Anchor Bracket, Stanchion-Mount
- Anchor Chain Snubber
- Anchor Chocks
- Anchor Tensioner, AT3 Anchor-Tite
- Chain Stopper
- USCG Chain Stopper
- Galvanized Folding Grapnel Anchors
- Horizon Claw Stainless Steel Anchors
Bestsellers
- Stainless Steel Pelican Hook 4
- Quick Attach Lifeline Kit w/ Gate - Closed Body
Authentication
- Forgot password?
Yachting World
- Digital Edition

The 10 modern and updated golden rules for line handling
- Rachael Sprot
- May 16, 2024
Yachtmaster Instructor and co-founder of Rubicon 3 Adventures, Rachel Sprot takes a look at line handling and brings you her top 10 modern rules

They say that most accidents happen in the home, and I’d hazard a guess that the same is true for sailing. Of the accidents I’ve witnessed over the years, a significant proportion have been in port, often while mooring. It’s a time when the crew are starting to relax, the seasickness has vanished and the bar’s in sight. Meanwhile, the skipper is focused on the manoeuvre.
We often underappreciate the hazards involved in mooring. As the size of yacht increases, particularly above 45ft, it’s essential to upskill our line handling, and that of our crew. Last issue we looked at line handling techniques while under sail, this issue we’ll look at coming alongside, berthing, and other critical moments. The good news is that safe line handling isn’t complicated: with a healthy respect for the hazards involved and a few golden rules, it should be easy to make the transition to larger vessels safely.
It may sound counterintuitive, but if you’ve got novice crew on board it’s essential to teach them how to tie up while you’re still tied up. Taking time to demonstrate where to stand, how to lasso a cleat, and how to make off a line or surge it, is one of the best investments you can make.
Once you’ve done this, find a big, empty berth and come alongside a couple of times to ensure that everyone understands the procedure, it will pay dividends in the end.

With higher topsides, stepping off becomes harder – particularly on icy or slippery pontoons. Photo: Rachael Sprot
2 Surging a line
Using the warps, such as a midships line, is an effective way to bring a large boat alongside, but it needs both sensitive use of the throttle and sensitive line handling. The person stepping ashore needs to know how to surge the line, rather than snubbing it, and the person on the helm needs to work with them. In strong winds this can be the difference between coming safely alongside, or causing damage.
3 Heaving lines
As the lines get bigger and heavier, and the topsides get higher, stepping ashore with warps becomes harder.
Throwing a heavy line is difficult: if you get enough momentum to launch the line, you risk sending yourself with it. I’ve come close to this myself and seen it happen to another skipper (it did wonders for crew morale, though little for his own!). Throwing a few loops of the line, and not the whole coil, is the trick for short distances, but it will only cover a few metres.
“If there’s one essential skill the crew of large yachts need,” notes large classic yacht skipper, Jim Thom, “it’s using the heaving line.”

Coiling long warps and lines is heavy work. Photo: Rachael Sprot
While most medium-sized cruising yachts won’t carry a dedicated heaving line, they often have a throwing line in a bag, which will do the same job.
Practising on the dock first saves embarrassment under pressure and could be the difference between pulling off a manoeuvre first time, or having to come around again.
If you’re receiving a heaving line, holding out an arm on the side you want it thrown will help direct the line in the right direction, but away from your face.
<h2<4 Lassoing
If you’re not met by the marina staff, your crew need to be able to secure a line to the dock themselves.
Topside height has increased considerably in recent years, and where we might once have expected a crewmember to be able to step off a 50-footer, it’s increasingly unrealistic. Nigel Rennie has witnessed several accidents over his decades as an RYA examiner. Three Yachtmaster candidates left exams in an ambulance having slipped on pontoons and suffered serious injuries, and several more missed the pontoon entirely and ended up in the water.
“When I’m teaching a course these days,” he said, “I always teach lassoing.” To lasso a cleat, throw a bight of line wide enough to ensure that it encircles the cleat, and then bring in the slack.

Use your hip when coiling lines to help support the weight. Photo: Rachael Sprot
5 Coiling lines
Line coiling is an art. A well-coiled line isn’t just nice to look at though, it’s also a safety issue. There are times when you need to rig lines in a hurry, such as having engine failure in a confined space or needing a tow. Lines need to come out of the locker ready to use, not tangled among the buckets and fenders.
Coiling big, heavy lines is hard work though, and the larger the yacht, the longer it takes. Skippers can encourage good habits by allowing time to stow the boat properly before heading out of port. Using a winch, rather than your arm, to coil the line around makes it easier, or flaking it into a figure of eight on deck. To finish it off without finishing off your biceps, hold the body of the coil between the crook of your arm and your hip, while you wrap the tail around it.

Unambiguous communication between the bow and the helm is vital for safe line handling. Photo: Paul Wyeth
6 Communication
Effective communication is particularly important on a large yacht where the controls are a long way from where the load is applied. Agree terms in advance and explain what you mean by each phrase. Danny Watson, skipper of Challenge 72, Catzero, insists that crew repeat back the instruction: “Slip the bow line,” should be answered with “Slipping the bow line,” and then “Bowline slipped.” The bow is too far away from the helm to see what’s going on, and the foredeck team are the skipper’s eyes forward.
Article continues below…

An expert guide to safe line handling at sea
Boats may have nine lives, but a sailor is not supposed to have nine fingers. Every year, however, we hear…

A complete guide to high latitude sailing (and avoiding icebergs)
I’ve just returned home from skippering 59º North’s Farr 65 Falken from Annapolis, Maryland, to Isafjordur in north-west Iceland. We…
Loading or unloading a line at the wrong time can be dangerous. A line should never be loaded without ensuring the people handling it are ready. If you’re going to drive onto a midships spring, explain this in advance and make a final check that hands are clear before engaging gear.
The language we use matters too. Sail training skipper Emily Caruso pointed out that “Make it off” sounds very similar to “take it off”. Unfortunately, it has completely the opposite effect to the one you want when you’re trying to secure a boat in a cross wind!
“Taking time to get the right lines in place can prevent a lot of rushing and mis-handling,” said Helen Walker, skipper of expedition yacht, Zuza, “then all the safety aspects can be adhered to without extra pressure and confusion.” With planning and preparation novice crew can be safely involved in deck operations, without it they’re more likely to be sidelined or injured.

Taking time to get the right lines in place can prevent a lot of unnecessary rushing when the time comes to deploy them. Photo: Paul Wyeth
8 Loose Ends
“Always ensure you can dump the line from on board if needed,” said John Wetton, Yachtmaster Instructor, “don’t put bowlines on cleats on board.” Having the loose end of the line on the dock means you’ve ceded control to those on shore who may, or may not, have understood instructions. If you’ve still got line on board you’ve still got options, such as easing, or releasing the line. There are times when you need to abort a manoeuvre or abandon a snagged line and depart the dock without it.
There is a story – possibly apocryphal – of a sailing school that almost lost a yacht when a line snagged. They were springing off a flimsy finger berth in a French marina, but when the line caught they were already making way. The rope was secured by a locking hitch with no way to release it. As the line came taut it ripped the pontoon off. Chaos ensued as they dragged the errant pontoon on a leash around the marina before eventually colliding with it and holing the hull. True or not, a line snag at a critical moment can have major consequences and being able to release it is key.

Cleats on the deck or pontoon can be hazardous – keep hands well clear when slipping lines. Photo: Paul Wyeth
Cleats may look benign, but they can be dangerous. A few years ago the Hamble Inshore Lifeboat deployed to a woman who’d lost three fingers on a pontoon in the river. She’d been trying to hold on to a mooring line which was only around half the cleat. The manoeuvre had gone wrong, and under pressure she held onto the warp rather than letting go. It’s easy for hands to be sucked towards a cleat, especially if the vessel is in strong wind or tide. A safe distance of half a metre or more should be maintained and crew need to understand the importance of friction in giving them control.

Always ensure you can dump a line from the boat so crew onboard retain control and have options. Photo: Paul Wyeth
10 Complacency
The best lesson I came across was from an old school friend. She’s not a sailor, but she does watch the Below Deck reality TV show which follows superyacht crew working aboard charter yachts. “Have I seen Episode 6, Season 2?” she enquired.
Below Deck isn’t the first place I’d seek instruction in seamanship, but this episode captures a terrifying accident. Deckhand Ashton Pienaar stands on the wrong side of the tender towing line as it pays out. His ankle is caught in a bight of line which drags him over the side. Disaster is only averted by the cameraman who stops filming to release the tow setting the six-tonne tender, and Pienaar, free before he loses a limb or drowns.
It’s not only novices who are hurt by poor line handling, professional seafarers can become complacent too. We’re all guilty of relaxing our guard when it comes to line handling, but good technique keeps everyone safe and models best practices for those around you.
If you enjoyed this….
Yachting World is the world’s leading magazine for bluewater cruisers and offshore sailors. Every month we have inspirational adventures and practical features to help you realise your sailing dreams. Build your knowledge with a subscription delivered to your door. See our latest offers and save at least 30% off the cover price.
- Sustainability
- Latest News
- News Reports
- Documentaries & Shows
- TV Schedule
- CNA938 Live
- Radio Schedule
- Singapore Parliament
- Mental Health
- Interactives
- Entertainment
- Style & Beauty
- Experiences
- Remarkable Living
- Send us a news tip
- Events & Partnerships
- Business Blueprint
- Health Matters
- The Asian Traveller
Trending Topics
Follow our news, recent searches.
Walk The Line
Advertisement
Hundreds of Chinese citizens camp out in the California desert, waiting to be taken into custody by US Border Patrol. Meanwhile, in Ecuador, more of their compatriots are following in their footsteps.
Walk The Line - Anyone Can Be American
Latest episodes.

Walk The Line - Inching Towards America

You May Also Like
Popular shows, upgraded dialysis centre in bedok has 25 stations; treats 40 more patients a week, sm lee calls for students to develop qualities like resilience, leadership, jakarta residents resort to buying clean water from neighbours, analysts: inauguration of ram temple not as big an election boost as india's ruling bjp hoped, indonesia improving flow of ciliwung river as part of flood mitigation efforts, singapore public experienced more acts of graciousness over past year: singapore kindness movement survey, rising concerns around public transport crimes like molestation, taking of up-skirt images, singapore sees surge in covid-19 cases, expects new wave to peak in a month, on the red dot: i am a hawker - fine-dining food in a hawker centre, this browser is no longer supported.
We know it's a hassle to switch browsers but we want your experience with CNA to be fast, secure and the best it can possibly be.
To continue, upgrade to a supported browser or, for the finest experience, download the mobile app.
Upgraded but still having issues? Contact us
I spent a night in Panama's richest neighborhood, often called a 'little Dubai' or the 'Miami of Latin America'
- Punta Pacifica is Panama City's most expensive neighborhood.
- The neighborhood has man-made islands, private marinas, and penthouses worth $5 million.
- I stayed at the five-star JW Marriott Panama and experienced the neighborhood's luxury firsthand.
Duncan McGowan describes Panama City's Ocean Reef Islands as "perfection."
The landscaping is manicured flawlessly, never a leaf or branch out of place. You'd have to hunt to find trash anywhere on the islands, and instead, you're more likely to notice bird songs filling the air.
Looking one way, all you see is the endless ocean. Turn around, and there's a stunning cityscape behind you, McGowan, the president of Punta Pacifica Realty , told Business Insider.
The Ocean Reef Islands are part of Panama's Punta Pacifica neighborhood, and that perfection is exactly what Panama's wealthiest residents seek.
On a recent trip to the country, I saw the opulence that residents chase across Punta Pacifica, Panama's wealthiest neighborhood.
I landed in Panama City, snapped skyline pictures, and texted my friends that I had arrived. Immediately, one pointed out how the city resembled Miami.
I spent my first night in Casco Viejo, Panama City's old town. From the coast, I could look out onto Punta Pacifica, where a grouping of tall buildings reached out to the clouds.
My friend's initial thoughts about Punta Pacifica aren't uncommon. McGowan said people always compare Punta Pacifica to dense cities like Miami, New York City, and Dubai. Central America Living refers to the neighborhood as a "mini-Dubai," and The New York Times said in 2014 that Punta Pacifica is "often called the Miami of Latin America."
The comparisons made sense. All three cities are home to impressive skyscrapers and coastlines. And since Punta Pacifica is home to the Ocean Reef Islands, which were man-made in the early 2000s, it's easy to see how it's grouped with Dubai.
But McGowan said that they are vastly different destinations.
"It resembles all of them, but it has its own flavor," McGowan said. "I think Panama City and Punta Pacifica have matured enough now that it doesn't have to be compared. It stands on its own."
The next day, I headed to Punta Pacifica.
Three decades ago, Punta Pacifica didn't exist.
Created in the early 2000s, a company that built one of Panama City's major highways earned the rights to develop 86 acres of landfill and 73 acres of mainland along an area of the city's coast known today as Punta Pacifica.
McGowan, who has worked in Panama's real-estate market for nearly two decades, said it was designed as a luxury area from the start, and living in Punta Pacifica can come at a steep price.
The neighborhood is home to more than a dozen condominiums and apartment complexes, which can range in price. On the lower end, McGowan said residents can expect to pay around $2,200 a square meter, while prime real estate can cost $7,000 a square meter.
A quick search on Punta Pacifica Realty or Panama Realtor shows one-bedroom apartments for sale at $200,000 and luxury penthouses for as much as $5 million .
I spent a night in the neighborhood's famous TOC building.
One building stands out in Punta Pacifica's skyline with its sail-like shape: the TOC building.
Today, TOC stands for The Ocean Club, but ask anyone in Panama, and they know it by its former name, the Trump Ocean Club.
The Trump Organization wasn't the building developer; local developer Roger Khafif was. However, the Associated Press reported that the Trump name was licensed to the building to increase its credibility and notoriety.
It became Ivanka Trump's business project in 2006, according to NBC , and since its opening in 2011, the building's history has been riddled with scandals. An NBC and Reuters investigation found that many of the property's brokers, customers, and investors were tied to drug trafficking and international crime.
In 2015, the AP reported that "concerns about overspending and transparency" led the Trump management company to be forced out after a vote by condo owners and board members. However, the Trump Organization refused to accept the vote and claimed that it quit instead. Along with that announcement, the Trump Organization demanded a $5 million termination fee, according to the outlet.
In 2018, the AP reported that Marriott International took over management and renamed it The Ocean Club to keep its TOC branding.
Today, the 70-story building is one of the largest mixed-use buildings in Panama.
The building includes the JW Marriott Panama and its 369 hotel rooms, along with about 630 condos, McGowan said.
It's the neighborhood's only five-star hotel. In addition to the hotel rooms and condos, the building is home to a casino, a handful of restaurants, real-estate offices, a spa, a gym, and multiple salons.
I spent a night in an executive suite at the JW Marriott and experienced Punta Pacifica's opulence firsthand.
A night at the JW Marriott felt like the ideal way to experience Panama's richest neighborhood. So, at 4 p.m., I arrived at the skyscraper and headed to the hotel's lobby on floor 16.
I received a key to my suite and headed to floor 31. Golden light cast across the room as I stepped inside. The suite had an open concept, with a shower and bathtub looking to Panama City's skyline.
According to TripAdvisor, standard rooms typically cost between $193 and $290 for a night. BI received a media rate for the room.
The same views could be seen from the king-size bed.
The suite was spacious, with two of the room's four walls lined with windows. A loveseat, table, and desk filled one area of the room. In another corner, a king-size bed called my name.
A balcony faced hundreds of condos and a sliver of ocean.
While TOC might be the most recognizable building in Punta Pacifica, it's far from the only condominium in the neighborhood.
A large balcony in my hotel room was just a few hundred feet away from other balconies. Below me, I spotted a bright blue pool, a parking garage, and a playground for the neighborhood children.
Hotel guests have access to amenities like a gym and spa. Plus, they can access other parts of the building, like the casino on the top floors.
Before the sun sank below the horizon, Moises Muñoz, the international sales manager at the JW Marriott Panama, gave me a tour of the building.
He compared it to a cruise ship, where everything you need is in one place.
We explored the commercial area downstairs, where real-estate offices, restaurants, salons, and businesses are located.
Inside the hotel, there's a spa and gym, which both hotel and condo guests can use. The Marriott is also home to the restaurant Masi and a Cava 15, a bar designed in conjunction with Louis Vuitton, Muñoz said.
The most impressive part was the infinity pools with seamless views out onto the ocean.
While luxury details such as a glass elevator and executive lounge heightened the stay, the most impressive part of the hotel was its two infinity pools.
Later that evening, I dined on fresh ceviche at the hotel's restaurant Masi.
While it was tempting to order room service and dine on my meal from the luxury of my executive suite, the lush oasis at the hotel's Masi restaurant called my name.
The restaurant serves Panamanian and Latin American cuisine. I ordered a trio of different ceviches alongside a pumpkin dish. Each bite had the ideal balance of citrusy and fresh flavors.
Before I went to bed that night, I noticed that only a handful of the hundreds of condos had their lights on.
McGowan explained that many of Punta Pacifica's condo owners don't live there year-round. Instead, it's a second, third, or even fourth home for the residents.
They might escape to Punta Pacifica during the winter or stay for a few weeks at a time. McGowan also added that most of Punta Pacifica's residents are foreigners.
McGowan said that even with its past, The Ocean Club is still one of the most luxurious condominium towers in the country.
McGowan said the building remains one of Punta Pacifica's luxury staples, adding that owning a condo there is like living in a high-end hotel.
Later, I explored the rest of the neighborhood.
Stepping outside the hotel, it was impossible to know the ocean was just a few hundred feet away. Instead, nearly every direction was filled with skyscrapers.
As I explored the small neighborhood, I spotted just a handful of stores and restaurants.
I covered most of the neighborhood in less than an hour. Along the way, I spotted dog parks with designer pooches, pristine playgrounds for children, and lobbies with spiraling staircases and impressive chandeliers.
It was clear that the area oozed wealth.
McGowan said that while it's a dense area, it often feels like a quiet neighborhood.
"I love this neighborhood," McGowan said. "I don't think I would move to another neighborhood in Panama City. This is the neighborhood I consider home."
Punta Pacifica has everything McGowan needs. There are stores, some of the city's top restaurants, and the ocean just around the corner. Everything is within walking distance, and McGowan has gotten to know his neighbors there.
"I bought myself a new car in August. I was driving it yesterday morning, and when I looked the car had 2,100 kilometers on it," he said.
And if he does need to drive, McGowan said Punta Pacifica is close to other popular areas in Panama. You're a short drive to Casco Viejo and other downtown parts of Panama City.
To wrap up my exploration, I headed to the most luxurious part of Punta Pacifica: the Ocean Reef Islands.
A short, narrow bridge leads to two small artificial islands, where the most expensive properties in Punta Pacifica are located.
"Ocean Reef Islands, today, is Panama's most expensive neighborhood in price per square meter," McGowan said, adding that the average price per square meter there is $7,000.
The man-made islands cater to Panama's ultrawealthy residents.
According to The New York Times , Empresas ICA announced plans to construct the two islands in 1998, around the same time the creation of Punta Pacifica was announced. Grupo Los Pueblos, a Panamanian company, was hired by Empresas ICA as the project's developer.
The project was largely completed in 2016, McGowan said.
"It is more expensive because they had to create the islands," McGowan said. "So the land itself has more value."
My walk was cut short; only residents and guests could enter the islands. McGowan painted a picture of the area for me.
He said the two islands have a slightly different feel because they're zoned differently.
One island is predominantly zoned for homes, while the second has more condominiums with taller buildings.
Currently, McGowan said the developers are in the last stage of the project, which is building the commercial component of Ocean Reef. This will include stores, restaurants, spas, and fitness centers.
These operations are catered to and supported by the island's residents since no one else can visit.
Between the islands is the yacht club and marina, which McGowan called the "jewel of the island." On a typical workday, the marina is teeming with yachts. Come Saturday, however, the island is deserted, with its yacht owners all out exploring nearby islands.
Ultimately, McGowan said the Ocean Reef Islands offer a tropical escape from Panama's bustling city life.
McGowan said stepping onto Ocean Reef Islands is peaceful. There's always a breeze, and bird songs fill the air.
"You really do feel like you're on a tropical island," McGowan said. "But you turn your head and look back to the city and see a massive skyline."
It's the best of both worlds, McGowan said.
Between yacht clubs and infinity pools, a night in Punta Pacifica highlighted how the city's wealthy live.
After less than 24 hours in the neighborhood, I tasted fresh ceviche, swam in the most luxurious pool of my life, and saw impressive condos people spent years dreaming of.
It's easy to see how this neighborhood earned its reputation as the Miami of Panama, but just as McGowan said, the neighborhood is truly its own unique oasis.
And you have to visit to experience it.
- Main content
- Updated Terms of Use
- New Privacy Policy
- Your Privacy Choices
- Closed Captioning Policy
Quotes displayed in real-time or delayed by at least 15 minutes. Market data provided by Factset . Powered and implemented by FactSet Digital Solutions . Legal Statement .
This material may not be published, broadcast, rewritten, or redistributed. ©2024 FOX News Network, LLC. All rights reserved. FAQ - New Privacy Policy
Cruise line offers retirees concerned about inflation a 'new way of life'
Retirees worried about inflation, cost of living are invited to sail on the odyssey cruise.

Cruise company facing biggest hiring challenge in decades, CEO says
UnCruise Adventures founder and CEO Dan Blanchard discuss post-pandemic travel demands on 'The Claman Countdown.'
A luxury cruiseliner is now offering retirees the chance to live on its ships and travel the world for a flat sum – and it may be more economical than keeping a home.
Villa Vie Residences's new Endless Horizons program requires a one-time payment of $299,999 for single-occupancy. For a double-occupancy cabin, the price increases to $499,999.
Passengers will sail on the Villa Vie Odyssey ship, which embarks on a seven-continent adventure on May 30. The ship is currently docked in Belfast, Northern Ireland.
In a press release, the company explained that the "lifetime access" deal caters to individuals who "envision their retirement years as a time for exploration and personal growth."
NOROVIRUS OUTBREAKS LINKED TO 2 CRUISE SHIPS WITH OVER 150 INFECTED

A luxury cruiseliner is now offering retirees the chance to travel the world for the rest of their lives. (iStock / iStock)
"Villa Vie Residences makes this possible by combining the comforts of home with the excitement of travel," the statement explained.
"Residents will enjoy a guaranteed Outside Cabin and access to more than 50 active interest groups ranging from culinary arts to fitness and purposeful exploration, ensuring a vibrant and engaging community atmosphere."
CARNIVAL FREEDOM PASSENGER ONBOARD DURING FIRE RECOUNTS ‘DANGEROUS, TERRIFYING’ EXPERIENCE
For budget-conscious seniors who are concerned about rising inflation and the cost of maintaining a home, Villa Vie Residences believes that the Endless Horizons may be the right fit for them.

The Endless Horizons program is primarily aimed at retirees who would prefer living on a cruise than in their homes. (Villa Vie Residences via PR Newswire / Fox News)
"One aspect most people nearing retirement age are concerned about is ongoing living expenses and the possibility of outliving their savings," Chief Operating Officer of Villa Vie Residences Kathy Villalba said in a statement. "This program eliminates that concern altogether while offering the ultimate dream: exploring every corner of the world by sea."
CLICK HERE TO SIGN UP FOR OUR LIFESTYLE NEWSLETTER
Chief Executive Officer of Villa Vie Residences Mikael Petterson explained that his business's mission is to "offer a seamless solution for those looking to retire on a fixed budget to never worry about ongoing expenses again."
"This is more than just a travel opportunity; it's a new way of life," he said. "For less than the price of an average home, you can secure a lifetime of experiences."

Tickets on Villa Vie Residences' Odyssey ship range from $300k to half a million. (Villa Vie Residences via PR Newswire / Fox News)
CLICK HERE TO READ MORE ON FOX BUSINESS
Information about booking is available on Villa Vie Residences' website. Fox Business reached out to Villa Vie Residences for a statement, but did not immediately hear back.
For more Lifestyle articles, visit foxbusiness.com/lifestyle.
NEWS... BUT NOT AS YOU KNOW IT
Jurgen Klopp leads chant for new Liverpool manager Arne Slot in emotional farewell speech

Share this with

Jurgen Klopp led the Anfield crowd in a chant for new Liverpool manager Arne Slot as he made an emotional farewell speech to his adoring fans.
The German took charge of the Reds for the last time in his brilliant nine-year stint on Sunday in a 2-0 win over Wolves.
It was a moving day at Anfield as the fans and players said goodbye to the iconic manager, but he quickly encouraged them all to support the man who is coming in to replace him.
Dutchman Slot is leaving Feyenoord for Liverpool and after listening to the supporters sing his name to the tune of Opus’ Live Is Life, he suggested the fans swap his name for the new manager’s.
‘I saw a lot of people crying and it will happen to me tonight because I will miss people, that is clear,’ he said in a speech on the pitch.
‘But as well, change is good. We don’t know exactly what to expect, but if you move with the right attitude everything will be fine because the basics are 100 per cent there and that’s the team and the new manager.
‘You don’t give a s**t what I want you to sing, I know. But I have an idea. I heard the song today a few times, so let’s see how the response will be. Arne Slot! Na, na, na, na na.’

Starting his speech to the Anfield fans, Klopp said: ‘I’m so happy I can’t believe it. I’m so happy about you all, about the atmosphere, about the game, about being part of this family. About us! How we celebrated this day, it’s just incredible, thank you so much!
‘It doesn’t feel like an end, it feels like a start because today I saw a football team playing full of talent, full of youth, full of creativity, full of desire.
‘That’s one part of development, that’s what you need obviously. People told me that I turned them from doubters into believers, that’s not true, believing is an active act, you have to do it yourself. I just said you had to, but you did it, that’s a big difference.

‘Nobody tells you now to stop you believing. This club is now in a better moment since a long time. We have this wonderful stadium, wonderful training centre and you [the fans], the super power of world football!
‘We decide if we are worried of excited. We decide if we believe or we don’t trust. We decide if we trust or don’t trust. Since today I am one of you and I keep believing in you. I stay a believer 100 per cent.’

The game was about as routine as it could have been for Klopp on his last day in charge of the team, with his side running out very comfortable winners.
Nelson Semedo’s straight red card for a lunge on Alexis Mac Allister helped the home side out and they were 2-0 ahead by half-time.
Mac Allister headed home the first to put the Reds ahead on 34 minutes, before Jarell Quansah bundled home a second six minutes later.
The second half saw Liverpool miss a string of good chances to extend their lead, while Wolves also had opportunities but never really looked like ruining Klopp’s day.
For more stories like this, check our sport page .
Follow Metro Sport for the latest news on Facebook , Twitter and Instagram .
MORE : Arsenal fans fooled by rumours of a West Ham equaliser vs Man City
MORE : Bayer Leverkusen aim subtle dig at Arsenal after missing out on Premier League title
MORE : Virgil van Dijk sends emotional message to departing Jurgen Klopp

Get us in your feed
Press Herald
Account Subscription: ACTIVE
Questions about your account? Our customer service team can be reached at [email protected] during business hours at (207) 791-6000 .
Garden tours, plants sales and more ways to spend time among flowers
Visit Maine's botanical gardens or get a sneak peek of what your neighbors are growing in their back yards.

You are able to gift 5 more articles this month.
Anyone can access the link you share with no account required. Learn more .
With a Press Herald subscription, you can gift 5 articles each month.
It looks like you do not have any active subscriptions. To get one, go to the subscriptions page .
Loading....
One of the loveliest ways to ease yourself fully out of the post-winter blahs and into springtime is to quit being a wallflower and instead surround yourself with living, blooming plants.
From botanical gardens to plant sales and garden tours, it’s time to make like the Scarecrow in “The Wizard of Oz” and while away the hours, conferring with flowers.

The waterfall at Coastal Maine Botanical Gardens in Boothbay. Photo by Tory Paxson, Courtesy of Coastal Maine Botanical Gardens
TOTALLY BOTANICAL
Coastal Maine Botanical Gardens in Boothbay is open for the season, daily from 9 a.m. to 5 p.m. Maine Days are May 31 to June 2, when anyone with a Maine driver’s license or state ID gets in for free. Ditto for dads/father figures on Father’s Day (June 16). Advance registration is required. With more than 300 acres of gardens and natural spaces, including a waterfall, there will be plenty to see, smell and bask in the scenery.
Here are more things to do in Boothbay

A tour group walks on the boardwalk at Viles Arboretum in Augusta. Joe Phelan/Kennebec Journal
Viles Arboretum is a botanical garden in Augusta with 6 miles of trails and more than 20 botanical collections. It’s open daily from sunrise to sunset, and admission is free. There are 224 acres with all sorts of flora and fauna to discover. Leashed dogs are welcome, and the visitor center is open from 10:30 a.m. to 4:30 p.m. Wednesday through Saturday.
Viles Arboretum offers medicinal plant walks, and although the May 18 session is full, you can still register for the June 15 and Sept. 14 events, lead by herbalist, homeopath and flower essence practitioner Debra Bluth. Tickets are $25. Advertisement
The Mount Desert Land & Garden Preserve has four areas to explore on its property in Northeast Harbor: the Asticou Azelea Garden (dawn to dusk daily), the Abby Aldrich Rockefeller Garden (noon to 4 p.m. Tuesday through Sunday from July 9 to Sept. 8, reservations required), Thuya Garden (dawn to dusk daily, June 15 to Oct. 14) and Little Long Pond Natural Lands (hiking trails and carriage roads open dawn to dusk daily). On June 26, at the Wildflowers of Little Long Pond event, participants can wander around the garden’s fields and forest, spotting wildflowers along the way while practicing how to identify them.

Joyce Saltman, right, and Beth Anisbeck embrace a tree for 60 seconds during a tree hugging event sponsored by Portland Parks and Recreation, at Deering Oaks Park last year. Carl D. Walsh/Staff Photographer
TOURS AND MORE
2nd Annual Tree Hugging 11 a.m. to 1 p.m. Saturday. Deering Oaks Park, Portland. portlandmaine.gov The tree hugging is a family-friendly community gathering to celebrate Portland’s many trees. Park ranger Liz Collado will lead a sensory awakening and forest bathing session. Along with tree hugging, there will be a storytime, and you can touch a forestry truck and meet naturalist Noah Querido and Portland city arborist Mark Reiland. Just down the road, you’ll find Fessenden Park, on the corner of Brighton and Deering Avenues. The tulips have arrived, and it’s worth a visit to see them.
McLaughlin Garden Lilac Festival 10 a.m. to 4 p.m. May 24. McLaughlin Garden and Homestead, 97 Main St., South Paris, $5. mclaughlingardens.org You’ll find more than 125 varieties of lilacs at the McLaughlin Garden Lilac Festival. Explore on your own or take a guided tour led by a horticulturist. There will also be family-friendly activities, and you can shop for native and unusual plants.
4th annual Woodfords Community Garden Tour 1-4 p.m. June 8. Woodfords Corner Community in Back Cove, Deering Highlands, Oakdale and Deering Center, $20 suggested donation. woodfordscorner.org Presented by Friends of Woodfords Corner, this self-guided tour features at least 10 gardens. As you make your way down the list, you’ll find yourself pleasantly surprised by all of the hidden havens bursting with flowers, plants and impressive yardscaping elements.
Peony Society of Maine 23rd annual Garden Tour 10 a.m. to 3 p.m. June 8 and 15. Both tours start at 1348 Ohio St., Bangor, $5 donation. peonysocietyofmaine.net You’ll visit multiple gardens in Bangor, Winterport, Ripley and St. Albans, and your senses will be filled with countless peonies. A peony plant will be raffled off at the end of each tour. Advertisement
Hidden Gardens of Historic Bath 10 a.m. to 2 p.m. June 22. Sagadahoc Preservation Inc., 880 Washington St., Bath, $40. sagadahocpreservation.org The Hidden Gardens of Historic Bath house and garden tour features several homes in North Bath. Every stop on the tour will be a treat for your senses and may motivate you to make some of your own magic when you get back home.
Garden Conservancy Open Garden Days 10 a.m. to 4 p.m. June 29. Beckett Castle Rose Garden, Singles Road, Cape Elizabeth, $10. gardenconservancy.org You’ll see plenty of roses as well as ocean views at Beckett Castle, which sits right on the water, with views of five lighthouses. The castle was built in 1871, and its rose garden features more than 70 varieties of heirloom roses. A 50-foot stone tower doubles as the rose arbor entrance to the castle.
PICK A PLANT SALE
Tate House Museum’s Annual Plant and Herb Sale 9 a.m. to 1 p.m. May 18. Tate House Museum, 1267 Westbrook St., Portland, 207-774-6177. tatehouse.org The wide selection includes perennials divided from the museum’s 18th century reproduction garden. Visitors can also make their own “seed bombs” and get a sneak peak at a new installation by artist Ashley Page from 10 a.m. to noon.
Animal Refuge League of Greater Portland Spring Plant S ale 9 a.m. to 11 a.m. May 18, Animal Refuge League of Greater Portland, 217 Landing Road, Westbrook, 207-854-9771. arlgp.org Perennials, house plants and more will be on sale, and plants that don’t have specific pricing are “name your own fee.” Anyone interested in donating plants or pots to the sale should send a message to [email protected] .
Taking Root Plant Sale 9 a.m. to 1 p.m. June 1, Tom Settlemire Community Garden, Maurice Drive, Brunswick, 207-729-7694. btlt.org This annual sale is organized by the Brunswick-Topsham Land Trust. Proceeds benefit the Common Good Garden, which provides food and gardening education for the Mid Coast Hunger Prevention Program. Master gardeners will be on hand to help shoppers choose their best options.
Scarborough Land Trust Native Plant Sale and Spring Festival 9 a.m. to 1 p.m. June 1, Broadturn Farm, 388 Broadturn Road, Scarborough, 207-289-1199. scarboroughlandtrust.org Visitors will find native plants, food vendors, local artisans, guided nature walks and activities for kids. To preorder plants, visit the Scarborough Land Trust website.
Maine Audubon Society Native Plants Sale and Festival 9 a.m. to 3 p.m., June 8, Gilsland Farm Audubon Center, 20 Gilsland Farm Road, Falmouth, 207-781-2330. maineaudubon.org More than 75 species of native wildflowers, shrubs and tree seedlings will be available, along with workshops, info tables and experts.
Staff writer Megan Gray contributed to this report.
Related Headlines
Headed to Coastal Maine Botanical Gardens? Here’s what else to check out in Boothbay
Success. Please wait for the page to reload. If the page does not reload within 5 seconds, please refresh the page.
Enter your email and password to access comments.
Forgot Password?
Don't have a commenting profile? Create one.
Hi, to comment on stories you must create a commenting profile . This profile is in addition to your subscription and website login. Already have a commenting profile? Login .
Invalid username/password.
Please check your email to confirm and complete your registration.
Create a commenting profile by providing an email address, password and display name. You will receive an email to complete the registration. Please note the display name will appear on screen when you participate.
Already registered? Log in to join the discussion.
Only subscribers are eligible to post comments. Please subscribe or login first for digital access. Here’s why .
Use the form below to reset your password. When you've submitted your account email, we will send an email with a reset code.
Send questions/comments to the editors.
Member Log In
Please enter your username and password below. Already a subscriber but don't have one? Click here .
Not a subscriber? Click here to see your options
IMAGES
VIDEO
COMMENTS
As its name suggests, this line is a way of watching over the life of the sailor. It is a line (strap, cable, rope...) stretched from the stern to the bow of the boat.The crew member who has to move towards the mast foot or the foredeck hangs the carabiner of his harness lanyard on it. This way, without unhooking, he will be able to stay connected to the boat all along his displacement.
Sizing Lifeline Wire. Racing sailboats should follow the World Sailing Offshore Special Regulations 3.14.6, which are summarized as follows: Up to 28' LOA—1/8" wire; 28-43' LOA—5/32" wire; 43' LOA and up—3/16" wire. These sizes are minimums; you can use larger sizes. 5/32" wire is not common in the US, but West Marine Rigging offers it on ...
Know how: Replacing Lifelines. As with so many other things on our 1987 Pearson 39-2 project boat, the lifelines looked to be original equipment. Made of vinyl-coated 3/16in 7x7 stainless steel wire, they were bleeding rust where the sheathing had cracked, and it was obvious they needed to be replaced.
Lifeline Netting 24 - 32" in Height. Stanchion Eye for 1" x .065 Wall Tube Stainless Steel. Lifeline Base Stainless Steel. Stanchion Sleeve with Eye for 1" OD Tube Stainless Steel. Suncor® Quick Attach™ Wedge Kit 3/16". Wire Rope 7x7 Stainless Steel 3/16" Vinyl Coated to 5/16". Suncor® Quick Attach™ Lifeline Kit Without Gate.
sailing. lifelines & terminals. CONTACT WEST MARINE. Live Chat. 1-800-262-8464. Store Locator. Shop the best selection of Lifelines & Terminals from West Marine. Visit for products, prices, deals and more!
Stanchion height and placement, line spacing (both horizontally and vertically), tension, deflection, toerails, etc. all need to be carefully considered. For professional installation or to discuss your own lifelines, email us at [email protected] or call us at 619-223-3788. We always look forward to hearing from you!
1.A wrap of tape around the lifeline prevents the hitch from sliding. 2. Dacron lashing (with chafe gear) can be tensioned. 3. The orange line is the new, high lifeline on our test cat. Darrell Nicholson. Practical Sailor has been independently testing and reporting on sailboats and sailing gear for more than 50 years.
Part 2 lifelines installed on sailboat DIYPart 1 https://youtu.be/-qf4s0V_BZI whats in the box Suncor https://suncorstainless.com/ Subscribe now! Don't miss ...
We will show you how to inspect & prepare your lifelines for measurement, the tools needed, and how to properly measure for replacement.
How to install Dyneema lifelines. January 22, 2021 goldenstate. Summary. I replaced the aged stainless steel cable lifelines on my boat with Dyneema synthetic lines. The total cost was around $600 and I learned how to eye splice a single braid rope. It took a total of about 8 hours to install the lines.
On the typical 40-footer, the upper lifeline is made of vinyl-coated wire with a base wire diameter of 3/16″, and an outside diameter of 5/16″. The lower lifeline is often smaller in diameter: 1/8″ coated wire, with an OD of just under 1/4″. The two wires combined typically retail for about $2.20 per running foot, or $176 for the wire ...
Captain John with 25+ years of experience shows you the no-nonsense cruising skills you need for safer sailing worldwide. Visit his website at https://www.sk...
1-45 results of 117. 1. 2. 3. Fisheries Supply is your premier supplier of sailboat lifeline fittings from top brands. We stock a full range of quality lifeline turnbuckles, pelican hooks, gate eyes, wire, rigging terminals and even lifeline kits if you want to DIY. We also offer a complete range of splicing and swaging services if you prefer ...
When all was said and done, I replaced my lifelines with Dyneema line, with chafe guards where necessary. Roger Hughes. The vinyl-coated wire lifelines on my 1977 Downeaster 45 schooner, Britannia, were well past their prime.Sections of the vinyl coating had faded into a dull brown—with parts chafed and cracked, exposing the wire—and many of the chrome fittings had lost their luster.
life lines. All swaged sailboat, power boat and yacht lifelines are assembled right here in our rigging shop. We use only the highest quality lifeline wire made 7x7 type 316 wire in our coated life lines never 7x19 or 1x19 wire. Our uncoated life lines are 1x19 wire, all strand polished and type 316 stainless steel. We refuse to compromise ...
Sailboat lifelines should be tight enough so they only stretch about two inches when hit with a force of 11 pounds (4.98 kg). Lifelines must be tight to prevent falls in high wind, violent waves, and stormy weather in general. A lifeline that gives slack is useless and can not prevent falls. Read on to learn more about sailboat lifelines and ...
Insert the bare wire, making sure the cover is snug against the end of the terminal. The best way to ensure this is to cut the cover 1/16in short of the 1 3/4in mark. 6. Tighten the bolts alternately until you can't see daylight between the die blocks. 7. Loosen the bolts and move the terminal 1/8in for the next crimp.
The gates on the stern of our boat are so small that the long tail bury would overlap. Since the long tail is 72x the diameter, you have to either drop the diameter down or drop the tail (Evan Starzinger recommends at least 63x the diameter). While Dyneema has negligible stretch, it will have some twist in the line since it has been coiled.
We used a method of installing the lifeline netting by lashing the netting to the lifelines using leech line along the top and bottom of the netting. To determine the amount of leech line needed, take the perimeter measurement of the area where the line will be installed and multiply it by 2. Then, multiply the product by 1.6.
Rigging Only is a full rigging service shop and sailing store owned and operated by riggers. Our technicians are trouble shooting, problem solving, and repairing rigging on boats like yours everyday. All running rigging, standing rigging, life lines, and wire splices, are made right here in our rigging shop and have been for 27 years.
Life Lines Docking Trellis Kits Hot Cable Railing Kits Cable Assemblies Running Rigging Standing Rigging Sta-Lok Fittings (Mechanical Fittings) 316 - 1X19 Stain steel wire Club 420 Hunter 35.5 Beneteau First 235 Sonar Hobie 33 J 24 J 70 0 item(s) You have no items in your shopping cart. Accessories New
If your boat does not have gates, please measure 'A' from the eye of 'B' to the eye of 'D'. How To Measure Lifelines: 1) Measure both sides of the boat for lifeline dimensions. 2) Do not measure with ropes, use a tape measure. 3) Enter a brief description of lifeline set-up from forward to aft. Please note fittings needed and any special ...
Boat Stanchions and lifelines from Bosun Supplies including marine hardware. 443-214-9246 443-214-9246 Categories. Stainless Steel Shackles. USA Made Anchor Shackle With Screw Pin; USA Made Round Pin Anchor Shackle; Anchor Shackle; Bolt Chain Shackle; Bow Shackle; Chain Shackle;
2 Surging a line. Using the warps, such as a midships line, is an effective way to bring a large boat alongside, but it needs both sensitive use of the throttle and sensitive line handling.
18 May 2024 10:00pm. Hundreds of Chinese citizens camp out in the California desert, waiting to be taken into custody by US Border Patrol. Meanwhile, in Ecuador, more of their compatriots are ...
A short, narrow bridge leads to two small artificial islands, where the most expensive properties in Punta Pacifica are located. "Ocean Reef Islands, today, is Panama's most expensive neighborhood ...
Villa Vie Residences's new Endless Horizons program requires a one-time payment of $299,999 for single-occupancy. For a double-occupancy cabin, the price increases to $499,999. Passengers will ...
Jurgen Klopp led the Anfield crowd in a chant for new Liverpool manager Arne Slot as he made an emotional farewell speech to his adoring fans. The German took charge of the Reds for the last time ...
Maine Audubon Society Native Plants Sale and Festival. 9 a.m. to 3 p.m., June 8, Gilsland Farm Audubon Center, 20 Gilsland Farm Road, Falmouth, 207-781-2330. maineaudubon.org. More than 75 species ...