- Multihull Sailor
- Real Estate
- Maintenance & Hardware
- Water Sports

The Best Boat Paints to Decorate and Repair Your Ride

No matter what type of boat you own, painting it and adding a bit of personal flair is always fun. Whether you choose to add a colorful stripe to the side or repaint the entire boat’s body, using high-quality, durable, and long-lasting paint is essential. Regardless of how you choose to paint your boat, you first need to decide on the right boat paint for your DIY project. To help you out, we've collected the best boat paints of 2024. The classic TotalBoat Boat Paint is our top pick, and you can check out our buying guide and other recommendations to learn more!
Our Top Picks For Boat Paints
- Best Overall: TotalBoat Boat Paint Shop Now ➔
- Easiest To Use: Duralux Boat Paint Shop Now ➔
- Quick Drying: Rust-Oleum Boat Paint Shop Now ➔
- Best Colors: Marine Coat One Gel Repair Kit Shop Now ➔
- 1 The Types of Boat Paint
- 2 Topside boat paint
- 3 Bottom paint
- 4 Wood boat paint
- 5 Tips When Using Boat Paint
- 6 Use the right type of paint
- 7 Follow the instructions carefully
- 8 Give ample time for the paint to dry
- 9 Choose the right colors
Can boat paint be used on all parts of the boat?
When should i paint my boat, does boat paint last forever, related articles, the best boat paints of 2024, best overall.

TotalBoat Boat Paint
Boats are almost always left exposed to the elements, which is why you’ll want a boat paint that will last you for years to come. The TotalBoat Boat Paint is a solid choice for any boat lover and has more than 20 colors to choose from, including aqua mist, sea foam, and fire red. The paint leaves behind a gloss that’s bright and is sure to stand out among other boats at the dock. This boat paint is incredibly easy and simple to apply. You don’t need to be an expert to give your boat a good coating with this seamless paint. Thanks to this boat paint’s bold profile and numerous color options, we’ve chosen it as our best overall pick, particularly for those who want to try painting their boat for the first time.
- Glossy and durable finish
- Up to 20 colors to choose from
- Self-leveling formula
- Not all colors are always available
Easiest To Use

Duralux Boat Paint
For many, painting a boat can be a risky endeavor. Owning a boat isn’t very cheap, and making a mistake during the paint job can lead to stains and errors that are difficult to fix. So, unless you can afford professional help, you may not want to take the plunge. Fortunately, painting a boat isn’t rocket science and with the help of the Duralux Boat Paint, it can be a fun and easy task. The paint only needs two thin coats with either a brush, roller, or airless sprayer. As long as you don’t paint your boat under the sun, you’ll get consistent and reliable results with this paint. The range of colors is a little bit limiting, but if you can get past that this boat paint is a strong first choice for novice boat owners.
- Very easy to apply
- Can be applied with various tools
- Long-lasting finish
- No warm color options available
Quick Drying

Rust-Oleum Boat Paint
Are you pressed for time or just itching to head into the water as soon as possible? The Rust-Oleum Boat Paint offers a quick and easy solution to all your problems. This paint dries in as little as one or two hours, which means you can start boating on the very same day you apply the paint. With a formula that retains its gloss over time, your boat will look as good as new for months or years to come depending on how you maintain it. While this boat paint only offers eight color options, it has a nice range of colors and most boaters are sure to find exactly what they’re looking for. If you’re okay with neutral color tones, such as sand beige or battleship gray, this fast-drying boat paint is a great investment.
- Dries very quickly
- Retains its gloss
- Great for use on fiberglass
- Not many color options
Best Colors

Marine Coat One Gel Repair Kit
With an easy-to-use formula and fast-drying properties, this gel coat will make your DIY boat project into an effortless task. Its versatile nature extends beyond boats, making it a perfect choice for fiberglass and other materials as well.
The real charm of Marine Coat One is its ability to create perfect color matches, bringing a fresh, vibrant look to your ride. Mix it up to get your preferred shade and watch as your boat wears a new, sparkling look. And it’s not just about aesthetics, it’s about enhancing durability too. So, if you’re looking forward to a sailing season with a boat that looks brand new and stands strong, this might just be your best bet.
- Easy to mix and apply
- Durable and long-lasting
- Provides a good color match
- Instructions are not novice-friendly
The Ultimate Buying Guide to the Best Boat Paints
When launching a boat renovation project, there’s a lot to keep in mind, such as boat carpets , boat seats , boat cushions , and more. But the most important element of all is boat paint. To renovate your boat, you’re going to need more than just regular old paint. Enter boat paint, a unique type of paint that is durable enough to stick to a boat in water. Boat paint usually leaves behind a glossy finish that gives your vehicle a nice tone that really pops when out on the water.
Because boat paint is made to last, you can expect a coating to stay in good condition for months or even years to come. How long your boat paint lasts will vary depending on how often you use your boat, where you’re boating, and how you store your boat when not in the water. There’s a lot to consider when buying boat point, so we’ve prepared a guide to help you out.
The Types of Boat Paint
Topside boat paint.
Topside paint is paint that’s applied on the top half of the boat, or the part of the boat that isn’t submerged in the water. While this type of paint can get wet, it’s used mostly for decorative purposes rather than protective purposes. You can get topside paint in a variety of colors and they can dry as quickly as one hour after application depending on the formula.
While topside paint may not be as protective as bottom boat paint, it’s still great for keeping your boat protected from harsh UV rays. Even your boat can feel the effects of the sun after weeks or months of exposure and a good coating of topside paint can prevent any UV damage from occurring on your boat’s hull.
Bottom paint
Bottom paint is a type of paint that’s applied to the bottom half of the boat, or the part of the boat that’s submerged underwater. This type of paint isn’t always visible as it’s under the water, but depending on how clear the water is you may be able to get a glimpse of it. Where bottom paint truly shines is in its ability to protect the boat from organisms in the water.
There are many critters in seas and lakes that can cause damage to your boat over time. Weeds and barnacles are some of the most common culprits. Bottom paint minimizes the chances of these critters from getting on your boat, ensuring it stays in good condition for much longer.
Wood boat paint
Wood boat paint is a type of paint that’s applied to wooden parts of the boat. These paints are not as long-lasting as other paints but are great if you want to preserve the wood finish on your boat.
Tips When Using Boat Paint
Use the right type of paint.
There are many types of boat paints that are used for certain applications. Before you think about the color or finish of the paint, first consider where you’re applying the paint. Are you trying to protect the bottom of your boat? Will you be adding color to the topside? Ask yourself these questions before buying so you can be sure to choose the correct type of paint, then you can choose the color.
Follow the instructions carefully
Paint is pretty easy to use and apply, but not all paints are the same. Depending on the formula of the paint, you may need to apply it a certain way or use specific tools for the best results. Even if you have experience painting walls, floors, or other surfaces, boats are a different thing entirely. You should always follow the instructions on the product packaging.
Give ample time for the paint to dry
Some paint formulas take overnight to dry, while others take only one or two hours. While you may be tempted to take the boat out for a ride as soon as the recommended drying time is over, it never hurts to wait one or two more hours just to be on the safe side. Unless you can comb over every inch of where you painted, it’s always a good idea to give the paint just a little extra time to dry. After all, the paint will be there for months or even years to come, so an extra hour won’t hurt.
Choose the right colors
Choosing the right colors for your boat paint can be a tricky task depending on how you want the paint to look. If you’re looking to simply paint over some scratches, it’s not too difficult to find the right color, but if you want to redecorate the hull that’s a different story. Think about what colors you like and how you want your boat to look. You may also want to consider the location itself, or where you plan on using the boat. These considerations may be trivial, but they’re worth thinking about if you want your boat to look nice in the end.
People Also Asked
No. There are certain types of boat paint used for specific parts of the boat, such as the topside or bottom.
If you feel like your boat could use a new paint job or if your boat has scratches from damage done by docking, it may be time to repaint your boat.
While boat paint formulas are made to last for as long as possible, these paints do not last forever and you will eventually have to apply another coat in the future.
Article Contributors
Sail magazine review team.
SAIL Magazine Review Team reports on best-selling products in sailing and boating. SAIL Magazine is reader-supported: When you buy through links on our site, we may earn an affiliate commission. Artificial Intelligence (large language models) may have been used in the research and creation of the content.
To ensure questions about product testing or a specific article are addressed, please contact [email protected]
How To Paint A Sailboat: A Complete Guide

Whether you’re new to owning a sailboat or not, you have likely put some thought into painting your boat yourself. It is important to keep your boat well painted as it can save you a lot of money in the long run. It can also save you a lot of money if you choose to paint your boat yourself.
Whether or not this is the first time you have painted your boat, you will still find this article useful. It has lots of tips and tricks for making sure you get the job done and get it done well. Hiring a professional may be easier, but there is a sense of pride and accomplishment in doing it yourself. If you use this article as a reference, you can’t go wrong.
Table of contents
Why is it important to paint your sailboat?
Painting your boat is not just an excuse to put some creative flair into your boat, it is an important process in keeping the boat safe. Safe from salt, safe from barnacles, and safe from damage. The paint acts as a vital protective layer, without it your boat will be vulnerable to all kinds of damage. If you have a wooden hull, this protective layer will keep the wood from rotting. It can also plug any minuscule holes that might allow sea life and salt to make its way into the body of the boat.
There is also, of course, the added benefit of having a boat that looks good . A boat is a point of pride and should be treated as such. Having a glossy looking boat is something to be proud of. Most boats are not painted far above the waterline, so it is even an opportunity to make your boat stand out. Some people also believe that painting a boat brings good luck. Unless of course, you paint it green, green is thought to bring bad luck. Whether or not you believe that is up to you.
What are the benefits of painting your boat yourself?
When it comes to painting your boat there are only two options. Hire a professional boat painting contractor, or bite the bullet and do it yourself. They both have their pros and cons, of course, but there is so much more to be gained by doing it yourself. First of all, painting your boat yourself is just as fun as it is difficult. Learning to paint is a valuable life skill that you won’t regret learning as early on in your sailing career as possible. If you can learn to paint your boat now, you will save yourself a small fortune in the long run.
Hiring a contractor is expensive, to say the least, it may be faster and easier overall, but the extra cost can make it simply not feasible. Or simply unappealing. If this is the first time you are painting your sailboat you will need to make a one-off purchase of all the equipment needed for prepping, painting, and finishing the boat. After these one-off purchases are out of the way, you will only need to buy paint and new rollers the next time. Even if you need to buy all the equipment brand new, it can be cheaper than hiring someone else to do the job for you.
How often do you need to paint your sailboat?
The general rule of thumb for painting your boat is that it will need bottom paint about once a year. This is when you will need to take the boat completely out of the water and give it a fresh new coat. If your boat spends all of its time in the water, it certainly needs painting at least once a year. The saltwater is so corrosive that you shouldn’t let your boat go without a fresh coat of bottom paint for more than 2 years. Even if your boat only spends half its time in the water, and the other half on land, you will find that its best to keep its coat topped up.
The top paint, or the above waterline paint, doesn’t need painting anywhere near as often. It isn’t in direct contact with the seawater so it simply isn’t going to get eroded down as much. The salty sea spray can still be damaging over time so this paint should be re-done every 3 years. It can be more or less frequent depending on use and personal preference. Some people like to do above waterline paint yearly, with the rest of their boat, but it isn’t necessary.
What are the best paints to use for your sailboat?
There are plenty of great brands of paint out there, in various colors and shades, so you won’t struggle for choice. There are some things you might want to look for in your paint . For example, you may have noticed that a lot of boats tend to have red hulls. This isn’t just a fashion statement, and while red is supposed to bring luck this isn’t the main reason either. The reason is that this red/orange paint is perfect for added protection along the bottom of your boat.
This red/orange paint is interestingly chosen because it is, of course, traditional; but mostly because of its copper. The copper is actually what gives the paint its red/orange color.
Copper is perfect for the bottom of your boat for several reasons. First, copper acts as a biocide. It stops worms from making their way into the hull if your boat is wooden. If it is metal or fiberglass, it still has the benefit of stopping barnacles and other sea life from attaching themselves deep into the hull of the boat. Copper is also strong enough to hold up to scraping.
Scraping is when you scrape barnacles and other sea life off the hull of your boat. Scraping is an important part of keeping your boat in good condition. It is important to check with the marina or port authority whether or not you are allowed to scrape. If you scrape without permission you may find yourself on the receiving end of a hefty fine. The reason is that they don’t want you introducing invasive species on to the marina floor. This is mostly a problem when you are coming from somewhere vastly foreign, not sailing from New York to Chicago for example.
How many coats of paint does a sailboat need?
When painting your boat it’s a good idea to think about how many coats of paint you are going to need. There is no exact number that is needed, it is mostly to do with how well protected your boat needs to be and how much time you have on your hands. Every coat takes time and attention to detail.
If you choose to do four coats of paint it is going to be time-consuming but very well protected. That being said, the minimum number of coats is two. One is not enough. If your boat only spends part of the time in the water, two to three coats are plenty.
If you are someone who lives on their boat full-time, or at least most of the time, you may want to do more coats. Three, maybe even four, might be ideal here. The reason is that first, your boat is going to experience way more wear and tear than one that is just an ocean part-timer. And second, taking out your boat (which is also your home) is a giant hassle. It is a tedious process, so doing it as infrequently as possible is probably in your best interest. More coats last longer. When you are sailing from place to place, finding somewhere to take your boat out of the water and perform this maintenance is inconvenient. You want to be doing it as little as possible.
What safety precautions do I need to take when painting my sailboat?
All paint can be toxic when inhaled. Even if it is “non-toxic” paint it is going to be harmful to your lungs. They aren’t meant to inhale anything but air, even non-toxic paint is going to be bad for them. This is why it is important to wear a face mask.
Your mask should be specifically for painting, not surgical masks or other cheap medial masks. They are not going to be strong enough, with a fine enough air filter. Whether you feel the need to wear eyewear is up to you during the painting process.
Before the painting begins, when you are scraping and sanding, it is a good idea to wear some goggles to keep debris and splinters out of your eyes. It is also a good idea to wear gloves. You don’t want to rough your hands up too much, they need protection from not only the paint but splinters and sharp pieces of metal.
Painting a boat can be dangerous work. Without taking the proper safety precautions you are putting yourself at unnecessary risk. This safety equipment costs just a few bucks and is equally important as any of the other tools needed to paint your boat.
What tools do I need to paint a boat?
There is more to painting your boat than just using paint and a brush . You will also need tough sandpaper , potentially an angle grinder or welder , paint, primer , brushes, paint rollers , paint thinner , and solvent. You will need to make sure you have all of these things before you start painting. You can pick any of these items up at a boating goods store.
It is a good idea to bring some buckets with you for filling with water, both for rinsing off your boat and your brushes. All of your safety equipment needs to be brought too.
If this is your first time painting your boat yourself, you may find you need to buy all of these things at once. That can be a lot to stomach when its all in one go, luckily, most of these tools and equipment can be reused. Besides, it is still going to be far cheaper than hiring someone to do it for you. All of this equipment is an investment in your boat.
How to paint a sailboat
Whether this is the first time you have painted your boat or not, you may find some of the tips in this next section useful. Painting your sailboat may be tricky at first, but over time you will get the hang of it. The problem with painting your boat is that it can be a very expensive mistake if you get it wrong.
It is important to read this guide carefully, take your time, and make sure you do the job properly. It may be slow going at first, speed will come over time. Once you have gathered all of your safety equipment and tools you are ready to get started.
The workspace
First of all, you need to ensure you have the right workspace. You cant paint your boat in the water so you are going to need to find somewhere to do your work. This is easy enough if you don’t live on your boat full time, take the boat to your house and do your painting on the driveway. If this isn’t an option because you don’t have space or live on your boat full time, you are going to need to rent somewhere. There are typically places affiliated with the marina that you can use. In some cases, these even come with a majority of the equipment you will need. This, of course, drums up the price a bit, but that’s unavoidable.
Your workspace needs to be well ventilated, or you risk making yourself very sick. Both from paint fumes, rubbing alcohol fumes, and fine matter from when you sand the hull down. This means painting your boat in your garage, if it even fits, is not always the best idea. If you do decide to paint outside, it is important to consider the chance of rain. Of course, your boat is pretty waterproof, but once you begin sanding rain might damage the wood if left to sit there.
Before you do anything else, it is important to look your boat over fully from top to bottom. You are looking for any bumps, scrapes, cracks and general damage. This damage is not going to be noticeable while the boat is in the water, so just before you paint it is one of the only times you get to have a close look. Once you have made note of all this damage, it is time to get to work repairing it. Depending on just how severe this damage is, you may want to get help with this next stage.
All of this damage needs to be repaired before anything else can take place. Painting over these damaged areas is just going to hide the problem temporarily, the next time it comes to painting you will find they are far worse. If you don’t deal with this now, they are going to snowball into complicated and expensive repairs.
After your repairs are done it is time to start sanding. This is very time consuming as you need to do it three times. Per coat. First, take the 600 grit sandpaper and make your way around the boat. It is best to use electrical tape to mark out a section at a time so you don’t keep losing your place. After you have finished with the 600 grit sandpaper, it is time to move on to 800, then 1200. This process is important so you will be painting on as smooth a surface as possible. It is then a good idea to wipe the surfaces of the boat down with a damp cloth to remove any of the dust and flakes of metal/wood. Otherwise, you end up painting over them.
You could wash the boat down with a hose but you want to avoid getting the boat unnecessarily wet now that the hull has lost its protective layer. If you are sanding down a boat with a copper paint bottom, you may find the sanding process difficult. Just do your best, it doesn’t need to be 100% perfect. It is important to get as much of the old paint off as possible. Your new paint won’t adhere to the old paint as well as it would to the boat hull itself.
Putting on a layer of primer is not 100% necessary but it is recommended. The idea is that you want your topcoat to adhere to the boat as well as possible, a layer of primer can help you do that. The primer needs to be painted on evenly all over the boat. If you only feel like doing below the waterline, that is fine too. It will save you a lot of time. Putting on the layer of primer is not the most time-consuming part, it is mostly the sanding down that you will have to do. You will need to sand down using the 600 grit paper, then the 800, then 1200. Just like last time. Your layer of primer needs to be as smooth as possible for the maximum adhesion.
Now comes the paint. It is recommended to do at least two layers of paint. One undercoat and one top. Some people choose to go as far as two layers of primer, two layers of undercoat, and three layers of topcoat. This is going to be very time consuming, remember you will need to sand down three times between each layer of paint. You can paint using a brush if you like but is far easier to use a roller. It is also far easier if you employ someone to help you with this stage. It could be your spouse, child, friend, or anyone. It doesn’t need to be a paid professional. It can take a long time to go through this process. Especially if you are effectively doing 8 layers of paint (including primer).
The fastest way to paint, especially if you are on your own, is to use a sprayer. They are easy to use, with a little practice. If you haven’t used one before you may find that you struggle to get an even coat. You should always paint in vertical stripes, not horizontal. Additionally, it is a good idea to have someone following after you with a small brush doing small touch-up jobs. Any unevenness will need to be sanded down and repainted. The whole painting process can take a week if you aren’t efficient.
Take pictures
It is a good idea to take pictures throughout the whole process. This is for future reference. For example, if you take pictures of the boat when you are assessing it for damage, you can compare them to after you have repaired or sanded the trouble spots down. If you cant see the trouble spots still, great! If you can, it will help you keep an eye on them after you have painted too. It’s a good idea to catalog all of these areas if they start to become regular problems you may want to have your boat looked at by a mechanic. You might also like to have a before and after picture for your blog, or just as a personal memento.
Hopefully, you now have all the theory needed to paint your boat. There is a lot more that goes into painting your boat than simply grabbing some paint and a brush. It takes planning, practice, and attention to detail. If you follow this guide you will have no trouble at all. If this is your first time painting your boat, don’t be disheartened if it takes a lot longer than you expected. Speed will come with time, it is far more important to get the job done right than get it done quickly. If you put the work in you will be painting like a pro in no time at all.
Related Articles
Daniel Wade
I've personally had thousands of questions about sailing and sailboats over the years. As I learn and experience sailing, and the community, I share the answers that work and make sense to me, here on Life of Sailing.
by this author
Repairs and Maintenance
Most Recent

What Does "Sailing By The Lee" Mean?
October 3, 2023

The Best Sailing Schools And Programs: Reviews & Ratings
September 26, 2023
Important Legal Info
Lifeofsailing.com is a participant in the Amazon Services LLC Associates Program, an affiliate advertising program designed to provide a means for sites to earn advertising fees by advertising and linking to Amazon. This site also participates in other affiliate programs and is compensated for referring traffic and business to these companies.
Similar Posts

How To Choose The Right Sailing Instructor
August 16, 2023

Cost To Sail Around The World
May 16, 2023

Small Sailboat Sizes: A Complete Guide
October 30, 2022
Popular Posts

Best Liveaboard Catamaran Sailboats
December 28, 2023

Can a Novice Sail Around the World?
Elizabeth O'Malley
June 15, 2022

4 Best Electric Outboard Motors

How Long Did It Take The Vikings To Sail To England?

10 Best Sailboat Brands (And Why)
December 20, 2023

7 Best Places To Liveaboard A Sailboat
Get the best sailing content.
Top Rated Posts
© 2024 Life of Sailing Email: [email protected] Address: 11816 Inwood Rd #3024 Dallas, TX 75244 Disclaimer Privacy Policy
Boat Reviews
- Boats Specs
- Marine Pros
- Boat Insurance
- Boat Warranties
- Boat Transport
- Boat Towing
- Marine Forecasts
Your Ultimate Boating Resource
Sailing Smoothly: The Best Guide to Selecting the Perfect Bottom Paint for Your Boat

Maintaining your boat’s performance and longevity is deeply anchored in the choice of the right bottom paint. It’s not just about aesthetics; it’s about creating a shield against marine life that can slow you down.
Dive into this all-encompassing guide to discover how the right bottom paint, tailored to your boating lifestyle, can make a world of difference.
The Vital Role of Bottom Paint
Think of your boat’s hull as a warrior in constant battle against underwater foes. Without bottom paint, it’s vulnerable to fouling, which can lead to reduced speed and efficiency. The secret weapon? Bottom paint infused with biocides that repel these unwelcome guests, keeping your hull sleek and swift.
Exploring the Seas of Bottom Paint Choices
Navigating the world of bottom paints can be like sailing through uncharted waters. There’s hard paint for the long haul, ablative paint that gracefully wears away with use, and even eco-friendly options that embrace green sailing. Each type has its unique strengths, so your choice should reflect your nautical needs.
The Copper Conundrum
Copper-based paints have long been the go-to for their fouling-fighting prowess. But as we become more conscious of our environmental impact, it’s important to weigh the effectiveness against potential ecological concerns.
Tailoring Paint to Your Boating Style
Your boating habits are the compass that guides your choice of bottom paint. Whether you’re leisurely cruising or racing against the wind, there’s a paint that aligns perfectly with your aquatic adventures:
Cruising Boats
With sleek and sturdy boats, their hulls coated in durable paint, resist the corrosive forces of time and tide. These vessels offer unwavering protection, allowing you to sail confidently through any weather conditions.
Racing Boats
For those seeking speed, ablative paints provide a slick and clean surface that is crucial for cutting through the waves. Their sleek, streamlined bodies sliced through the water with precision and speed. Each boat was coated in a shimmering layer of ablative paint, creating a smooth and clean surface that was essential for achieving maximum velocity.
Factors to Navigate When Choosing Paint
The waters you sail, the material of your hull, and even local laws are crucial markers in your journey to the perfect paint:
As you glide through the vast expanse of ocean, the type of water beneath your boat plays a crucial role in determining the ideal paint for your vessel. The crystal clear waters of a freshwater lake call for a different coating than the salty waves of the open sea. And even the laws and regulations of the local area can impact your choice of paint.
Hull Material
Selecting the hull material for your boat is like choosing a vessel as a sailor. The material you choose will play a crucial role in determining which type of paint will adhere best and provide optimal protection for your boat. Think carefully about your options, for the material itself can greatly impact the performance and longevity of your watercraft on the open seas.
DIY or Professional
Taking on a DIY project can be both exciting and daunting. Are you confident in your skills to paint your own ship, or will you leave it to the professionals? Consider the type of paint you choose–some are more forgiving for those without professional experience. As you set out on this endeavor, envision yourself as a deckhand navigating rough seas, armed with your chosen brush and paint, ready to transform your ship into a masterpiece.
Local Rules of the Sea
As you sail the open sea, always keep a vigilant watch on the horizon for any local regulations that may dictate your voyage. Pay special attention to any restrictions regarding copper-based options, as they may affect your journey in unexpected ways. Stay informed and navigate confidently to ensure smooth sailing ahead.
Final Thoughts
Your boat is more than a vessel; it’s a testament to your passion for the sea. Choosing the right bottom paint is a crucial step in ensuring it remains your faithful companion on countless voyages. With a keen understanding of the types of bottom paint and a thoughtful consideration of your boating style and environment, you can set sail confidently, knowing your boat is as ready for adventure as you are. Keep your hull in prime condition, and the sea will always welcome you with open arms.
RELATED ARTICLES
Overview of the 2024 sea-doo rxp-x 325, overview of the 2024 parker offshore 2900 cc, what your boat’s beam is and why it matters, power cats of 2024: ultimate guide to the top power catamarans this year, navigating the heat: 10 safety tips for a safe boat ride in the summer heat, latest posts, don't miss, our newsletter.
Get the latest boating tips, fishing resources and featured products in your email from BoatingWorld.com!
What type of wood is used for pier pilings?
What is the difference between a dock and a floating pier, what is the proper technique for pulling a beginner wakeboarder, what does ‘no wake’ mean on a lake, what is the difference between wash and wake, highs, lows, and tidal know-how: a deep dive into ocean currents, 10 essential tips for fishing near private property, the benefits of using a drift sock: guidance for anglers, lure fishing: secrets for imitating live bait and attracting fish, explore the untapped depths of america’s best bass fishing spots, outboard motor maintenance: tips for keeping your engine in top shape, the essential boat tool kit: tools every boater needs, diy boat building: 8 tips and tricks for building your own vessel, the art of miniature maritime craftsmanship: ship in a bottle, antifouling paints: a guide to keeping your boat shipshape, beginner’s guide to standup paddle boarding: tips and techniques, boating for fitness: how to stay active on the water, kayak safety: how to stay safe on the water, anchoring in a kayak or canoe: how to secure your small boat, overview of the 2024 yamaha 252sd, overview of the 2024 tiara yachts 48 le, overview of the 2024 bass cat jaguar sts, 2024 pursuit os 445: an overview, 2024 aquila 47 molokai review, 2024 sea-doo switch 13 sport review, gear reviews, megabass oneten max lbo jerkbait review, fortress anchors fx-7 anchoring system review, fortress anchors fx-11 anchoring system review, fortress anchors commando anchor kit review, fortress anchors aluminum anchors review, stay in touch.
To be updated with all the latest news, offers and special announcements.
- Privacy Policy

Home » Blog » Sail » Boat bottom paint: choose the best antifouling paint for your boat
Boat bottom paint: choose the best antifouling paint for your boat
By Author Fiona McGlynn
Posted on Last updated: February 9, 2022
You’re perusing the chandlery looking for a gallon of boat bottom paint (a.k.a antifouling paint). You just want to get in, get out, and get on with painting your boat.
But you reach the paint aisle and are awash in choices and confounding terms : hard modified epoxy, premium ablative, water-based, photoactive, thin film … The shop assistant suggests one paint, but your marina neighbor swears by another brand.
You’re feeling defeated. What happened to the good old days of slapping on some tar with a paintbrush and calling it a day?
Welcome to the convoluted (and at times highly controversial) world of marine boat bottom paint!
Fortunately, antifouling paint is not all that complicated . We’ll walk you through the different types of paint, help you choose the right bottom paint for your boat, and list the best boat bottom paint brands in each category.
Note: This post contains affiliate links. If you purchase a product through a link on this site we will earn a small commission. All opinions are our own. Thanks for your support!

What is boat bottom paint?
Antifouling paint is a specialized paint that is applied below the waterline to inhibit the growth of weeds, slime, and animals (e.g., barnacles and tube worms).
All antifouling paints are made from a combination of these four components:
- Biocide (deters living organisms)
- Resin (keeps the paint together)
- Solvent (determines application characteristics and clean up/removal methods)
- Pigment (color and viscosity)
The differences in paints are based on the sources and mixes of these four elements .
For example, the softness or hardness of a paint is determined by the type, combination, and quantity of resin used in the mix. More on the differences between soft and hard paints later!
Do I need bottom paint on my boat?
For boats kept in the water for more than a week at a time, it is necessary to apply boat bottom paint to prevent growth of marine life (fouling).
Why would you bottom paint a boat?
Boat owners apply antifouling paint to the bottom of boats that are left in the water all season because it reduces the growth of marine life (fouling). Fouling not only reduces a boat’s performance but can also permanently damage the hull.
- Fouling can dramatically reduce a boat’s performance. A fouled bottom causes drag, which reduces fuel efficiency, speed, and handling, and can even cause a boat to sit lower in the water.
- Fouling can permanently damage the hull. In extreme cases, where marine growth has been left unchecked for extended periods of time, the “glue” produced by fouling critters can damage fiberglass and wooden boats.
How long does bottom paint last on a boat?
Depending on the marine life in your area, how you use your boat, and how often you clean your hull, you may need to apply antifouling paint anywhere from once a year to once every three years .
When should you bottom paint a boat?
Bottom paint may last one to three years, but you should check to see if it needs new paint, every year. If you see worn-through patches, flaking, blistering, corrosion, or any of the signs below, it’s time to repaint. Clean the bottom of your boat first, so you can see the condition of the paint.
• The paint has worn through. A common practice is to alternate boat bottom paint colors so you can clearly see when this has happened. • Flaking or blistering paint. When water gets under the paint (often around hardware) it can cause blistering and damage. If you see a fair bit of flaking or blistering, it’s time to repaint. • If you find yourself using abrasive tools and scrubbing to remove growth while cleaning your hull. Your dive service can also advise you on when it’s time for new paint. • If you notice performance issues , like reduced boat speed or handling and you have persistent growth on the hull. • Corrosion (if you have an aluminum boat). Aluminum doesn’t “rust”, though it does produce aluminum oxide which causes paint to flake off, exposing the aluminum underneath. • Your boat has been stored in the water for three seasons . Despite manufacturer claims to the contrary, most paint jobs don’t last more than three seasons.
A note on timing and temperature
Most boaters apply antifouling paint at the beginning of the season once temperatures have warmed up enough for the paint to dry. It’s important to know that paint will only dry under the right conditions (generally speaking 50-85 degrees F and below 65% humidity). It can be too cold, hot, or humid for the paint to cure, so read the manufacturer’s directions and choose your timing carefully.
Note that hard boat bottom paints lose their antifouling effectiveness when exposed to air so you would not want to apply hard paint in the winter and then store it out of the water for several months.
Types of boat bottom paint
Antifouling paints can generally be classified into three groups: s oft paints , hard paints , and hybrid paints. As mentioned previously, the difference between soft and hard paint is the type, combination, and quantity of resin used in the mix.
Ablative bottom paint
Soft bottom paint (a.k.a. self-polishing and ablative bottom paint) is intended to gradually wear away as water flows over the hull. As the paint gradually sloughs off, it exposes fresh biocide, preventing marine organisms from attaching to the hull.
- Reduces buildup of old paint (as it’s constantly wearing away) which means less sanding and expense when you go to repaint.
- Soft paints contain less copper but the ablating action means the copper is used more efficiently.
- Does not lose effectiveness when exposed to air.
- If the boat is docked for long periods (not moving) the paint will not effectively slough off and fouling will occur.
- Ablative antifouling paints are a poor choice for fast boats because higher speeds quickly wear away the paint.
Generally recommended for:
- Slow boats (e.g. cruising sailboats and non-planing powerboats) that are used frequently as well as boats that are stored out of the water for part of the year. While displacement boats may choose either soft or hard bottom paints, many boat owners opt for soft paints due to the advantages of lack of paint build-up.
Interlux’s Micron CSC
Pettit’s ultima sr40.

Hard bottom paint
Hard bottom paint ( a.k.a non-sloughing or hard modified epoxy paint) does not erode over time and instead, the biocide leaches into the water. Water will gradually penetrate the paint until the biocide has been completely used up at which point the hard paint is no longer effective.
- Great for fast boats (e.g. racing sailboats and powerboats) as their tough exterior does not erode with increased speeds .
- Can be “burnished ” (finely sanded and polished) to provide a fast and smooth surface .
- Often contain a higher copper content which means better antifouling performance.
- Can be scrubbed more aggressively than ablative paint when cleaning the bottom of your boat.
- Hard paints build up over time with each additional coat unless vigorously sanded back each year. Eventually, the paint may build to a point where it cracks and peels and the hull will need to be stripped back (a very time-consuming process).

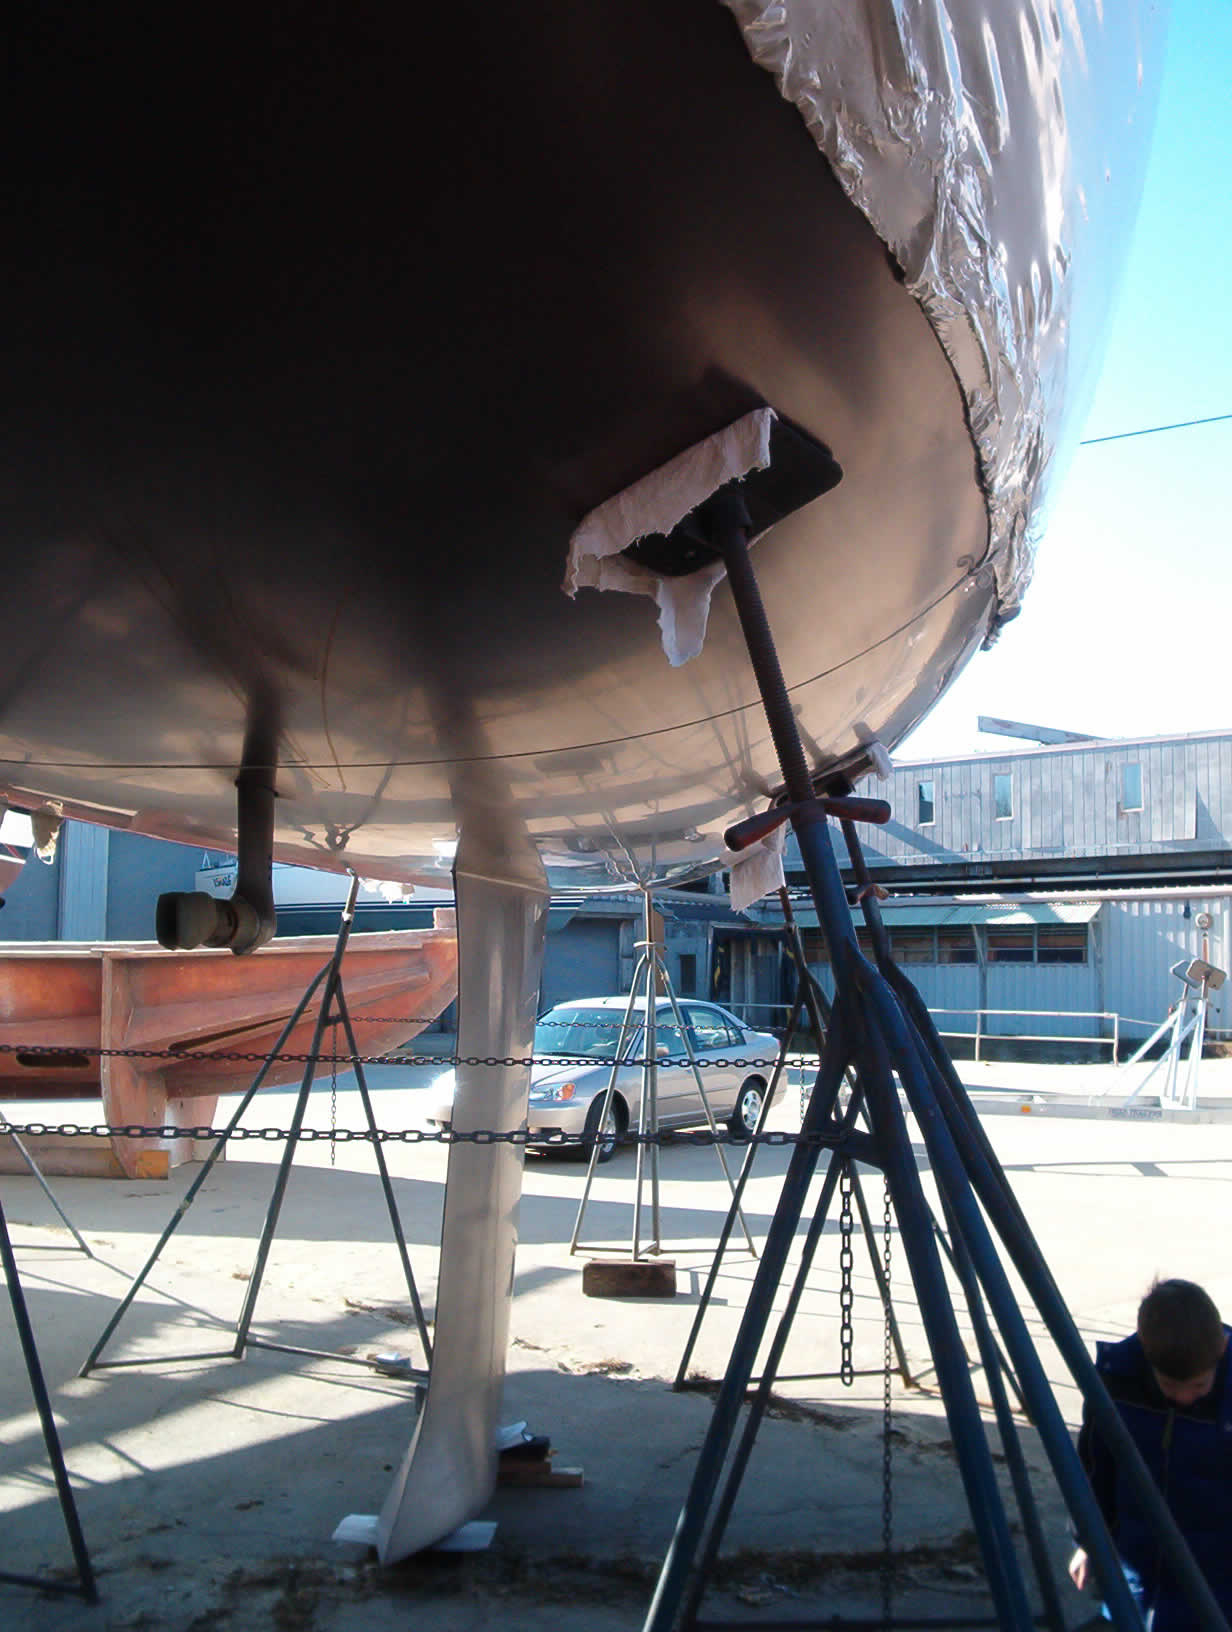
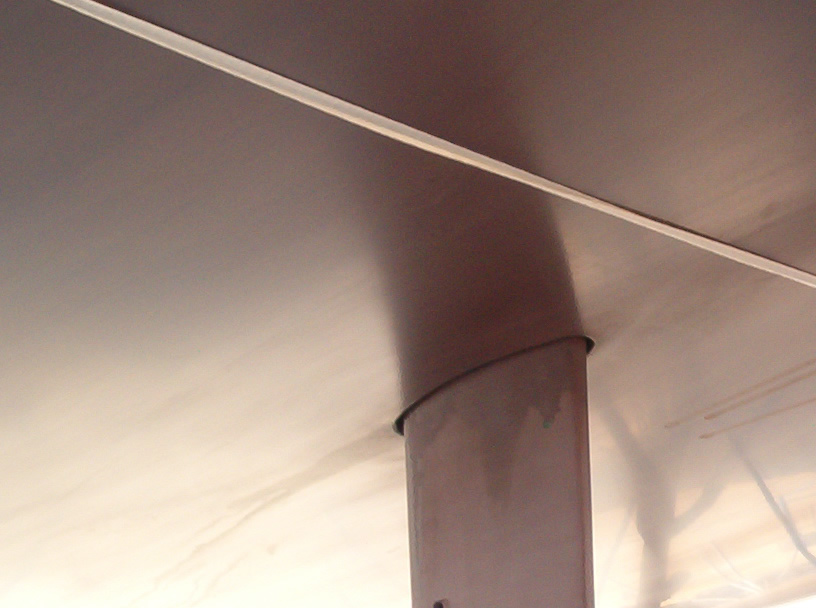
Stripping back paint to gel coat is a multiweek paint job and one of the downsides to hard paints which build up over time.
- Fast boats (e.g. racing sailboats or planing powerboats) and boats that stay in the water year-round. Ablative paints won’t last long at high speeds and a hard burnished surface will be faster for racers.
Interlux’s Ultra
Pettit’s trinidad sr.

Hybrid bottom paint
Hybrid bottom paints (aka semi-hard ablative paints) incorporate many of the benefits of both hard and soft bottom paints into a single product. Hybrid paints are self-polishing (like soft paint) and release biocides at a controlled rate (like a hard bottom paint), but they can’t be burnished to a smooth slippery surface for smoothness and speed. They also have less buildup than a hard paint.
- Ablative action
- Releases biocides
- Less buildup than hard bottom paint
- Holds up to faster speeds
- Can tolerate haulouts and air exposure without loss of protection
- Can’t be burnished
Generally recommended for
- Highspeed powerboats
- Slower displacement boats
- A fast trailerable boat may be better off with no paint at all as hard paints don’t do well when exposed to air for long periods . If that’s not possible, a hybrid paint may be a better option.

Things to consider before buying bottom paint
There are a few important things you should consider when choosing a boat bottom paint.
What type of material is my boat’s hull?
Boat hulls can be wood, fiberglass, aluminum, and steel. It’s important to ensure that a paint is appropriate for your boat’s hull material.
For example, aluminum boats must use specialized aluminum-safe paint. The cuprous oxide in regular paints will result in galvanic corrosion and damage an aluminum hull. Aluminum-safe paints use alternate biocides like zinc and cuprous thiocyanate.
For the same reason, you should never paint underwater metal components (like a propeller) with cuprous oxide paints .
Examples of aluminum safe paints: • Interlux’s Pacifica • Pettit’s Ultima Eco

What type of paint is on my boat right now?
If you’re repainting a boat you must ensure that any paint you apply is compatible with the existing paint on the hull. West Marine , Pettit , and Interlux all publish compatibility charts for reference .
As a rule of thumb, soft paints can be applied over hard paints but hard paints cannot be applied over ablative paints . To switch from soft paint to hard paint, the soft paint should first be entirely removed.
But what if I don’t know what the old paint on the hull is?
If you don’t know what type of bottom paint is currently on the hull, you can at least determine whether it is hard or soft paint by rubbing the hull with a light-colored, damp rag. If the paint easily rubs off onto the rag, it’s likely ablative.
How often do I use my boat?
If you use your boat frequently, ablative bottom paint is a good choice because fresh biocide will be released as the boat moves through the water.
If your boat will be sitting for long periods, a hard bottom paint may be a better choice.
Where will I be using my boat?
There are many different types of fouling. Marine biologists estimate there are more than 4,000 known fouling species! Generally, these species fall into one of three groups: animals, weeds, and slime.
Factors like water temperature, water quality, nearby population centers, inflows from rivers and streams, the speed of currents, and the amount of sunlight will affect the types and degrees of fouling in your area.
You’ll want to choose a bottom paint that is suitable for the fouling in your area. As fouling can differ from one marina to the next, it’s a good idea to ask the dockmaster or boaters in your marina what fouling they notice and what paint they use.
For example, freshwater areas like the Great Lakes, don’t have to worry about barnacles, but they do suffer from slime. In this case, a thin film paint might be a good option as it offers a super slippery, low friction finish to prevent slime from attaching to the hull.
Examples of thin film paints:
Interlux’s vc offshore, pettit’s sr-21, do i plan on racing my boat.
If you’re looking for high-performance, opt for a hard bottom paint that can be burnished (wet sanded) to a shiny, slippery, and fast finish.
What are the environmental regulations in my area?
The word “biocide” literally means “life-killer”. The biocides used in anti-fouling paint are harmful to aquatic life (and not particularly healthy for humans to work with). It’s widely accepted that accumulated copper from boat bottom paint is detrimental to the marine environment .
In places like California and Washington state, this has led to new environmental regulations regarding the sale and use of boat bottom paints. Many locales also limit copper accumulation by prohibiting in-the-water hull cleaning.
In response to these health risks and environmental concerns, paint manufacturers have begun to offer more environmentally friendly alternatives, including:
- Water-based, low volatile organic compound (VOC) bottom paints
- Copper-free bottom paints containing photoactive materials and organic biocides.
These non-toxic, copper-free, and environmentally responsible alternatives to conventional antifouling paints are effective, kinder to the environment, and healthier for the person using them.
Examples of eco-friendlier bottom paints:
Interlux’s micron cf, pettit’s hydrocoat eco.

How many coats of bottom paint do I need?
For ablative paint , a single coat is sufficient for a season, whereas two or three coats of paint are recommended for multi-season use.
For hard paint , one or two coats is generally recommended. Additional coats will just add to more sanding down the road.
If in doubt, check the manufacturer’s recommendations.
How many gallons of bottom paint do I need?
The amount of bottom paint you’ll need depends on the size of your boat and how many coats you apply.
You can use this calculation to give you a rough estimate of how many gallons of paint you’ll need per coat.
Calculate the area you’ll need to paint:
[Length of your hull LOA (in feet) x Beam (in feet) x .85]
Then, divide it by the paint coverage listed by the manufacturer.
Area to paint (in square feet) / coverage (in square feet per gallon)
For example, a 35-foot sailboat with a 12-foot beam using a paint with a coverage of 400 square feet per gallon would be:
[35 x 12 x .85] / 400 = .9 gallons per coat
With this information in hand, you can now walk confidently into your local chandlery and make an informed decision on antifouling paint. It’s time to paint!

Fiona McGlynn is an award-winning boating writer who created Waterborne as a place to learn about living aboard and traveling the world by sailboat. She has written for boating magazines including BoatUS, SAIL, Cruising World, and Good Old Boat. She’s also a contributing editor at Good Old Boat and BoatUS Magazine. In 2017, Fiona and her husband completed a 3-year, 13,000-mile voyage from Vancouver to Mexico to Australia on their 35-foot sailboat.
Terms and Conditions - Privacy Policy
- 2024 BOAT BUYERS GUIDE
- SWS ADVENTURES
- Email Newsletters
- Fishing Boat Reviews
- Fly Fishing
- Marine Electronics
- Fishing Tackle
- Fishing Destinations
- The Bahamas Fishing Guide
- Boating Safety
- Ultimate Boating Giveaway
- Uncategorized
Choose the Right Bottom Paint
- By : Glen Law
- Updated: September 21, 2007

| If you don’t perform your own maintenance, it’s important to let the boatyard know which bottom paint to apply. |
Nobody likes to think about bottom paint, but everybody likes to think about his checkbook – or at least preserving its contents. Second to preserving fishing time, saving money – especially when it comes to boat maintenance – is something we’re all interested in. Even the guys who you’d think have better things to worry about than fuel consumption sit up and take notice when their choice of bottom paint can save them some serious bucks.
Case in point: When the J&T;, a 61-foot Viking, was delivered to Johnson & Towers, Inc. (the big marine diesel distributor in Baltimore), it sported a coat of standard Viking-issue ablative bottom paint. “We’d requested a different paint, but it just didn’t happen,” recalls J&T; skipper Dave Shinn. “They put on the paint they regularly use, the self-cleaning type.”
The J&T; fishes the Atlantic from New Jersey through the Caribbean each season, so water conditions and distances covered are extreme. The boat logs 1,500 hours a year.
“We left the original Micron CSC paint on, and we ran with that until it was time to repaint the bottom,” says Shinn. “Then we switched to the Interlux VC Offshore we had requested, the paint we were most used to.
“Once we switched to the hard paint, we noticed a big difference. Our speed stayed the same, but when we started comparing fuel logs from before the change to after we replaced the soft paint with hard paint, we discovered we had gone from 120 gallons an hour at cruise speed to 110 gallons an hour. And that’s not just on a single trip; it’s consistent with what we’ve recorded in our fuel logs over the past ten months we’ve been running with the VC Offshore.”
Return Investment
Granted, few of us run our boats 1,500 hours a year, or range as far and wide as the J&T; does. But all things are relative, and a nearly ten-percent savings on anything is worth paying some attention to. Look at it as return on investment.
Most of us who paint our own hulls, or who direct the boatyard to use a specific product, decided long ago which brand and type of bottom paint we like best, and we’ve pretty much stuck with it. But things change – water conditions, boat usage, even climate – and all of these variables have a lot to do with the type of paint that’s most efficient. Therefore, it pays to reassess from time to time the way you use your boat. Maybe you keep it in a different place than you did when you chose your paint originally. Maybe you’ve changed the species you most fish for or the amount of running you do. Maybe the quality of water you fish in has changed. The demands you make on your bottom paint can be as varied as the waters you fish and the species you seek.
While there are a number of bottom paints on the market from several major manufacturers, there are really only a limited number of choices you can make. Quite simply, there are “hard” paints and there are “soft” paints, each for a different purpose, and in those two categories there are weak, moderate and strong toxicity levels, which indicates the amount of the toxic ingredient, or biocide, that kills the things that want to live on the bottom of your boat. John Ludgate, vice president of sales and marketing for Pettit Marine Paint, explains some of the differences.
Ablative Vs. Hard
“There are two kinds of paint: ablative, which wears away by itself, and hard, which means the copper biocide leaches out and leaves the paint behind looking like Swiss cheese. At the end of 12 to 18 months you have to sand off this residue and apply a new layer of hard paint.”
Marine bottom paint comes in different varieties, each designed for a specific application or location.|
Ablative paint requires less maintenance, says Ludgate. “You don’t have to sand it to apply more paint. Like a bar of soap, the whole thing removes itself at a controlled rate, taking the organisms with it.”
Why you would choose one over the other has to do with the way the boat is used, as well as the level of maintenance you are willing or unwilling to take on. Another consideration, says Ludgate, has to do with the characteristics of the paint itself.
“Trailered boats and dry-storage boats require special consideration. Once you take a hard paint out of the water, the copper oxidizes and loses its effectiveness. Then it has to be sanded and repainted before you put it back in the water. With an ablative paint you don’t have to do this.”
There are advantages to both kinds of paint, and perhaps the biggest factor in choosing between ablative and hard is how the boat is used. “For high-speed running you need hard paint,” explains Ludgate. “At speeds of over 25 or 30 knots, ablative paints dissolve much faster. Fishermen who want to run 43 knots out to the canyons prefer a harder, more durable paint that will hold up to the wear of high speeds.”
Another benefit of hard paint is its “scrubbability.” In Southern California and parts of Florida, bottom cleaning is done on a regular basis by divers with scrub brushes, and a hard paint is essential for this kind of treatment. “Other guys will put on an ablative paint, which doesn’t build up on the bottom, so a complete stripping job is seldom necessary,” says Ludgate. “Pettit sells more hard paint than ablative, because that’s what most people have traditionally used, but the trend these days is more towards ablative as people recognize the benefits of less maintenance.”
How Powerful?
Once you’ve established the way you use your boat, and thus the kind of paint you need, you’ll want to consider the strength of the biocides based on the type and ferocity of bottom-fouling organisms that live in your area.
Jim Seidel, the assistant marketing manager for Interlux, explains a systematic approach to reviewing your particular needs. “Geography is a major consideration,” he says. “Different climates support different organisms, which require different paints. Florida is different than Maine. Tropical waters are much tougher on anti-fouling paint than are cold northern waters. In the tropics you need something that is a little more powerful and will hold up a little longer.”
Water type can vary within the same general locale, too. “Here in New Jersey, inshore and offshore are not the same,” says Seidel. “Some bays will be different, too. For example, the eastern side of the bay may be more salty, so on that side you’ll have more animal fouling, while on the west side there’s more slime fouling. It’s a salinity issue. And some areas, such as the mouth of the Connecticut River, have a lot of slime and grass growth – especially in the early spring after everybody puts lawn fertilizer down, so the paint can become overwhelmed. Another spot, Boston Harbor, was long notorious for high fouling because of sewage discharge that put a lot of nutrients in the water.”
The choice of bottom paint can affect performance and economy, depending on how and where a boat is used. |
These special demands, especially for slime control, have recently been answered by paint manufacturers through the addition of a booster biocide, particularly irgarol, a biocide recently approved by the EPA. Interlux calls it Biolux, and it’s available as a dual biocide in the company’s top-of-the-line paints, both hard and ablative. Pettit includes the same chemical in its premium paints, and designates it with the SR – “slime resistant” – moniker. By any name, it’s an additional biocide that, when combined with the regular copper additive, increases bottom protection in especially demanding conditions – the kind that are likely to change over time in response to climatic change and nutrient runoff.
Booster biocides are state-of-the-art in the world of bottom paint, but another trend under development is the non-metal, non-stick surface – a paint so slick that nothing can grow on it. This approach is not yet commercially viable, as the products that have so far been developed require weekly wipe-downs, a type of maintenance that many find too demanding. But it’s an approach that is likely to be developed over the next few years, so we may want to keep an eye on it.
So, what’s the “bottom line?” Every once in a while it may pay to reconsider the paint you’ve been using. Runoff from that subdivision up the street from your marina might just be making the aquatic environment a lot friendlier for nasty underwater organisms, so you may need a boost in biocide. Or, if you’re running longer distances or putting on more hours each year, a different type of paint may just be more economical. Hey, an annual savings of ten percent in fuel costs wouldn’t be too hard to take!
| ¿ New from Interlux is a high-performance, polishing, two-part bottom paint that the company says is the strongest, cleanest antifoulant in the world. Formulated with new Activated Biolux anti-slime technology, the two-part packaging (you simply mix them together) allows the antifouling ingredients to combine more effectively at the time of application. Available in black, blue and red, it’s designed to last up to 18 months with no mid-season scrubbing necessary, is easy to apply, cleanup is with soap and water, and it has very little odor. For product information, contact Interlux Yacht Finishes, Union, New Jersey; (800) 468-7589; www.interlux.com. – Ed. |
| ¿ , (800) 468-7589 ¿ , (800) 221-4466 ¿ , (314) 621-0525 |
- More Uncategorized

Everglades Boats

Boston Whaler

Contender 23Bay

New Electric Trolling Motors for Salt Water

Slow-Pitch Pollock

Selecting the Right Transducer Frequency for Deepwater Fishing
- Digital Edition
- Customer Service
- Privacy Policy
- Terms of Use
- Cruising World
- Sailing World
- Salt Water Sportsman
- Sport Fishing
- Wakeboarding
The Fastest Boat Bottom Paints: Antifouling for Speed
Whether you're racing your boat or cruising casually, everyone wants to sail faster. Is there a bottom paint that will make your boat sail faster? And is it right for you?
What are The Fastest Boat Bottom Paints? The fastest bottom paints are vinyl or Teflon based hard paints, which can be wet sanded and burnished to a smooth finish .
Maintaining a fast, racing finish with these paints requires more maintenance than a hard copolymer or a softer ablative paint. It is more maintenance, but it can make a big difference in boat speed.

On this page:
What slows you down, bottom preparation is everything, maintaining the finish, alternatives to hard and burnished, how much faster is it, what are your goals, racing vs. cruising.
In a word: friction. Friction causes turbulence and drag
Without requiring a degree in Computational Fluid Dynamics to explain it, a rough bottom is slower. More friction is slower - think about rubbing your hand across a carpeted floor versus a glass table top with a little oil spilled on it. Which is easier? Now imagine you're playing with a toy boat on either surface. If you push the boat, which one will be easier to push? Which might even keep sliding a little if you let it go?
Getting more into the science (still without the degree!), when fluids move over a surface there is a "boundary layer," the layer of fluid closest to the surface skin. When a hard surface moves through a liquid, molecules of the liquid get dragged along with it. This increases "skin friction" and causes drag. The faster something moves, the more drag.
If the flow of molecules in the boundary layer is "laminar", it is evenly spread and more calm. A "turbulent" boundary layer pulls more water with it and causes more friction and drag. A smooth bottom helps maintain laminar flow and reduce turbulence and drag as the boat speeds up.
These forces can be considerable if a boat bottom is not a fair surface, and the effect is more pronounced at higher boat speeds.
Given the power provided from your sails is constant, a boat with less drag will move through the water faster.
Spraying a layer of VC Offshore or Baltoplate on your boat will not make it instantly faster. To get the full benefit of a hard, fast bottom paint job the surface bottom must be prepared with care.
- Old incompatible bottom paint must be stripped. You can't put a Teflon based paint over an ablative or copolymer paint. It won't stay on.
- The bottom should be "faired." The aim is to create a smooth, curved surface with no bumps, dips or ripples. This is labor intensive and requires expertise and a keen eye to fair a hull.
- The bottom should be sanded smooth after fairing and before painting. Even if an orange is round and fair, if you spray paint it you will not end up with a smooth surface. You must start with a smooth surface.
- For a fast finish, spraying gives an even, smoother coating and reduces the amount of sanding time. Rolling hard bottom paint makes little sense because of the increased work from the rough paint application.
- Sanding and wet sanding is a must. Sprayed paint will still feel rough to the touch. For a fast finish sanding and wet sanding with up to 400 grit sandpaper will get results.
- Burnishing is a step even farther than wet sanding, and can give a mirror finish to a well prepared bottom.
Hard bottom paints designed for racing are not as effective at preventing grown as softer ablative paints or copolymers. They don't hold as much active antifouling, and it doesn't leach out of the paint or get refreshed since the paint doesn't slough off. And wet sanding and burnishing both remove some surface active ingredients.
In high growth areas, a racing finish with require constant maintenance and cleaning. When I raced my last boat, I had a diver come every week to clean the bottom and we dove on the boat ourselves at major regattas. You won't get hard growth quickly, but you will get slime buildup in very little time which can slow you.
You may not get two seasons from a coat of racing paint. If you don't, you'll want to wet sand it before the start of the season to ensure everything is smooth and ready again. The good news is that a properly prepared bottom is easy to re-spray and sand back to a good finish compared to the first time you do it.
What if you don't dive, can't clean your boat regularly, or don't want to pay a diver? Maybe you just want to go faster but aren't a speed-mad racer looking for every 1/10th of a knot speed extra?
Dry sailing for smaller boats is very popular. Fair the bottom and leave it unpainted or put on an underwater epoxy paint. As long as you don't store the boat in the water for more than a couple of days during a regatta there shouldn't be any growth. Most dinghies are dry sailed. Many smaller boats kept at clubs or marinas with a crane have this option, though there may be a cost to haul and launch.
If you stay in the water, a good choice is a hard copolymer paint. These are often referred to as "self polishing," as they smooth themselves with use as the paint sloughs off. Many of these are quite hard and can be carefully sanded to a smooth finish. Since they’re softer, you don’t want to sand through the paint. With proper preparation before painting, a sprayed paint job, and a little sanding, your bottom can be almost as fast as the high maintenance race boats.
Even without the sanding, a good bottom preparation before painting can give you more speed on passages. These paints are popular with long distance cruisers and people who use their boats frequently. You'll lose a little edge if you're racing, but you won't put yourself at the back of the fleet with it.
"What are you getting for your money" is a common question when preparing a boat for racing. The faster bottom and the newest sails won't win races for you if your crew can't tack or gybe and you can't spot wind shifts. You can lose the entire advantage of that quarter knot speed increase with a blown tack or a missed shift.
From personal experience, replacing a rough, coarse, orange-peel looking bottom with a polished and burnished bottom made a big difference. Both in my boat speed, and my wallet. It was expensive to do and expensive to maintain. But the boat was faster, and we were racing competitive regional events. The difference was most noticeable at low speeds and in light air.
There is not a lot of empirical data about how much faster a burnished Teflon bottom is over a well prepared copolymer paint. So the answer is "yes, it's faster," but with your boat, your budget, and your application there’s no way to predict that you may be 5% or 10% or half a knot faster.
To the casual club racer or cruiser, is it worth the time and money to prepare and maintain the fastest of possible finishes? It may not be; that's a question that only you can answer.
The best choice for a fast bottom comes down to you, your boat, and how you will use it.
- Are you a racer? If yes, is it weeknight club racing, or are you racing at higher level regional events against serious racers?
- If you cruise, how much maintenance are you willing to do to keep every extra fraction of a knot of speed?
- Where do you sail? Some areas have more aggressive growth than others. A sailor in the Great Lakes may get away with a hard bottom paint with less work than a New England coastal racer or a cruiser in the Caribbean.
- What is your budget for bottom preparation and maintenance? Are you willing and able to do some yourself?
- What us the current condition of your bottom? How ready is it for a top quality refinishing?
You will find very few non-racers who take the time and effort to apply the fastest bottom paints. The cost/benefit/effort analysis doesn't show a reasonable payback for what you get.
Most sailors aren't taking their boats to world-class regatta venues, they're taking off for weekends and vacations and maybe doing the club series on Wednesday nights or the annual regatta. Most of those boats are not going through the expense and effort for a competitive racing finish.
On the other hand, if you're racing in a competitive one-design fleet at New York Yacht Club Race Week or the San Diego NOOD Regatta, you can bet almost every boat in your fleet will have a smooth, wet sanded finish.
Leave a comment
You may also like, do i need to antifoul (bottom paint) my boat - sometimes.
Any time you buy a new boat, you get a work list as long as your arm. Bottom paint is expensive, toxic, and can be difficult to apply. It's an easy task to want to …

41 Sailboat Cruising Essentials for Long Trips

How to Calculate Outboard Motor Size for Sailboats
- BOAT OF THE YEAR
- Newsletters
- Sailboat Reviews
- Boating Safety
- Sails and Rigging
- Maintenance
- Sailing Totem
- Sailor & Galley
- Living Aboard
- Destinations
- Gear & Electronics
- Charter Resources
- Ultimate Boating Giveaway
How to Paint Sailboat Decks
- By Tom Zydler
- Updated: March 14, 2013
Painting a sailboat
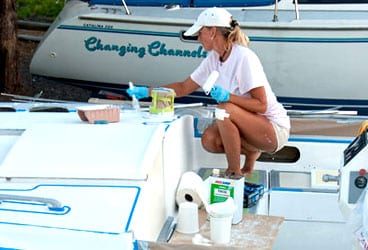
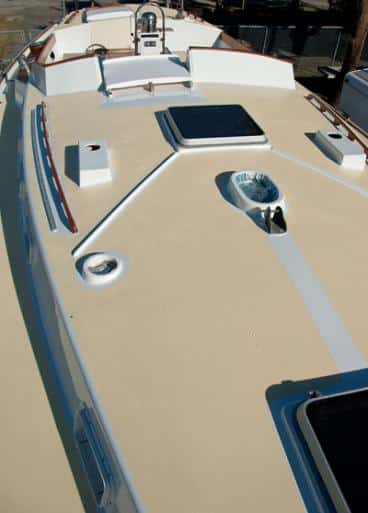
Janet Van Leuwen and Steve Van Wig own a Whitby 42. Looking at their beautiful, well-groomed ketch, you’d never guess it was built in 1982. The name on the stern, Lunacy , may be the only hint of the incredible amount of work that the couple has put into rejuvenating their boat. Bringing the decks and the coachroof top to their present glory was a large part of the project, as these tasks would’ve been on any glass boat more than 25 years old. This is how they did it. And frankly, this is how it should be done.
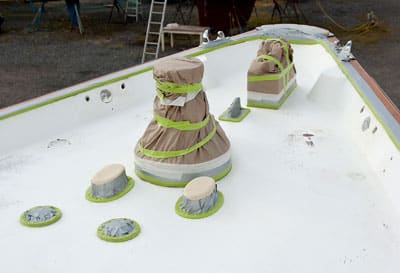
Before the couple could begin doing any prep work for painting, the deck hardware had to be removed. They needed access to tight spaces where the horizontal deck surface turned into vertical bulwarks, around the masts’ partners, near the windlass base, and so on. (They also removed the chainplates, which needed attention as a separate project.) Out came all stanchions, their bases, various padeyes, winches—anything and everything, in fact, that could obstruct the power sanders required to remove the worn-down, cracking, original nonskid pattern. Steve then used silicon sealant to plug all the fastener holes that would be reused; silicon repels paint, so the fastener locations would be visible when they began reinstalling the hardware.
Donning breathing masks and kneepads, the couple spent days grinding the old surfaces with 80-grit discs. Using thick foam pads on machines running at high rpm prevented any gouging in the laminate. Smaller sanders (both round and square) helped them to negotiate tight turns; at times, they resorted to manual sanding blocks. Working with thickened polyester and epoxy resins, Steve filled several hairline cracks and dings. They then sanded this filler with 80-grit, then 100-grit, and finally 120-grit sandpaper to achieve a smoother surface before vacuuming up all the accumulated dust.
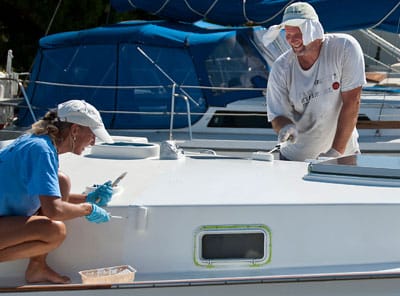
Next, to keep paint drips off teak handrails, the windlass, and the portholes, they masked these with heavy paper and tape. Right after the final wipe with a cleaning solvent, they took two days to roll and brush on two coats of epoxy primer, the base for the final topcoat. Over the next few days, the primed surfaces were sanded with 120-grit paper, followed again by vacuuming and hosing the resulting dust. Afterward, Janet cleaned all the surfaces with non-sticky tack cloths designed for multipart polyurethanes.

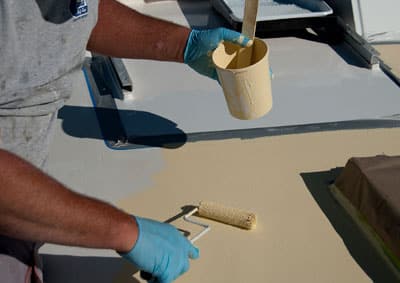
At this juncture, Steve identified and outlined the future nonskid areas, then spent a couple of days taping their inner edges with long-life 3M masking tape. At the corners, joining short lengths of tape on tight curves required meticulous care. After they wiped everything with cleaning solvent, they applied the first coat of multipart polyurethane to all the surfaces outside the future nonskid. Two more topcoat applications followed within allowable, 16-hour intervals. After sanding with 220-grit paper, dusting, using the tack rag, and wiping the solvent, they rolled and brushed on the fourth and final topcoat. The solvent-resistant, ultra-smooth, high-density foam-roller covers and quality brushes delivered the best finish. Working in the hot Florida sun required frequent additions of brushing reducer.
After allowing 48 hours to fully cure, they removed the masking tape. Fresh tape was then applied along the outside margins of the nonskid areas. All was ready for applying the nonskid coats. But first Steve spent a few days experimenting. He mixed his own color tints—too dark, and you couldn’t walk barefoot on the sun-heated deck; too white, and the deck glare was intolerable.
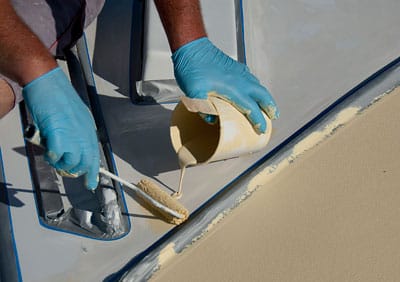
Also, he tested paint combined with various nonskid additives on scrap plywood; very coarse grit could damage human skin if a sailor knelt or fell on deck. He decided to combine equal amounts of coarse and fine grit. Significantly, this mixture prevented the coarse grit from settling down in the paint in lumps. On the big day, Steve and Janet mixed the activator with the paint base in a large container, added the correct nonskid grit, poured in the brushing reducer, and thoroughly stirred it all. After pouring small dollops within a taped area, Steve spread it out with a roller with Janet assisting, adding more paint or grit as necessary. She also wiped up Steve’s occasional paint drips with a solvent-soaked rag. The work went quickly and smoothly, though constant stirring of the paint/grit mixture was absolutely vital.
Twenty-four hours passed before heavy, late summer rain rolled in. By then, the paint had cured hard, and the coachroof was finished. They then repeated the whole operation to paint the deck. Nobody said rejuvenating a classic-plastic yacht would be quick or easy. But when the entire project was finished and Lunacy ‘s deck sparkled, the two sailors realized that all their meticulous efforts had been well worth it.
Steps:** 1. In preparation for the job, much of the deck hardware, including the stanchions, had to be removed. The remaining gear was carefully and completely covered and masked. 2. All the fastener holes were filled with silicon sealant, and the couple spent days grinding the old surfaces. Then Janet used a solvent wash to ensure a strong bond with the primer paint. 3. After dings and cracks were repaired and sanded, two coats of epoxy primer were applied. 4. Following another round of sanding, vacuuming, cleaning, and taping, the couple rolled and brushed on a fresh coat of Awlgrip topcoat. 5. After four coats of Awlgrip, it was time for the nonskid. First, Steve experimented with colors and grits. Once under way, he poured on a dollop of pre-mixed paint and spread it evenly. Note the paint stirrer, which was used to prevent the grit from settling. 6. Stirring frequently, to make sure the coverage was even in each masked area, Steve worked quickly and efficiently while Janet addressed small splashes with a solvent-soaked cloth. 7. Voilà! Once the masking tape was removed, the fresh decks fairly glistened.
What You’ll Need: • Hook-and-loop sanding discs, sized to fit the sander pads • Sheets of sandpaper of grits 80, 100, 120, 180, 220, and 320 • 3M masking tape in widths of 1/2 inch (No. 256), 1 inch (No. 2090), and 2 inches (No. 225) • Gerson synthetic tack cloths • Roller frames and roller covers, with phenolic cores: ultra-smooth, high-density 4-inch and 6-inch roller covers (available from Home Depot; for the primers and topcoats) and Yellow stripe 3/8-inch nap (from West Marine; for the nonskid paint mixture) • Good-quality varnishing brushes • Cabisil (colloidal silica) thickening agent for making fairing putty with epoxy or polyester resin • Plastic putty knives • Interlux Fiberglass Solvent Wash 202 (for cleaning surfaces) • M.E.K. solvent (for cleaning all brushes) • Disposable paper/plastic pails of various sizes • A dozen wooden paint stirrers • Interlux Epoxy Primekote • Awlgrip topcoat (with Brushing Reducer and brushing converter) • Awlgrip Griptex nonskid additive (fine and coarse grades) • Ryobi and Makita random orbital sanders • Ryobi 6-inch palm polisher (used with a foam pad as a sander in complex spaces) • 3M breathing dust masks, ear protection, and solvent-resistant gloves
Longtime CW contributor Tom Zydler and his wife, Nancy, plan on spending this summer exploring the coast of Labrador aboard their Mason 44, Frances B .
- More: boat maintenance , How To , maintenance
- More How To

Surviving the Storm: A Sailor’s Tale of Hurricane Lee

Best Practices for Boat-Show Shopping

Grease the Wheels of Your Boat: A Guide to Proper Lubrication

A Bowsprit Reborn: A DIY Renovation Story

Sailboat Review: Dufour 41

Storm-Tossed, Lobster-Blessed: A Culinary Cruising Tale

Minimalist Cruising: Georgian Bay by Dinghy
- Digital Edition
- Customer Service
- Privacy Policy
- Terms of Use
- Email Newsletters
- Cruising World
- Sailing World
- Salt Water Sportsman
- Sport Fishing
- Wakeboarding

Coppercoat: The environmentally sensitive antifoul choice *sponsored post*

Yachting Monthly sponsors the Chichester Marina Boat Show and Watersports Festival

Round the Island Race 2019: Entries open

Düsseldorf Boat Show 2019: Fairline announces yacht line-up

Düsseldorf Boat Show 2019: Bavaria to showcase its complete range of motoryachts
- Subscribe Now
- Digital Editions
Best boat paint: 9 of the best DIY topcoats for fibreglass, wood or metal
- Ben Meakins
Nothing improves the look of a boat quite like a fresh lick of paint. Whether your boat is wooden, steel or GRP, today’s easily applied boat paints can give your boat’s topsides a new lease of life

Nothing improves the look of a boat quite like a fresh lick of high-quality boat paint. Whether your boat is wooden, steel or GRP, today’s easily applied topcoats can give your boat’s topsides a new lease of life.
But it’s not quite as simple as slapping a coat of enamel over any surface. To get the best results from your boat paint, you need to put in the hours with sanding, priming, filling and fairing.
The good news is that the best boat paints available today are easier than ever to apply, and are formulated to give an excellent finish for the DIY applicator.
A roller and a brush are all you need for a good result, and with practice your boat will look hugely improved. Pay attention to the instructions and above all to the recommendations on weather, temperature and surface preparation and you’ll be well on your way to an excellent paint finish .
There are, broadly speaking, two distinct types of boat paint you might like to consider – one- and two-pack. Let’s take a closer look.
Best one-pack boat paint
This type of boat paint is relatively inexpensive, available in a wide range of colours, and easy to apply. Most will dry through solvent evaporation, and will be easy for the DIY boat owner to apply with either a brush or a roller: or sometimes using both and the ‘roll and tip’ method.
- Easier to apply than two-pack boat paint
- Cheaper than two-pack paint
- Softer and less durable than two-pack paint

International Toplac boat paint
This is the classic one-pot boat paint. It’s got a good reputation for easy of application and longevity and is easy to apply. Available in a wide range of colours, it’s claimed to last longer than conventional one-part enamels, while its Silicone alkyd technology gives high-gloss and lustrous colour. 2-3 coats are recommended, with Pre-Kote undercoat recommended to prepare the surface.
RRP: £25.50/750ml
Buy it now on Amazon (UK)
Buy it now on eBay (UK)
With each product is a ‘Buy it now’ link. If you click on this then we may receive a small amount of money from the retailer when you purchase the item. This doesn’t affect the amount you pay.
International super gloss hs boat paint.
International have been making strides to make their topcoats easier to apply by amateurs, and Super Gloss HS is their latest one-pack boat paint that claims to not need brushing out – you can just roll it on. Available in a limited selection of colours, it is nonetheless easy to apply and claims to offer excellent gloss in 1-2 coats when applied by brush or roller. Like Toplac, it can be applied over Pre-Kote undercoat.
RRP: £23.95/750ml
Buy it now from Amazon (UK)
Buy it now on eBay
Hempel’s Brilliant Gloss boat paint
Hempel’s Brilliant Gloss is an alkyd topcoat that can be rolled and brushed on. It’s recommended to paint on top of the company’s Primer Undercoat, and, like Toplac, 2-3 coats are recommended. Application is said to be easy and the end result should be resistant to pollutants and the marine environment.
RRP: £24.95/750ml

Jotun Yachting EasyGloss boat paint
Another one-pack alykd topcoat, Jotun’s easygloss is designed for application by brush and roller. It should be applied over the company’s EasyPrimer and is designed for easy DIY application. Two coats are recommended, and this boat paint will dry to a high gloss finish, especially when the correct undercoats are used.
RRP: £18.99/750ml
Buy now on eBay
Teamac Marine Gloss boat paint
Teamac is a long-established paint manufacturer from the North-East of the UK and while their boat paints aren’t as well known as the big brands, they come well reviewed and are well priced compared to the alternatives. Their single-pack marine gloss is available in over 50 colours, can be applied by brush or roller and should be applied over Teamac Marine Undercoat.
RRP: £16.77/1L

Epifanes Yacht Enamel boat paint
Available in 46 colours, Epifanes’ Yacht Enamel claims excellent flowing properties on application and can be applied by brush or roller. 3 coats are recommended for optimum durability when applied by brush, and 4 when applied by roller. Epifanes undercoat is recommended.
Best two-pack boat paint
If you’re looking for the best combination of finish and durability, then two-pack boat paints are your best bet. Unlike single-pack paints, they rely on two components being added together and cure with a chemical reaction, so are much more hardwearing than one-pack paint.
They are significantly more expensive (around twice the price) and this, combined with the need to mix only as much as you will need, can lead many people to think they are more complicated to apply. That needn’t be the case – application is no harder than with one-pack – but prior planning is needed. You also need to be aware of the substrate – if it’s previously been painted with one pack, then you’ll need a barrier coat underneath as the solvents in the two-pack paint will eat the boat paint underneath.
- Much more durable and hard-wearing than one pack
- Better finish than one pack
- More expensive than one pack
- Need to be aware of the substrate

International Perfection boat paint
International’s Perfection is a 2-pack polyurethane which has been long used to good effect by DIY painters to get their boats looking like they’ve been painted by a pro. 14 colours are available, and 2-3 coats are recommended, to be applied by brush or roller – or a combination of the two. Recommended undercoat is Perfection Undercoat, which is available in white or grey depending on the colour you’ll be painting on top.
RRP: £57.25/750ml

Hempel Polygloss boat paint
Designed for brush or roller application, Hempel Polygloss is a high gloss enamel that is claimed to protect against abrasion and degradation. This boat paint has a limited number of colours available (white, black and blue), but should give good results.
RRP: £40.99/750ml

Epifanes poly-urethane yacht coating
Dutch manufacturer Epifanes has long been popular with wooden boat owners for the quality of their varnishes, but their boat paints come highly recommended by those in the trade, which is always a good sign. Their poly-urethane yacht coating is well priced and is available in a wide range of colours.
RRP: £34.99/750ml
Free Shipping On All Orders!
- Epoxy Resins
- Polyester Resin
- Urethane Resins
- Epoxy Project Supplies
- Antifouling Paints
- Topside Paints
- Thinners & Solvents
- Paint Supplies
- Wood Oils & Finishes
- Wood Finishing Supplies
- Cleaning & Polishing
- Accessories

Table Top Epoxy

Clear High Performance Epoxy Kits

5:1 Traditional Epoxy Resin Kits
- Thinners & Solvents

Wet Edge Topside Paint

Premium Marine Topside Primer

Spartan Multi-Season Antifouling Paint
- Wood Finishes
- Wood Oils & Finishes

Gleam Marine Spar Varnish

Lust Rapid Recoat Marine Spar Varnish

Halcyon Water-Based Marine Varnish

TotalBuff Rubbing Compound

TotalShine Finishing Compound

White Knight Fiberglass Stain Remover
- TotalBoat Gear

FlexFit Fitted Mesh Back Baseball Cap

Men’s Long Sleeve T-Shirt Hoodie

Women’s Long Sleeve T-Shirt Hoodie
FREE SHIPPING with a minimum puchase of $1,200.00 You are $10.00 away from your free shipping!
Shipping, taxes, and dicount codes calculated at checkout.
Which Bottom Paint Should I Use?

What is Boat Bottom Paint?
Bottom paint is applied below the waterline on your boat, and typically refers to antifouling paint that prevents marine growth from clinging to your hull. Barnacles and slime can slow you down and increase your fuel costs because the engine has to work harder to move your boat through the water. A bottom full of barnacles and weeds can also put you in harm’s way because it can seriously hamper your ability to maneuver.

The key antifouling ingredient is some type of biocide for deterring hard marine growth such as barnacles and mussels. Some antifouling paints also include an algaecide for preventing soft growth like algae, slime and weeds. There are many different antifouling coatings, making it hard to choose the paint that’s right for your boat and your budget. Some coatings work better in different locations, including fresh or salt water. Some are more environmentally friendly than others, and some cost more based on the amount and type of biocide, and the protection they provide.
Do I Need Bottom Paint on My Boat?
If you pull your boat out of the water every time you use it, you probably don’t need bottom paint. But if you keep your boat in the water all season, or if you take your boat out of the water periodically, such as on a trailer or lift, then yes, you should apply bottom paint to prevent hull fouling. Same goes whether you keep your boat in salt water or fresh water.
What are the Different Types of Antifouling Paints?

All bottom paints are not the same and will not be effective for all boats, in all waters and fouling conditions, and for all types of boating. Bottom paints are usually one of two types: hard or ablative, with variations that are effective based on how much time the boat spends in the water and how often it moves. For example, hard bottom paints are effective for a single season, and they build up season after season, eventually requiring costly removal. Ablative paints come in single-season and multi-season varieties and don’t build up.
Ablative Bottom Paint
Ablative paint is designed to gradually wear away as water flows beneath the hull, either from use or from the movement of tides and currents. Fresh biocide is exposed as the paint layers wear away, preventing marine fouling organisms from attaching to the surface. Some ablative paint formulas are for multi-season use, and some are effective for only a single season. Also, ablative bottom paint can be copper-based or copper-free, and water-based or solvent-based. For most ablative paints to work effectively, motion is required, so this paint is best if you use your gets frequent use.
Self-Polishing Copolymer Ablative Bottom Paint
This type of antifouling paint also wears away gradually to expose fresh layers of biocide, but the self-polishing properties of its controlled-release copper copolymer formula make it work whether the boat is at anchor or underway. Some copolymer ablatives are effective for multiple seasons, and need only a light scuffing to reactivate the antifouling in the spring, just before launching.
Hybrid Copolymer Ablative Bottom Paint
Hybrid bottom paints are self-polishing and release biocides at a controlled rate like copolymer bottom paints do, but hybrid paints can be burnished–like a hard bottom paint–for smoothness and speed. Unlike hard bottom paints, hybrid paints have less buildup to remove next season.
Hard Bottom Paint
A hard bottom paint coating doesn’t wear away like an ablative coating does, it just loses its biocide over time. The biocide in hard bottom paints leaches constantly while the boat is in the water, whether the boat is moving or not. Hard paints lose their effectiveness once all the biocide leaches out. Because hard bottom paint doesn’t wear away, it builds up and has to be sanded down before reapplying bottom paint the next season. Also, hard bottom paints generally become rendered inactive one the boat is hauled out of the water, so they’re best for boats that remain in the water for extended periods. They’re also ideal for racing boats or boats operated at faster speeds because the hard paint coating can be burnished to increase smoothness and speed.
Questions to Answer Before Buying Bottom Paint
What is my boat made of.
When it comes to choosing bottom paint, substrate (surface) is a big consideration. Do you have an aluminum, fiberglass, steel or wooden boat? Most bottom paints contain some type of copper biocide, which is suitable for fiberglass and wooden boats, but not for aluminum. The copper in the paint causes galvanic corrosion, which will destroy an aluminum boat or pontoon boat. For antifouling protection on aluminum boats and underwater metal parts, you have to apply a copper-free bottom paint .
Inflatable boats made of PVC, Hypalon or other materials also need bottom paint if they’re left in the water for long periods. Ablative bottom paints designed for inflatable boats won’t crack after drying or peel while you’re rolling up the inflatable for storage.
Where Do I Use or Keep My Boat? Location is Everything!

What are the fouling conditions in your area? By ‘area’ we mean not only the geographic location, but the specific harbor, and even your location in the harbor. Why? Because the fouling conditions can be that location-specific. Is the fouling light, moderate, or heavy in your part of the harbor? Typically, more biofouling occurs in waters that are warm and still, rather than colder waters where water flow is unrestricted.
Is My Boat in Fresh Water or Salt Water?
Barnacles, algae and slime are the bane of boat owners who do their boating in salt water. And even though boats left in freshwater don’t have to worry about barnacles, they can still get slimy and grow green beards. If algae slime and algae are a problem, you’ll want a paint that contains an algaecide such as zinc pyrithione (this applies to copper-free biocides, too). If you do your boating in freshwater lakes, look for bottom paints designed specifically for freshwater fouling. Why pay for extra protection you don’t need?
How Often Do I Use My Boat?
If you use your sailboat or power boat frequently, ablative bottom paint is a great choice because it’s most effective when the boat moves through the water to release fresh biocide. If you don’t use your boat as often and it spends a lot of time at the doc or on the mooring, your best bet would be a self-polishing copolymer paint that’s effective whether the boat is moving or not. In addition, brief boating seasons are suitable for a single-season antifouling paint , but for a longer boating season, it can be more effective and economical to apply a multi-season bottom paint . If you trailer your boat, a harder ablative antifouling paint that can withstand trailering and beaching might be the way to go.

Do I Want to Use My Boat for Racing?
If you want to race your boat or you just want to make your boat go faster, use a thin film bottom paint, a hard modified epoxy bottom paint, or a hybrid bottom paint that can be burnished. Burnishing involves wet sanding or using a Scotch-Brite® pad to make the surface smoother.
Should I Use Solvent-Based Bottom Paint or Water-Based Bottom Paint?
Environmental restrictions in some areas prohibit the use of solvent-based paints due to their high VOC (volatile organic compound) content. If this is the case, you can apply a water-based, low VOC bottom paint . Water-based bottom paint offers easy cleanup and is very effective against marine fouling.
A common misconception about water-based bottom paint is that it will dissolve and leave the hull with no antifouling protection once the boat is in the water. Not true. Once cured, the water in water-based bottom paint evaporates and leaves a protective film containing the biocide.
Should I Use Copper-Based or Copper-Free Bottom Paint?
Again, environmental restrictions may dictate the use of copper-free antifouling bottom paint. Typically, a higher percentage of copper in the paint means it’ll be more effective at combating shell fouling. But copper-free bottom paint containing the eco-friendly biocide Econea™ (tralopyril) has proven very effective on shell fouling such as acorn barnacles and zebra mussels. If you have an aluminum boat, you have to use a copper-free antifouling paint to avoid galvanic corrosion, which will destroy aluminum. Underwater metals also need bottom paint that’s copper free .
What Type of Bottom Paint is on My Boat Now?
If there’s bottom paint on your boat now, it’s really important that your new bottom paint is compatible with the old bottom paint. You don’t want your new paint to peel, so you need to find out what the previous paint is. If you can’t determine that, you’ll need to strip off the old paint completely and start over. Antifouling paint formulas change often, but here are some general compatibility and surface preparation guidelines. For best results, read the bottom paint manufacturer’s recommendations.

How Much Do I Want to Spend On Bottom Paint?
Typically, the higher concentration of biocide a bottom paint has, the more expensive it will be. Hard bottom paints are typically less expensive than ablative antifouling paints. Among the ablative marine paints, the single-season ablatives are typically less expensive than the multiple season ablatives.
How Much Bottom Paint Do I Need?
The amount of bottom paint varies depending on how big your boat is and how heavily you apply the bottom paint. Refer to the paint manufacturer’s details on coverage amounts (typically given in square feet per gallon). Here’s an easy formula for figuring out the square footage of your hull below the waterline, where you’ll be applying bottom paint.
Length (in feet) x Beam (in feet) x .75 Here are some typical estimates for various types of boats. These estimates assume you’re applying two coats, and that you’ll be coating the surface as thickly as possible without drips or runs.
| 14′ outboard | 1-2 quarts |
| 18′ runabout | 2 quarts |
| 20′ sailboat | 3 quarts |
| 24′ runabout | 3-4 quarts |
| 30′ sailboat | 1.5 gallons |
| 32′ cruiser | 1.5-2 gallons |
| 36′ auxiliary | 2 gallons |
| 40′ sailboat | 2.5 gallons |
| 45′ sailboat | 3-3.5 gallons |
| 50′ sportfisher | 4+ gallons |
How Often Should I Bottom Paint My Boat?
How long does boat bottom paint last? Depends on the type of bottom paint you use and your boating conditions. Typically, you should apply bottom every year, but there are some bottom paints that last multiple seasons. If you use your boat regularly or keep it in the water, check it every year to see if you need to reapply bottom paint.
Hints to Help You Choose the Right Bottom Paint for Your Boat
- Ask other boaters in your local marina – they’re a prime source of information about what works and what doesn’t in your particular location.
- If you want to paint in the fall and launch in spring without repainting, choose a multi-season self-polishing copolymer paint . This type of bottom paint has an unlimited launch window.
- All bottom paint manufacturers have a chart that shows the compatibility of their bottom paints with those of existing brands. Be sure to take a look at the compatibility chart before you buy.
TotalBoat Bottom Paint Comparison Chart
| Sailboat | √ | √ | √ | √ | √ | √ | |
| Power Boat | √ | √ | √ | √ | √ | √ | |
| Fiberglass | √ | √ | √ | √ | |||
| Wood | √ | √ | √ | √ | |||
| Primed Aluminum | √ | √ | √ | ||||
| Primed Steel | √ | √ | √ | √ | √ | √ | |
| Underwater Metal Parts | √ | √ | √ | ||||
| Hypalon, PVC | √ | ||||||
| Salt Water | √ | √ | √ | √ | √ | √ | |
| Fresh Water | √ | √ | √ | √ | √ | ||
| % Copper | 38% | 26% | 24% | ||||
| Copper-Free | √ | √ | √ | √ | |||
| Solvent Based | √ | √ | √ | √ | √ | ||
| Water Based | √ | √ | |||||
| Used Frequently | √ | √ | √ | √ | √ | √ | |
| Trailered | √ | √ | √ | √ | |||
| Single Season | √* | √ | √ | √ | √ | √ | |
| Multi-Season | √ | √* |
* Krypton provides full-season protection in salt water, where the water flow is unrestricted. It can provide multi-season protection in fresh water conditions. If you have any questions about which bottom paint to use, please call our Tech Support Team at (800) 497-0010.

Krypton Copper-Free Antifouling Bottom Paint

JD Select Water-Based Bottom Paint

Underdog Boat Bottom Paint

TotalProtect Epoxy Barrier Coat Primer

TotalFair Epoxy Fairing Compound
Leave a comment
Related articles.

Bottom Painting with Salty Sunrise
We’re excited to welcome a new ambassador to our marine community with this week’s featured video from Salty Sunrise! Kelsey and Tim of Salty Sunrise sold everything they owned seven...

Victoria the Tender Gets Some TLC
In the latest episode of Acorn to Arabella, we return to where it all began for Steve and his wooden boat, Arabella. This time however the focus is on Victoria, the...

Boat Restoration with Andy Miller and TotalBoat
This spring, we had the incredible opportunity to welcome boat repair wizard Andy Miller from the Boatworks Today YouTube channel to the TotalBoat Shop. Andy, a master in the art...

Antifouling Update on an Aluminum Boat with Whi...
It’s been over three years since we’ve featured Nike from White Spot Pirates, so we were very excited when she reached out recently needing help tackling some updates! Nike's aluminum...
- Choosing a selection results in a full page refresh.
- New Sailboats
- Sailboats 21-30ft
- Sailboats 31-35ft
- Sailboats 36-40ft
- Sailboats Over 40ft
- Sailboats Under 21feet
- used_sailboats
- Apps and Computer Programs
- Communications
- Fishfinders
- Handheld Electronics
- Plotters MFDS Rradar
- Wind, Speed & Depth Instruments
- Anchoring Mooring
- Running Rigging
- Sails Canvas
- Standing Rigging
- Diesel Engines
- Off Grid Energy
- Cleaning Waxing
- DIY Projects
- Repair, Tools & Materials
- Spare Parts
- Tools & Gadgets
- Cabin Comfort
- Ventilation
- Footwear Apparel
- Foul Weather Gear
- Mailport & PS Advisor
- Inside Practical Sailor Blog
- Activate My Web Access
- Reset Password
- Customer Service

- Free Newsletter
Dufour 44 Used Boat Review

Blue Jacket 40 Used Boat Review

Catalina 270 vs. The Beneteau First 265 Used Boat Match-Up

Ericson 41 Used Boat Review

How to Create a Bullet-Proof VHF/SSB Backup

Tips From A First “Sail” on the ICW

Tillerpilot Tips and Safety Cautions

Best Crimpers and Strippers for Fixing Marine Electrical Connectors

Solving the Dodger Dilemma

Polyester vs. Nylon Rode

Getting the Most Out of Older Sails

How (Not) to Tie Your Boat to a Dock
Fuel Lift Pump: Easy DIY Diesel Fuel System Diagnostic and Repair

Ensuring Safe Shorepower

Sinking? Check Your Stuffing Box

Why Choose the Wharram Design?

Winterizing: Make It Easy With Checklists

Boat Improvements for the Technically Illiterate

What Do You Do With Old Fiberglass Boats?

Stopping Holding-tank Odors

Giving Bugs the Big Goodbye

Galley Gadgets for the Cruising Sailor

The Rain Catcher’s Guide

Sailing Gear for Kids

What’s the Best Sunscreen?

UV Clothing: Is It Worth the Hype?

Preparing Yourself for Solo Sailing

R. Tucker Thompson Tall Ship Youth Voyage

On Watch: This 60-Year-Old Hinckley Pilot 35 is Also a Working…

On Watch: America’s Cup

On Watch: All Eyes on Europe Sail Racing

Dear Readers
- Boat Maintenance
Topside-Paint Endurance Test 3-Year Checkup
Two-part lpus rate highest for durability and gloss retention..

Our topside-paint test panels have endured three full years of 24/7 exposure to the elements, and the time has come for their final evaluation. Testers have annually scrutinized the paint swatches and rated the topside coatings on gloss retention, flow out, scratch resistance, and anti-oxidation ability. In this final round of evaluating, we will also compare the panel results with the products real-world performances aboard our test boats.
Our goal from the start of this test was to take a variety of promising topside coatings and apply them to boats in our test fleet-sailboats, dinghies, and other craft-and set up an in-situ test to validate or contradict our panel testing. These field tests have put paint systems through more realistic punishment in a true working environment. And the comparison between real world usage and static testing helped us validate both a wide range of the paints tested and the testing protocol itself. (See Field Test Findings” on right)
Testers reported on the application of these paints in the August 2008 issue and rated their performance in the November 2009 and February 2011 issues. Now, at the three-year mark, testers can offer some interesting observations about specific paints and paint types.
How We Tested
For the long-term evaluations panel test, we applied two coats of each paint to carefully prepped sections of fiberglass panels. The panels endured identical weathering, and the swatches were washed with a mild soap before inspection. All ratings are relative to the field.
Gloss-retention testing included taking reflected light readings, in bright daylight, with a spot meter and reflected light meter; results were averaged. To test for oxidation buildup, testers placed a new cotton/polyester piece of cloth on a rotary disk and moved it slowly over each coating surface for 20 seconds, then noted any residue on the cloth.
To determine the hardness of each coating, testers used Gradcos pencil hardness test method: A roller device holding a pencil at a given angle was pushed across the surface of the coating; by using pencil leads of varying hardness, the coating was eventually scratched, and testers noted the hardness of lead required. We rated each performance on a 1-5 scale with 5 being the hardest. Tests were repeated five times.
To test for adhesion, testers used a scalpel to cut crosshatches through small sections of paint, then placed a piece of masking tape over the crosshatched surface, rubbed it and pulled it off. Paint pulling away from the surface detracted from the rating. All of the paints passed the adhesion test.
For the one-year report (PS, November 2009 ), testers evaluated abrasion resistance using a Scotchbrite scuff pad and 3 pounds of pressure; this test was conducted only on white paints. They used drops of dark tea (mimicking tannic acid, the culprit behind most waterline stains) to evaluate stain resistance.
Test Panel Findings
All of the topside paints that weve been monitoring fall into four categories: conventional enamel, modified enamels, two-part coatings, and water-based paints for marine use. Our tests found that when it comes to ease of application, the one-part products stole the show. But the highest marks for gloss, hardness, and durability went to the two-part polyurethane coatings.
Our intentional use of the term coating stems from the way these long-chain, polymer-linking paints behave. In essence, they are more of a catalyzed resin than conventional enamel. The latter loses solvent through evaporation during its curing process, while the former goes through a molecular crosslinking process that leads to both extra hardness and a wet-looking, high gloss. One thing we did notice in this field of super performers was that they come with some tradeoffs.
For example, industry leader Awlgrip (an Azko Nobel company) is the manufacturer of coating systems marketed for professional use only. Because their two lines of paints are available to the general public at West Marine and other retail chandleries, we included them in the test. These are not DIY coatings for the inexperienced, but the skilled and practiced DIYer-those already familiar with fiberglass repairs, applying epoxy primers, and fairing a surface, and who know what sanding to perfection really means-may be ready to handle professional-grade products like Awlgrip.

The top-rated Awlgrip behaves much like the other two-part products in our paint reviews, and it delivers the very best results. The companys top-coat bifurcation gives users two different products and approaches to two-part painting, and its worth a closer look. The makers traditional two-part, high-solids, polyester-based linear polyurethane (LPU) coating is named Awlgrip and its acrylic, modified two-part polyurethane topcoat is Awlcraft. The latter is easier to handle and allows a user to fix flaws in the finish or spot repair damage that occurs at a later date. Sags, hangs, or a fly doing the backstroke just after the final coat is applied don’t result in as critical a failure as they do with Awlgrip. With Awlcraft, wet-sanding and touching up is not as much of a Michelangelo-level skill as it is with Awlgrip because Awlcraft is a bit softer and can be rubbed out and polished back to maximum gloss in the same manner automotive paints are handled. However, as with all softer acrylic-based LPUs, theres a drop in abrasion resistance when compared with polyester-based LPU paints like Awlgrip.
Between top-rated, top-priced Awlgrip and much softer, brush-friendly one-part enamels resides an interesting array of chemical innovation. Traditional enamels like those made by Z-Spar, Kirbys, and Sherwin-Williams delivered good initial gloss but most deteriorated over the three-year test run. The good news is that none suffered adhesion loss or excessive oxidation, and an open can of alkyd enamel doesn’t have the harsh chemical odor that two-parts have.
Interlux and Epifanes urethane modified enamels outpaced old-style paints and nudged ahead of Pettits EasyPoxy. West Marines Sea Gloss Pro also delivered great results. CrystaLacs Crabcoat was the only water-based product in our test, and from the start, gloss was not its strong suit. But Crabcoat does offer good adhesion, durability, and an attractive semi-gloss, and for those working inside or in tight confines, theres the bonus of a low VOC level. However, when it comes to comparing one- and two-part paints, its important to note that theres a significant performance gap between them.
After three years of testing, its become clear that two-part paints are in a league all their own. All two-part coatings we evaluated had more shine and better adhesion at the three-year point than any of the single-can options. That said, there was a grouping of top single-part urethane modified enamels that surprised us with their durability and, to a lesser extent, their shine.
Interluxs Brightside and Epifanes Mono-urethane are case in point, and in our third-year panel evaluation, they earned high marks as all-around paints when it came to ease of application and durability. Perhaps the best test of their tenacity was how well they held up on the cockpit sole of Technical Editor Ralph Naranjos Ericson 41. (See Field Test Results on right) These paints have endured 3 years of sailing travails plus the onslaught of icy winters and boiling hot summers. The gloss has diminished some, but their adhesive quality as nonskid paints and waterway topcoats has been impressive.
When all was said and done, theres no question that the professional approach to a two-part paint makeover yields the best-looking results. However, there are a few shortcuts that do work and a few that should be avoided. One-part urethane modified enamels like Brightside, Epifanes Mono-urethane, and Pettits Easypoxy deliver handling convenience and a surprisingly long-lasting finish. Boat owners who have mastered the handling challenges of a two-part LPU sprayed finish can get close to the like new look of a professional paint job. But keep in mind that these coatings contain aggressive solvents and other unfriendly chemicals. Covering up and wearing an appropriate respirator and eye protection are part of the process.
We were glad to see that results from our three-year panel testing showed a strong correlation to our field test findings. The winners in both test groups paralleled paints highlighted in previous years. One of the biggest surprises, however, was that traditional enamels held their own, retaining good adhesion, despite losses in gloss retention. On the panels, all of the paint products remained well adhered, but a few failures in the field could be linked to shortcuts in preparation. We demonstrated that those looking to lessen the chances of ending up with flaking and peeling paint should consider using an epoxy primer and above all, follow manufacturer surface prep guidelines as closely as possible.

- George Kirby Jr. Paint CO.
- Sherwin-Williams
- Signature Finishes
- West Marine
RELATED ARTICLES MORE FROM AUTHOR
This weekend I saw my first example of a “vinyl wrap” as a topside application, on a 50’ Fontaine Pajot (sp?) catamaran. Almost overnight the boat Was transformed from an ordinary, dated, white hulled cat, to a like-new boat in a striking gray finish. How does this system compare to other topside finishes like traditional gel coat and two part finishes?
Hello D.N.; thanks for the update on the topside paints but one question. I used EZpoxy polyurethane on my 1967 Morgan 24 this year and noted they offer the Performance Enhancer to increase hardness and durability. I used it as they advised and am happy with it thus far. The results are noticeably harder and cure faster and (for those who desire it) there is a higher gloss… Why have i heard nothing about the combination in various reviews including yours? It is an easy to work and forgiving topcoat…why no notice?
i am wondering about using an oil based exterior finish that is NOT a marine product… obviously these are much cheaper… any testing on this?
I have restored, modified, and repainted a few boats in my amature days. Full disclosure I am a former marine mechanic and have taught technologies for 20 years. Brightsides has been an overall disappointment to me. In 4 attempts at repainting my Bluenose 24, (my brother in law is a rough landing skipper) I only had the gloss come up once. The other three times the paint kicked too early or just cured dull. In putting an epoxy bottom coat on my Shark 24, with Pettit epoxy, that claims to cure even down to 5 celsius, the paint started kicking on the roller leaving a bumpy mess like a teen’s complexion. Pettit replaced the product and after exhaustive grinding off the previous mess, it happened again. Pettit is off my list forever. Epifanes has been my go to choice for my trawler yacht, a Mainship Mk1. It has been the best experience of them all. Using a roll and tip method, the brush strokes did not level out leaving noticeable lines up close. I contacted Epifanes Canada and they now recommend just rolling, and they are right. Just roll it on and it’s great. Yes the mono urethanes are softer, but they are so much more user friendly when rolling on. A factor when some drydock locations would not allow spraying without building a full enclosure. After my first season, a green dockhand caused a minor scratch with improper line handling. I called Epifanes and they advised just tape of a trapezoid shape around the scratch and repaint it. You will have to get real close to see the tape line. BAM! it worked just like they said. I now do not fear docking scratches as I know I can successfully with little fuss repair them during drydock times, or even afloat if need be. I have no investment in any of these products. I am Epifanes sold. Awlgrip is too fussy for a DIY boatyard job. Unless you want to fork out big bucks, accept the 4 foot test. If it looks great 4 feet away, be happy.
Total Boat on deck. A forty years old non skid started to erode. Sanding was almost impossible: it grinned all sand paper and the majority of wheels. I decided to deal extensively and degrease. And coat of Total primer ( same color as the original ) was applied. A second coat after two days did not offer nay adhesion advantage, using the metal comb scratch and peel testing method. It was followed by one coat of Total Boat Wet Edge (white) mixed with 33% Total Boat Non Skid ( Light grey to match the primer ). I added 50% of Interlux flattening agent. The result is very satisfying. I liked the non-skid : its material does not settle as much as other manufacturers like Petit. This system will be easy to maintain if necessary. It took 5 hours per coat on a 36ft deck, trapping included. The temperature was above 65F. and the humidity was low. There was high wind that accelerated the drying process. I’d be interested to read Practical Sailor writing on Total Boat products. This system was tested against test panels of Petit and Interlux. I did not see any major difference in adhesion nor ease of application.
Before tackling ANY large painting project, paint a few 1-to 2-foot panels, playing with rolling, tipping, and specifically, the working temperature and amount of thinner.
Never push the low temperatures or high humidity. Follow the instructions or the odds will incline against you. I avoid paint projects both spring and fall in cold climates–the weather is just not dependable enough. Instead, I target that part of the summer when the wind stinks anyway and sail in the off-season.
I’ve always been able to get the finish I wanted. I pick the weather, dial in the thinner, buy the best rollers and brushes, and prep ahead of time so that I can easily finish in one push.
As for non-marine finishes, Rustoleum Gloss Protective Enamel is dependable for little projects like brackets and backing plates. I always keep a can of white handy–exact color matching is not vital on small things. It takes fewer coats than yacht finishes and seem to hold up about as well. Every hardware store has it.
LEAVE A REPLY Cancel reply
Log in to leave a comment
Latest Videos

The Performance Sailboat from Island Packet: Blue Jacket 40 Boat Review

Top 3 Winter Boat HACKS!

Cabo Rico 34 Boat Review

Super Shallow Draft Sailboat: The Leeboard Sharpie
Latest sailboat review.

- Privacy Policy
- Do Not Sell My Personal Information
- Online Account Activation
- Privacy Manager
Please verify you are a human
Access to this page has been denied because we believe you are using automation tools to browse the website.
This may happen as a result of the following:
- Javascript is disabled or blocked by an extension (ad blockers for example)
- Your browser does not support cookies
Please make sure that Javascript and cookies are enabled on your browser and that you are not blocking them from loading.
Reference ID: e15d353c-7786-11ef-ad83-2ccb87205342
Powered by PerimeterX , Inc.

Boating Basics Online is reader-supported. When you buy via our links, we may earn a commission at no cost to you. Learn more
The Best Boat Paints for Aluminum, Wood, Fiberglass & More
Written by J. Harvey / Fact checked by S. Numbers

If you want to enjoy a relaxing and fun sailing experience without troubles, you’ll need to keep your boat in the best possible condition. One of the things that you have to pay attention to is fading and flaking paint. The ultimate solution for this is the best boat paint in the market today. Here’s a guide for you on how to identify the right paint:
- Based on Your Boat’s Material: You don’t have to rely on a certain type of boat paint to match all kinds of boats. Bear in mind that different materials can be used in building a boat. Thus, identifying what your boat is made of is important to get started with the paint job. It can be aluminum, wood, and fiberglass.
For example, fiberglass boats need tough urethane paint to give a glossy finish or acrylic latex that adheres well to the said material without blistering and cracking. Moreover, there’s also marine paint for wood and aluminum.
- The Paint’s Composition: Although several marine paints can render the highest shine or the most desired result, you have to be aware of its composition. The number of chemicals in these paints can be toxic and pose health risks upon exposure. Be aware of the content if it’s safe or not. A respirator mask can help you get away from it though. You can also opt for eco-friendly and less toxic boat paints.
- The Boat Parts that You’ll Paint: When painting the exterior of your craft, the best paint for boats is something that can withstand long water exposure. Antifouling paint is mainly formulated for below the waterline use. You’ll see an indication on the label if it’s antifouling or suitable for below the waterline application.
You may think that there’s a ton of important factors that you have to consider when buying boat paint. Don’t lose hope as this review has sorted out the most outstanding boat paints.

- Has outstanding gloss retention
- Spreads easily on the surface
- Has long-lasting UV protection
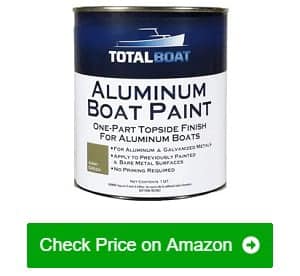
- Easy to use with various tools
- Smoothens and dries out in no time
- Can easily clean the painted surface

- Doesn’t flake or chip easily
- Can restore old aluminum boats
- Creates camouflage finish for hunting
Table of Contents
1. Rust-Oleum 206999 Marine Topside Paint
2. totalboat 511784 aluminum boat paint, 3. duralux m720-1 marine paint, 4. totalboat totaltread non-skid deck paint, 5. seahawk aluma hawk jon boat green, 6. interlux ybb379/1 fiberglass bottomkote paint, 7. rust-oleum 207012 marine flat boat paint, 8. interlux y4359/qt brightside polyurethane paint, 9. tuff coat ut-100 black-gallon, 10. pettit 3237q ez-poxy paint, 11. us marine products 250 antifouling bottom paint, factors to consider when choosing boat paint, do you need special paint for a boat, how to prepare your boat before painting it, should i paint or gelcoat my boat, can i use spray paint on fiberglass boat, best boat paint reviews.
Because of this marine paint, it didn’t cost me a lot to freshen up the look of an old fiberglass boat. No one can tell that a boat is an aged one as it has outstanding gloss retention. Apart from fiberglass, it can also create an even and smooth finish on metal and wood. I’m in awe of its beauty and elegance.
I was reluctant at first to use this topside paint for the boat hull due to the indication of use below the waterline. Some helpful information could be found in forums and marine topside paint reviews though. It’s fine if your boat only contacts with water when in use and it’s being trailered later on. Luckily, it suits me well because those are part of my routine when handling my boat.
I sand and apply mineral spirits between coatings for an awesome outcome. It’s self-leveling too, so it’s not hard to lay it out on the surface. You can either use the usual brush or foam brush. Only its strong smell bothers me, and this compels me to wear a respirator mask during application. But generally, this Rust-Oleum paint gives fantastic results from the roll and tip method.
This paint is also useful covering rusty gas meter pipes, and it turns out splendidly. It’s available in various colors and the battleship gray is approved by the gas company. The colors are similar to Awlgrip boat paint.
- Creates even and smooth surface on fiberglass, metal, and wood
- Spreads easily on the surface due to self-leveling property
- Works well with the roll and tip method
- Used on covering rusty pipes
- Has a strong smell
Whether it’s for the maintenance of your boat or refurbishing an old one, this marine paint is the best choice for aluminum. The low-sheen coat from it is not only captivating but lasts for a long time. I can attest that it has a resistant finish against UV rays, corrosion, abrasion, and harmful chemicals.
This is the only paint for aluminum boats that is easy to use. The previous paints are quite thick and hard to work on. I sometimes use an electric paint sprayer, and I don’t have problems with clogging. Another applicator option is a good-quality foam roller.
My aluminum boat is sandblasted before I apply several layers to create a nice finish. I do it to ensure that the paint holds well. Don’t be dismayed when you see that the first layer is blotchy. I usually apply three coatings to achieve the desired result. The waiting time for it to dry doesn’t test my patience as brush marks become smooth (if you use a brush) in no time.
- The best choice for maintenance or refurbishing an old aluminum boat
- Resistant against UV rays, corrosion, abrasion, and harmful chemicals
- Creates camouflage and low sheen finish that doesn’t chip, fade, or peel
- The first coat may appear blotchy
The main thing I like about this product is its cost-efficiency. Imagine how a 1.5L of this marine paint can cover three boats! It can be done because a small amount of this substance can go a long way. It’s a vinyl-type paint that suits aluminum boats the most. Some people use it in pools due to its plastic-like coat.
Since I don’t want flashy paint, I’m glad that it creates just a slight sheen. It never fails to give my aluminum boat a brand new look. Even a 40-year old canoe was restored in its former glory. Aside from aesthetics, I can create a durable finish as it doesn’t flake or chip even though the boat bumped against dock bumpers a couple of times.
Expect that vinyl-type paint like this is pretty thick. You can use a brush or a roller but not a sprayer as it’s sticky. It’s self-leveling and the coverage is satisfactory. In addition, I haven’t come across issues with sagging or running to both vertical and horizontal surfaces.
Applying it thinly is fine, and you can obtain the sought-after finish after two layers. Light sander and lacquer thinner are some of the things that you may need. But you can just pass on the primer without ruining the lasting effect.
- Cost-efficient as a little amount of paint can go a long way
- Doesn’t sag or on vertical and horizontal surfaces
- No need for a primer for a lasting effect
- Too thick to be in a sprayer
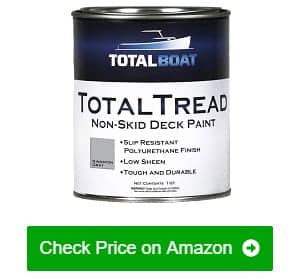
This deck paint consists of one part polyurethane that seems to have the strength of two-part polyurethane paint. Having this on my deck and cockpit is a brilliant idea because it guarantees secure footing for everyone on board. It can happen as it forms a rubberized texture but is not abrasive at all. Furthermore, the possibility of slipping is minimized.
To achieve the expected result, I started with stirring the paint with the help of a drill for 5 minutes. I thinned it out and used a nap roller to spread it properly. Don’t forget to wear gloves as this substance is so hard to remove without the strength of mineral spirits. While there are only four color options, they’re tintable with Totalboat wet edge boat topside paint.
Upon seeing the first coat, I know that I need to apply it for the second time. Indeed, applying two coats does the trick. My 21-foot bay boat turned into a well-groomed woman with its low sheen finish! Surface preparation is crucial to obtain the finish that promises durability. From what I’ve observed, it doesn’t easily fade or peel.
But the drying time can test the patience of boat owners. It’s still tacky after 48 hours. By all means, it dries quickly when you place the boat under the sun.
- Forms a rubberized texture for secure footing
- Not abrasive
- Spreads well when applied
- Tintable with Totalboat wet edge topside paint
- Low sheen finish that doesn’t easily fade or peel
- Versatile as it can be on different materials and boat parts
- Hard to remove from your skin
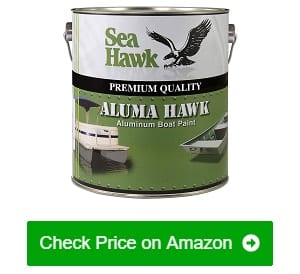
I was lost in searching for the right marine paint for metal and aluminum boats. Relief came to me when I discovered this paint. Thanks to its corrosion inhibitors, I don’t have to worry about damages that can untimely depreciate my Jon boat and pontoon.
I’m impressed with the durable finish of this paint. The coverage is amazing too! A can of this Aluma Hawk paint is not fully consumed for a 10-foot Jon boat. It’s worth every penny because its application goes well, like I’m spreading peanut butter on the toast. More so, I tried using a sprayer gun and things went well as expected.
Another thing to love about it is that you don’t need a primer. Although there’s no indication of being antifouling paint, it can be used above or below the waterline. I only need to make a mixture of 50-50 paint and MEK. Take note of this so you can lay it out on the surface without issues. Stirring the paint can be a challenge, but just take your time and you’ll get the right texture.
- Has corrosion inhibitors
- With an impressive durable finish
- Worth buying due to the amazing coverage
- No need for primer
- Can be used above or below the waterline
- Great color for hunting
- Stirring this paint is challenging
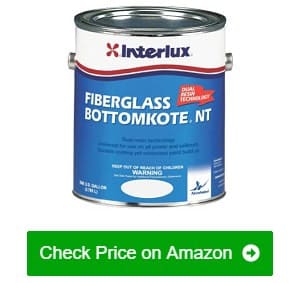
I’ve been using Interlux boat paints for 25 years, and I think this is an improvised version of Interlux 779. I can vouch for how trustworthy this company is. This bottom paint delivers several advantages that I’m grateful for. With the formulation of dual resin technology, the finish that it creates is durable and will surely last for a long time.
This spreads well so I can say that it’s worth spending for. To my delight, this is a quick-drying paint. You can launch your boat the same day you do the boat painting job. It won’t freak out impatient boat owners who need to be back to the waters in the soonest time.
Since it has the characteristic of ablative paint, you can’t expect high gloss from it. Slow polishing action will impress you in keeping the surface clean. Because of this ability, unwanted paint build-ups are discarded. Continuous use of your boat also means unstoppable smoothening action. This function makes it fuel-efficient in exchange for trouble-free maneuvering of your boat.
- Durable and long-lasting finish
- Spreads well and quick-drying
- Has slow polishing action to remove unwanted build-ups
- Smoothens the hull with continuous use and fuel-efficient
- Withstand different kinds of water
- Can be on various surfaces
- Not for those who like high gloss finish
- Not suitable on aluminum hulls
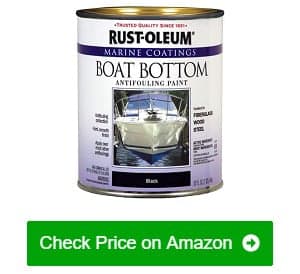
I checked several antifouling paints and I made the right decision in picking this one. It’s the paint for the boat bottom, especially if you let your boat stay in the water for days. The finish of this bottom paint doesn’t come off easily despite bumping onto trailer bunks. The credit goes to the hard and smooth layer that it creates.
It’s been on my boat for over a year now and it has survived all the seasons. Slime and barnacles are at the bottom of my boat after a week of being stationed in the water. It’s not a big issue as I can scrape them with so much ease. It’s also reliable when it comes to protection, as it resists UV damage, moisture, mildew, and salt. Hence, it won’t be budged when exposed to either fresh or saltwater.
My brother thanked me because this has fixed the bottom of his sailboat that is damaged by beaching. It can mend oopsie and flaws on the boat’s bottom. Moreover, this is not only a marine paint for fiberglass boats. It can be on bare wood or with existing paint, bare metal or rusted ones, decks, walkways, and more.
- Has a hard and smooth finish that doesn’t easily come off
- Can survive all seasons
- Slime and barnacles can be easily scraped
- Protects the boat from UV damage, moisture, mildew, and salt
- Fine with either fresh or saltwater
- Can be used to mend damaged on the bottom of the vessels
- Mixing or stirring the paint can be challenging without any tool
Boat painting is much easier and productive because of this one part polyurethane paint. I don’t have to incorporate the tedious roll and tip method. Just by rolling, I can get a hard and high gloss finish. Although I use brushes for application, the coat looks like it’s done through spraying as the leveling is awesome.
Despite the properties that guarantee straightforward application, I have to do my part in preparations. Sanding is needed, but I missed some spots once. This paint saved me by covering the flaws. Furthermore, it goes smoothly whether you put it on a vertical or horizontal surface. It’s not only easy and quick to apply paint, but drying time is also awesome since it would only take a few seconds.
You may do a rolling and tipping method. However, it’s essential to use marine brushing fluid. This additional liquid can adjust to humidity, temperature, and painting style. I usually make two layers to achieve the finish that I love. It’s almost the same with the gloss of a gel coat or something like a bright white light. In regards to aesthetics, you’ll enjoy choosing from fiberglass boat paint colors due to the several available shades.
- Hard and high gloss finish that covers flaws
- Straightforward application and quick drying time
- Goes smoothly whether on a horizontal or vertical surface
- With gloss like gel coat or bright white light
- Has protection against abrasion and staining
- Resistant against grease and oil for easy cleaning
- The roll and tip method may be tedious
There are textured particles in the formula of this non-skid paint. It’s ideal for decks and floors to prevent slipping and accidents. Besides keeping everyone safe, it also protects surfaces from getting damaged.
However, many boat owners find it useful in hunting, fishing, and bow fishing. In my case, I usually go fishing over a dozen times. Dirty foot traffic, jugs, bait, and fish make my boat messy. I’m glad that I chose the black color, so the stain won’t be too conspicuous. Cleaning by scrub and water is done with ease as well. I sometimes just use a hose to get rid of the dirt and no negative effects have emerged.
The extreme durability of this paint is not to be doubted. Once it’s dried, I can’t scratch it with a screwdriver. The texture is nice and it doesn’t get hot in an instant. Hence, I don’t wonder why it’s resistant to UV rays and harsh chemicals. I’ve seen how it’s not easily degraded by wear and tear of frequent use.
As you can see, there’s a lot to gain from this paint. That’s why several coats and steps that are required to complete the durable finish are worth it. Primer is always needed to ensure that it holds on the surface. I always use a drill mixer to allow the rubber to integrate properly. This method also ensures that I can apply the paint evenly.
- Non-skid to prevent slipping and accidents
- Cleaning dirt and mess is undemanding
- With extreme durability
- Has a nice texture that doesn’t instantly get hot
- Resistance against UV rays and harsh chemicals
- A primer is always needed for a better hold
Even without incorporating the tipping method, I was able to give a nice coat to my boat. The electric blue hue dries up like a gel coat layer due to its superior gloss retention. I’m so fond of it because it improves my boat’s appearance.
Some of my friends even suspect me of being so attentive with my boat’s paint like I do application twice a year. They’re just being exaggerated as they can’t help but be amazed to see the gloss consistency. The superb appearance is maintained due to advanced ultraviolet filters in this paint.
To gain this result, the manufacturer has added silicone to the formula. Thus, it’s easy to apply while establishing the glossy effect. This topside boat paint can also form a coat that protects your boat from damaging elements and weather changes. I know that the ads are not bluffing due to the polyurethane in them.
I even can’t believe it with my eyes that the gloss remains unchanged and lasts for a long time. Thus, it exceeded my expectations. Even without incorporating the tipping method, I was able to give a nice coat to my boat. It sets right after every brush stroke. The process is straightforward, and I enjoy watching it being laid out on the surface. Painting with this one part of polyurethane is not a hard task but fun instead!
- Has superior gloss retention that improves a boat’s appearance
- Protection from damaging elements and weather changes
- The glossy, gel coat layer lasts for a long time
- Brushing this paint is so easy even without the tipping method
- Economical as it can go a long way
- Can get messy
It’s sometimes a long process to look for the ideal bottom or underside paint. Not to mention that there’s a wide array of selection in the market. I’m glad that I gave this paint a shot, and I wasn’t wrong as it takes care of my 18-foot boat very well.
The full-season ablative properties of this product got me covered. Furthermore, I don’t have to worry about barnacles, algae, hydroids, and saltwater. These things won’t have permanent residence on the boat bottom. I like the ablative polishing that it does. Even with continuous exposure to water, paint build-up won’t trouble me. You can depend on it to resolve low to moderate fouling conditions.
I’ve also found out that it’s both hardy in fresh and saltwater. When all of these abilities are summed up, they can be described as universal or international boat paint. It can be on every carefully prepared bottom except aluminum. Aside from its toughness and durability, I can always obtain a smooth finish that resists abrasion.
- Has full-season ablative properties
- Barnacles, algae, hydroids, and saltwater can’t harm the bottom
- Does ablative polishing to dismiss paint build-up and low to moderating fouling conditions
- Hardy in fresh and saltwater
- A universal boat paint that can be applied with ease
- In black dirty to not easily catch dirt
- Not for aluminum surface

Different Types of Boat Paint
In a DIY paint job, you have to collect the things that you need on your own. It’s better that you have everything on hand before starting. You have to head out to boat supply stores or hardware stores to purchase marine supplies. The main concern that you may have is the type of paint that you need to use. Here are the varieties to choose from:
- Alkyd enamel paint
Every inexperienced painter of boats should know that this is one of the outstanding paints in the market. You’ll find it at a low price, but it’s not as glossy as other types.
- One part polyurethanes and enamel paints
These paints are well-known for their durability and resistance to outdoor elements. Application is a breeze and investing in them won’t cost you much money.
- Two-part polyurethane paint
It has a reputation for being built-to-last paint. It’s a combination of incredible durability and a lasting glossy effect.
- Boat paint for fiberglass
Three kinds of paint suit fiberglass boats. First is urethane that has a large chemical content. Thus, you need to wear proper protective equipment during the application. It’s not water-based, but it’s allotted for projects that receive a lot of beating. It’s due to its ability to repel chipping, wear and tear, and possible damages. A glossy finish comes along with its excellent performance.
The second option is acrylic latex as it can stick on the fiberglass well. Cracked and blistering can’t take it down. It can even hold up steadfastly from the weight of cleaning. It’s water-based and eco-friendly, so using this will not bring discomfort and inconvenience. This paint is great for both indoor and outdoor use.
Last but not least, a mixture of acrylic resin and urethane is perfect for fiberglass too. It’s also characterized as acrylic and water-based polyurethane. Many boaters know this because of its terrific adhesive properties. What makes it favorable on the user side is that you may not clean the fiberglass before application.
The toughness of this mixture is amazing. It can even stick on dusty spots and old, existing paint.
- Bottom Paint
The ideal bottom paint depends on how you utilize and store your vessel. Although you’ve used multi-season paint, you still need to double-check if you need to do some touch-ups every year. Going pro-environment is through using copper-free paint. Nevertheless, you may need one with copper if you sail all year round along a rugged marine environment.
Benefits of Using Boat Paint
The absolute benefit that you can get from boat paints is the avoidance of pricey repairs or buying a new boat. Utilizing reliable paint is one way of taking care of your boat. It’s a significant maintenance item that can block possible damages in advance. It’s a fact that boats are expensive investments. Hence, you can’t just disregard the importance of keeping its optimum performance and prolonging its life span.
The clean and impressive appearance of painted boats is not only for aesthetics. It’s also a layer that protects the surface from abrasion, toxic elements, and instant fading. Saltwater can be harsh, while the marine environment can sometimes be in bad condition that can harm boats. Additionally, boat paints can also counter rust, corrosion, and scratches.

The word ‘special’ is not the specific word for your boat’s needs. As mentioned above, different types of the best boat paints are made for various purposes. For example, non-skid paint with the textured compound is your choice if you wish to have a non-slip surface for decks and floors.
To ensure that you can obtain the best result, here are some simple instructions in preparing your boat before painting:
- You have to clean your boat thoroughly. Sand, dirt, and any type of waste should be eliminated. You may think that it’s clean once your boat is taken out of the water but there’s more than that. The correct way of cleaning your boat requires rags, scrapers, and a high-pressure hose. With these tools and your dedication, your boat will be dirt-free.
- Some pieces of hardware need to be taken out of the boat before you begin cleaning. Be smart to identify the things that you need to remove. With the right judgment, you won’t create undesirable damages or cracks. As for the objects that can’t be lifted, cover them with painter’s tape to keep them clean.
- Marine solvent and rough sponges can help you remove the waxy coat on the vessel. These things can get rid of even the stubborn spots or loose paint. It’s vital that you thoroughly remove it before painting.
- Preparation is also subject to the necessary repairs. Fill any dent, knock, or deterioration before the painting job. This is intended to free the final finish from lapses and holes. A marine-grade epoxy is an item that will help you accomplish this task.
- Sanding is essentially done most of the time. 20-grit sandpaper, finishing sander, and random-orbit sander are the things that you need to come up with a smooth finish. Every inch should be sanded properly. This process ensures that the paint binds well and an even layer is formed.
The paint used on boats is urethane formulated, which means it’s specifically made for boats and yachts. Marine paints come in different colors, so you can choose what you prefer. Bottom paint is known to be an expensive option, but it protects the underside well. Once the hull is painted, it becomes resistant to peeling and cracking.
However, marine paint is not chemically stable compared to gelcoat. This implies that painted surfaces are more vulnerable to chipping. Preparations are essential before laying out the paint. These steps will enable you to gain a smooth, even, and glossy finish. Even though there are some things to do, they’re easy. Thus, it’s always in DIY painting jobs.
Despite the unbeatable durability of gelcoat, you have to know that it’s labor-intensive. A lot of sanding is required to obtain the sought-after gloss because you have to go through multiple coatings. With these facts, paint is easier to work with despite necessary preparations. On the other hand, you have to look out for demanding repairs and refinishing of the gel coat.
All in all, gelcoat can last for two decades and paint can serve you for up to 10 years. Many boat owners settle for marine paint because the needed preparations are more manageable and less laborious than gel coats.
Fiberglass is non-porous, which means that it’s not compatible with spray paint. Nonetheless, you can do it by taking some techniques. Note that it can’t be done directly like when you spray it on wood. The fiberglass surface should be conditioned so the paint won’t peel off right away. Aside from aiming for a smooth finish, you have to make sure that no dripping, running, and sagging will take place.
You can begin with the usual preparation which is cleaning your boat. Dish soap and water can help you with it. Allow it to dry before you abrade the surface using a palm sander with 400-grit sandpaper. Then wipe the debris down with a tack cloth. The next step is lightly applying a primer to the fiberglass. Don’t apply it generously at a time. The right course of action is by misting to avoid any flaw in the result.
Let the primer sit for four hours. When it’s dry, you can spray acrylic paint in the same way that you apply the primer.
Based on what this review tells you, there are several factors that you have to think about before you can bet the best boat paint for you and your boat. You’ll no longer be in hot water as long as you know what to find. Picking the right boat paint will give you the chance to improve the aesthetics of your boat and build protection from different elements out there. A smooth, durable finish also makes sailing safe and fun!

“I am James Harvey – founder of Boating Basics Online. It is established with the drive to help out first-time boaters, which are those desiring to explore their way through the water. So if you are new to boating, start from here with me. “
How to Articles | Bottom Paint Store
Learn more about boat paint applications and marine supplies.

Which Bottom Paint is Best for Freshwater Lakes?

The short answer is this: Antifouling Bottom Paint that works well in the harsh conditions of the Caribbean will be more than enough protection for boats in freshwater lakes. The real trick is choosing the paint that will fit your situation the best. Choosing a bottom paint with more biocide (usually cuprous oxide) will be more potent and fight off growth more successfully. Sometimes you don’t need to purchase the strongest and the greatest. A paint with just the right amount of biocide will do nicely and can also save a few bucks.
Here are some basic guidelines to help you decide which paint is best for your boat.

If the boat never comes out of the water except to be repainted , a Hard Epoxy Bottom Paint will keep away the algae. Sea Hawk Sharkskin is a mid strength Hard Bottom Paint that fits a tighter budget.
What about Bottom Paint Additives?
Sea Hawk bottom paint produces a paint additive called Bio Cop TF to help fight against algae and soft growth. This product will boost the effectiveness of your paint’s ability to keep the hull free of growth. **NOTE: Biocop TF Pint may only be used as a bottom paint additive in the following products: AF-33, Cukote, Sharkskin, Talon, and Tropikote. A booster has restrictions to paint added to and you should stick with the same manufacturer.
If you still aren’t sure what is needed for your boat, check out these other How To Articles:
Do I Need Bottom Paint on My Boat?
What is the Best Paint for My Boat?
Choosing the Right Boat Paint
How to Apply Bottom Paint Over Existing Bottom Paint
IMAGES
VIDEO
COMMENTS
Get deals and low prices on marine paint in Home Improvement on Amazon. Browse & discover thousands of brands. Read customer reviews & find best sellers
The TotalBoat Boat Paint is a solid choice for any boat lover and has more than 20 colors to choose from, including aqua mist, sea foam, and fire red. The paint leaves behind a gloss that's bright and is sure to stand out among other boats at the dock. This boat paint is incredibly easy and simple to apply.
Rust-Oleum Marine Flat Boat Bottom Antifouling Paint. As one of the most respected brand names in the bottom paint industry, Rust-Oleum is known for producing some of the best sailboat bottom paint and the Marine Flat Boat Bottom Antifouling Paint is one of them. This bottom pain is designed to be suitable for various conditions (both ...
While Californias anti-copper push has stalled for now, the movement continues to gain momentum elsewhere. Last year, Washington state passed legislation prohibiting copper-based antifouling paint on new boats sold after 2018 and banning the use of bottom paints with more than 0.5-percent copper on recreational boats after 2020.
After you have finished with the 600 grit sandpaper, it is time to move on to 800, then 1200. This process is important so you will be painting on as smooth a surface as possible. It is then a good idea to wipe the surfaces of the boat down with a damp cloth to remove any of the dust and flakes of metal/wood.
Racing Boats. For those seeking speed, ablative paints provide a slick and clean surface that is crucial for cutting through the waves. Their sleek, streamlined bodies sliced through the water with precision and speed. Each boat was coated in a shimmering layer of ablative paint, creating a smooth and clean surface that was essential for ...
In the days of carvel-planked and clinker-built wooden boats, an annual coat of topside paint was part of the spring commissioning routine. The softer enamels delivered a season of shine, oxidizing a little over winter, and by spring, they were ready for a light-scuff sanding and a rejuvenating coat of alkyd enamel. ... a best-of-both-worlds ...
We presume these boats are being relaunched the following season without being repainted. Favorites from Interlux included: Micron 66, Micron Extra, Fiberglass Bottomkote NT, and ACT. Pettit paints popular in this region included the ablatives SSA, Vivid, and Hydrocoat, and the budget-priced hard paint Unepoxy.
The Top 6 Boat Paints in 2024. 1. Great for Alu Boats in Brack: TotalBoat Alumipaint AF. 2. Easy Fiberglass: Interlux Fiberglass Bottomkote Aqua. 3. Strong Protection for Fiberglass: Sea Hawk Sharkskin. 4.
Then, divide it by the paint coverage listed by the manufacturer. Area to paint (in square feet) / coverage (in square feet per gallon) For example, a 35-foot sailboat with a 12-foot beam using a paint with a coverage of 400 square feet per gallon would be: [35 x 12 x .85] / 400 = .9 gallons per coat.
There are advantages to both kinds of paint, and perhaps the biggest factor in choosing between ablative and hard is how the boat is used. "For high-speed running you need hard paint," explains Ludgate. "At speeds of over 25 or 30 knots, ablative paints dissolve much faster.
You may use this paint on aluminum, fiberglass, wood, or steel boats in fresh and saltwater. You can also use it on outdrives, trim tabs, and other underwater metals. Krypton comes in five bright colors (blue, white, red, black and green) and is available in quarts or gallons. Coverage is 350-400 square feet per gallon.
The best bottom paint not only protects your boat's performance, it looks good, too. By Lenny Rudow. Bottom painting your boat is a tough, dirty, time-consuming job, but choosing the best bottom paint for your needs can be even tougher. Bottom paints are all intended to eliminate growth on your boat's bottom and to get the job done they ...
Your best bet here is to use a bottom paint that contains zinc or ECONEA as the biocide. Worthy of mention, is the specialty paint PropSpeed which contains no biocide at all. Instead, it is a super-slick coating that easily sheds marine growth. Propspeed is used on underwater metals, including props, struts, shafts and keel coolers.
The bottom should be sanded smooth after fairing and before painting. Even if an orange is round and fair, if you spray paint it you will not end up with a smooth surface. You must start with a smooth surface. For a fast finish, spraying gives an even, smoother coating and reduces the amount of sanding time.
Then Janet used a solvent wash to ensure a strong bond with the primer paint. 3. After dings and cracks were repaired and sanded, two coats of epoxy primer were applied. 4. Following another round of sanding, vacuuming, cleaning, and taping, the couple rolled and brushed on a fresh coat of Awlgrip topcoat. 5.
Hempel Polygloss boat paint. Designed for brush or roller application, Hempel Polygloss is a high gloss enamel that is claimed to protect against abrasion and degradation. This boat paint has a limited number of colours available (white, black and blue), but should give good results. RRP: £40.99/750ml.
Apply primer, if necessary, and resand. Apply the finish paint with a partner, using roller and brush. Let each coat dry completely before lightly sanding for the next, laying on a minimum of two coats. Protect yourself and the environment. A smooth application of bottom paint helps boat performance.
Ensure an even spread by holding the brush at a 45° angle—this minimizes brush marks. The best finish is achieved on large areas by two people; one to apply the paint, the other following immediately behind to smooth the finish. Clean or change brushes every 20 minutes or so. Always use lint-free cleaning cloths.
Refer to the paint manufacturer's details on coverage amounts (typically given in square feet per gallon). Here's an easy formula for figuring out the square footage of your hull below the waterline, where you'll be applying bottom paint. Length (in feet) x Beam (in feet) x .75. Here are some typical estimates for various types of boats.
6. Our topside-paint test panels have endured three full years of 24/7 exposure to the elements, and the time has come for their final evaluation. Testers have annually scrutinized the paint swatches and rated the topside coatings on gloss retention, flow out, scratch resistance, and anti-oxidation ability. In this final round of evaluating, we ...
Manufacturers say it's best to apply boat paint when temperatures are in the 50°-85°F range and humidity is below 65%. If you don't have access to a heated shed, plan to do the job when conditions in your area are closest to these parameters. ... If you are painting a new boat for the first time, wipe down the entire bottom with a good ...
Among marine paints for fiberglass boats, aluminum pontoons, and wooden boats, this one creates the most durable layer that protects my boat. 10. Pettit 3237Q EZ-Poxy Paint. Even without incorporating the tipping method, I was able to give a nice coat to my boat.
Here are some basic guidelines to help you decide which paint is best for your boat. If the boat comes out of the water periodically, such as on a lift or trailer, Ablative Bottom Paint is the correct choice. When in fresh water, slime and algae tend to be the most concerning. Sea Hawk's AF-33 or Talon and Blue Water Marine's Copper Shield ...
This initiative is designed to guide boat owners, marinas, and boatyards in adopting best practices for antifouling, thereby reducing the environmental impact while maintaining the performance benefits. Choosing the Right Antifoul: Environmentally Friendly Options. Selecting the right antifoul is the first step in responsible antifouling.
Look at all the accessories you may have on your bow. Ask Captain Chris to help you with your new boat - https://www.captainchrisshipstore.com/