

Learn How to Make a Miniature Sailboat | Step-by-Step Guide
Alex Morgan

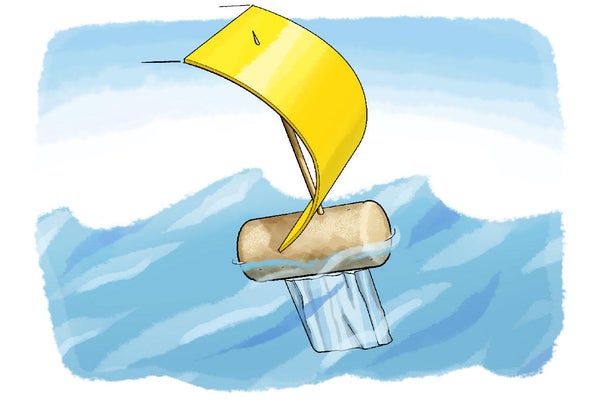
Making a miniature sailboat can be a rewarding and enjoyable hobby. Building your own miniature sailboat allows you to unleash your creativity, learn about boat construction, and have a functional piece of art. With the right materials, tools, and techniques, you can create a beautiful miniature sailboat that is both aesthetically pleasing and capable of sailing. In this article, we will guide you through the process of making a miniature sailboat, from gathering materials and tools to painting and finishing touches, testing and setting sail, as well as troubleshooting and maintenance. Let’s embark on this exciting journey of constructing your very own miniature sailboat.
Key takeaway:
- Making a miniature sailboat maximizes creativity: Building a miniature sailboat allows individuals to express their creativity and craftsmanship while creating a functional toy or decorative piece.
- Gathering the right materials and tools is crucial: The quality of the miniature sailboat depends on using the right materials and tools for each component, such as the hull, mast, sails, rigging, and accessories.
- Attention to detail enhances the finished product: Painting and adding finishing touches to the miniature sailboat, including sanding, priming, applying paint and varnish, and adding details and decorations, bring the sailboat to life and make it visually appealing.
Gather Materials and Tools
Get ready to set sail on a fantastic DIY adventure! In this section, we’ll dive into the essential steps of gathering materials and tools for creating your very own miniature sailboat. From crafting the sturdy hull to designing the mast and sails, we’ll cover all the bases. We’ll even explore the intricate details of rigging and accessories that will give your sailboat that extra touch of authenticity. So, hoist your imagination and get ready to embark on this nautical journey with us.
To create the table for the sub-topic “ 1. Hull “, the following information is provided:
The table above provides vital information about the hull of a miniature sailboat. It includes details about the construction material , shape , length , width , keel , and bilge . These factors greatly impact the sailboat’s performance and stability on the water.
2. Mast and Sails
When building a miniature sailboat, the mast and sails are the most crucial components. It is essential to select a strong and lightweight material such as aluminum or carbon fiber for the mast. Cutting the mast to the desired length is also important, ensuring that it is tall enough to catch sufficient wind. To guarantee stability, securely attaching the mast to the boat’s deck using screws or bolts is necessary. Attaching the sails to the mast with sail ties or rigging clips is essential, ensuring proper alignment and tightness. Setting up the necessary rigging lines to control the positioning and tension of the sails is also important. Prior to setting sail, it is crucial to test the mast and sails to ensure that they are securely fastened and functioning properly.
I once had the exciting experience of building a miniature sailboat, and attaching the mast and sails filled me with anticipation. As the wind caught the sails and propelled the boat forward, a sense of pride engulfed me for my creation. Witnessing my sailboat smoothly glide across the water, responding to the wind, was an exhilarating sight. Building and sailing a miniature sailboat truly showcases the ingenuity and craftsmanship of humans.
3. Rigging and Accessories
Below is a table outlining the steps of rigging and accessorizing a miniature sailboat:
Rigging and accessories are vital for the performance and functionality of a miniature sailboat. Securely attaching the mast and sails ensures stability and proper maneuvering. Rigging lines adjust the sails to catch wind effectively. Accessories such as pulleys, cleats, and winches enhance overall control and ease of operation. Paying attention to proper rigging and accessories leads to a well-functioning and enjoyable miniature sailboat experience.
Throughout history, sailing has fascinated and allowed people to explore open waters. Sailboats have been used for transportation, discovery, and leisure from ancient civilizations to modern times. Miniature sailboats now provide enthusiasts with the thrill of sailing on a smaller scale. With the right rigging and accessories, these vessels navigate waters gracefully and precisely, bringing joy to builders and sailors. The art of rigging a sailboat has been passed down through generations and holds tremendous importance in sailing. By understanding the rigging process and selecting suitable accessories, sailors can create miniature sailboats that embody the spirit of adventure and love for the sea.
Building the Miniature Sailboat
To set sail on the journey of building a miniature sailboat , we’ll dive into the practical steps that bring it to life. Get ready to embark on a captivating adventure as we tackle the art of constructing the hull, attaching the mast and sails, and adding the intricate rigging and accessories. From the sturdy foundation of the hull to the intricate details of the rigging, each sub-section will unveil essential elements to create a captivating miniature sailboat . So, grab your tools and let’s set sail into the world of boat building !
1. Constructing the Hull
To begin constructing the hull, gather all of the necessary materials including plywood, a saw, and sandpaper. Measure and cut the plywood to the desired dimensions for the hull .
It is important to sand the edges of the plywood in order to achieve a smooth finish . Next, apply wood glue along the edges and join the pieces together to form the hull . While the glue is drying, use clamps to hold the pieces in place.
To reinforce the hull , add epoxy resin to the joints. Once the entire hull is dry, sand it down for a polished look. For added protection, apply a primer . Paint the hull with the desired color using marine-grade paint for water resistance.
It is important to note that the hull plays a vital role in the stability and performance of a sailboat on the water.
2. Attaching the Mast and Sails
To successfully attach the mast and sails to your miniature sailboat, simply follow these steps:
1. Begin by preparing the mast, ensuring it is clean and free from any debris or imperfections.
2. Carefully position the mast in the designated area on the hull, making sure it is properly aligned.
3. Secure the mast to the hull using either adhesive or small screws, ensuring a stable attachment.
4. Attach the sails by positioning them on the mast and securing them with small strings or ropes.
5. To improve the catchability of the wind, adjust the tension of the strings or ropes to properly tighten the sails.
6. Test the attachment by gently moving the sailboat to ensure the mast and sails are securely attached. Make any necessary adjustments for stability.
7. Check that the sails can move freely and are not obstructed by the mast or any other parts of the sailboat.
By following these steps, you will achieve a secure attachment of the mast and sails to your miniature sailboat . This is crucial for optimal performance and the enjoyment of your sailing experience.
3. Adding Rigging and Accessories
Adding Rigging and Accessories
When adding rigging and accessorizing your miniature sailboat , you should follow these steps:
1. Begin by attaching the mast to the hull using either glue or screws.
2. Next, secure the sails to the mast using small clips or ties.
3. Then, add the rigging lines by tying them to specific locations on both the mast and hull. These lines play a vital role in controlling the movement and positioning of the sails.
4. Attach smaller accessories, such as life rings or flags , to the boat using either adhesive or small hooks.
To ensure optimal results, make sure that the rigging lines are tight and the accessories are securely fastened. This will help prevent any accidental detachment while in use.
If you want to enhance the overall appearance of your mini sailboat, you can consider using colorful and eye-catching accessories. You can also experiment with various types of rigging materials, such as thread or thin wire , to achieve different visual effects.
Painting and Finishing Touches
Give your miniature sailboat the perfect finishing touches with the section on painting and finishing . From sanding and priming to applying paint and varnish, we’ll cover all the steps you need to know. Plus, we’ll show you how to add those final details and decorations that will truly make your sailboat shine. Get ready to transform your creation into a masterpiece that will impress all who see it.
1. Sanding and Priming
When sanding and priming a miniature sailboat, it is important to follow these steps:
1. Prepare the surface: Start by cleaning the hull with a damp cloth to effectively remove dust and debris.
2. Sand the hull: Take a gentle approach and sand the entire hull using fine-grit sandpaper in a circular motion.
3. Remove any sanding residue: After sanding, it’s crucial to wipe away any residue or dust with a clean, dry cloth.
4. Apply the primer: To ensure a smooth surface, use either a small paintbrush or foam brush to apply a thin, even coat of primer to the hull. Make sure to cover the entire surface area and allow the primer to dry completely.
5. Sand the primer: Once the primer is dry, lightly sand it using fine-grit sandpaper. This step will help smooth out any imperfections.
6. Remove any sanding residue: Eliminate any remaining residue or dust by using a clean, dry cloth.
By following these steps, you will ensure that the hull of your miniature sailboat is properly sanded and primed, creating a smooth surface for painting.
2. Applying Paint and Varnish
To apply paint and varnish to a miniature sailboat , follow these steps:
1. Sand the surface to remove imperfections and create a smooth, even surface.
2. Apply primer to the hull and other parts of the sailboat. This helps the paint adhere better and provides a good base for the colors.
3. Choose the colors you want and apply them using a small brush or airbrush. Start with the base color and let it dry before adding additional colors or details.
4. Once the paint is dry , apply varnish to protect the paint and give it a glossy finish. Use a brush or spray varnish, following the product instructions for application.
5. Allow the varnish to dry completely before handling the miniature sailboat or adding any additional details.
Pro-tip: When painting a miniature sailboat, use thin coats of paint and varnish for smooth, even coverage. Work in a well-ventilated area to prevent fumes. Remember to clean brushes thoroughly after each use to maintain their quality for future projects.
3. Adding Details and Decorations
– First , gather all the necessary materials for adding details and decorations to your miniature sailboat. This can include flags, stickers, miniature figures, or decorative ropes.
– Next , consider where you want to place these decorations on your sailboat. Popular areas include the hull, mast, and sails.
– Carefully attach each decoration using an appropriate adhesive, ensuring that they are securely in place.
– Use small paintbrushes to add intricate details or accents , such as patterns or designs, to the flags, figures, or other decorative elements.
– To protect the decorations and give them a glossy finish, apply a coat of varnish or sealant. This will also keep them from getting damaged over time.
– Take a moment to inspect the added details and decorations , making any necessary adjustments to improve their overall appearance.
– Be patient and allow ample time for the glue, paint, and varnish to dry completely before moving or handling the miniature sailboat.
Testing and Setting Sail
As we delve into the thrilling section of “ Testing and Setting Sail ” in our article on “ How To Make A Miniature Sailboat ,” get ready to embark on an exciting adventure. We’ll explore the essential steps in this process, including preparing for launch , selecting the right conditions , and monitoring and adjusting the sailboat. So, hold onto your hats and let’s navigate the waters of sailboat testing together!
1. Preparing for Launch
To effectively prepare for the launch of a miniature sailboat, it is important to follow these steps:
1. Assess the weather conditions: Before launching, it is crucial to check the weather forecast. Look out for calm winds and clear skies, as this will ensure smooth sailing and minimize any accidents.
2. Position the boat properly: Ensure that the sailboat is placed in a clear area, away from rocks or other boats. This will provide enough space for maneuverability.
3. Secure the mast and sails: Double-check that the mast and sails are securely attached. This is essential for effective wind-catching and to ensure a smooth sailing experience.
4. Inspect the rigging and accessories: Take the time to examine the rigging and accessories, such as ropes, pulleys, and hooks. Make sure they are in good condition and properly connected to prevent any mishaps or malfunctions.
5. Conduct a final safety check: Before launching, perform a thorough safety check. Confirm that all necessary safety equipment, including life jackets and flotation devices, are on board and easily accessible.
6. Position the sailboat in the water: Carefully place the sailboat in the water, ensuring that it floats steadily. Avoid any sudden movements or excessive force during this process.
7. Adjust the sails: Based on the wind conditions, adjust the sails accordingly. Raise and trim them for optimal performance and speed.
8. Launch the sailboat: Release the sailboat into the water gently, either by pushing it or releasing it from a docking position. Observe its movement and make any necessary adjustments for a successful launch.
By following these steps, you can effectively prepare your miniature sailboat for a successful launch and enjoy a pleasant sailing experience.
2. Selecting the Right Conditions
Selecting the Right Conditions
When setting sail with your miniature sailboat , it is crucial to select the right conditions. Here are a few key steps to follow:
1. Analyze wind patterns and carefully choose a location that offers consistent and steady wind direction. By doing so, you can ensure smoother sailing and a more enjoyable experience.
2. Before embarking on your sailboat adventure, make sure to check the weather forecast. Avoid sailing on days when strong winds, storms, or unfavorable conditions are expected. This will help you steer clear of potential risks and hazards.
3. Look for calm waters with gentle waves for optimal stability and maneuverability. Avoid areas known for strong currents, rapids, or turbulent waters as they can greatly affect your sailboat’s performance.
4. It is important to select a location that provides ample space for your sailboat to navigate freely. Avoid crowded areas to minimize the risk of collisions and enhance your overall safety.
5. Opt for a location with good visibility to easily keep an eye on your sailboat. Avoid areas with dense fog, limited visibility, or high traffic, as they can hinder your ability to navigate effectively.
By diligently following these steps and carefully selecting the right conditions, you can have a safe and enjoyable sailing experience with your miniature sailboat .
3. Monitoring and Adjusting the Sailboat
Monitoring and adjusting the sailboat is crucial for optimal performance on the water. By following these steps, you can ensure that your miniature sailboat is in top condition:
Regularly check the balance of your sailboat to make sure it is evenly weighted and not leaning to one side. This will help maximize its performance.
Observe the wind direction and any changes in speed. Adjust the sails accordingly to harness the power of the wind effectively.
Monitor the position of the rudder to control the sailboat’s direction. Make small adjustments as needed to stay on course.
Pay close attention to the water conditions. If the waters are rough or choppy, you may need to make adjustments to the rigging or sails. It is important to ensure that everything is secure and properly adjusted for safe navigation.
Continuously monitor the sailboat’s speed and be ready to make changes to the sails or rigging to either increase or decrease speed as desired.
It is essential to take note of any issues or malfunctions that may arise. Address problems such as loose lines or a broken mast before continuing your sailing adventure.
By following these steps , you can effectively monitor and adjust your miniature sailboat , providing you with a successful and enjoyable sailing experience.
Troubleshooting and Maintenance
Looking to keep your miniature sailboat seaworthy? In this section, we’ll tackle troubleshooting and maintenance to ensure smooth sailing. From addressing balance and stability issues to repairing damages and wear, we’ve got you covered. Plus, we’ll reveal tips for keeping your sailboat shipshape through proper cleaning and storage practices. Get ready to take charge of your miniature vessel’s longevity and performance!
1. Handling Balance and Stability Issues
Handling Balance and Stability Issues
To effectively handle balance and stability issues in a miniature sailboat, it is important to follow these steps:
1. Check the alignment of the keel and rudder to ensure that the keel is securely in place and that the rudder is properly aligned with the centerline of the boat.
2. Adjust the position of the mast by moving it either forward or backward in order to determine the ideal balance point. Moving the mast forward will increase weather helm , while moving it backward will increase lee helm .
3. Modify the shape of the sail by adjusting the tension on the halyard and cunningham lines in order to control the sail draft. A flatter sail shape can help reduce heeling and improve stability.
4. Trim the sails by making small adjustments to the main and jib sheets in order to achieve proper sail trim. Over-trimming the sails can lead to excessive heeling, while under-trimming can result in poor performance.
5. If the boat continues to be unstable even after making adjustments, consider adding small weights to the keel or hull. This can help lower the boat’s center of gravity and enhance stability.
Pro-tip: Achieving the perfect balance and stability in a miniature sailboat may require some trial and error. Experiment with different adjustments and take note of their effects on the boat’s performance.
2. Repairing Damages and Wear
When repairing damages and wear on a miniature sailboat , follow these steps for proper maintenance and longevity:
1. Identify the damage: Inspect the sailboat for cracks, scratches, or broken parts.
2. Gather necessary tools and materials: Prepare epoxy resin, sandpaper, paint, and replacement parts if needed.
3. Prepare the damaged area: Clean and remove debris, using sandpaper to create a suitable surface.
4. Repair the damage: Apply epoxy resin according to the manufacturer’s instructions, ensuring a secure bond.
5. Sand and paint: After the repair has cured, sand the area for a smooth finish. Use matching paint for a seamless appearance.
6. Inspect and test: Carefully check for any remaining damages and test the sailboat’s functionality.
7. Maintain regularly: Clean and maintain the sailboat regularly to prevent further wear and damage.
By following these steps, you can effectively repair damages and wear on your miniature sailboat , ensuring its continued functionality and enjoyment. Proper maintenance is key to prolonging the life of your sailboat and ensuring many happy sailing adventures.
3. Cleaning and Proper Storage
To ensure the longevity and enjoyment of your miniature sailboat, it is essential to follow these steps for cleaning and proper storage:
1. Begin by rinsing the sailboat with freshwater immediately after sailing. This will effectively remove saltwater and debris.
2. Allow the sailboat to thoroughly air dry before storing it. This step is crucial in preventing the growth of mold or mildew.
3. When cleaning the hull, gently scrub away any dirt or stains using mild soap and water. Rinse with freshwater to ensure a thorough clean.
4. Carefully remove the sails and inspect them for any dirt or damage. Clean the sails using mild soap and water, making sure to rinse them thoroughly. It is important to allow the sails to completely dry before storing them.
5. Take the time to check the rigging for any signs of wear or damage. Use a damp cloth to remove any dirt or grime that may have accumulated.
6. Find a secure, temperature-controlled storage area that is dry. This will protect the sailboat from potential damage. Ideally, store the sailboat on a rack or shelf to avoid placing unnecessary pressure on the hull.
By following these cleaning and proper storage practices, you can extend the lifespan of your miniature sailboat and enjoy it for years to come.
Some Facts About How To Make A Miniature Sailboat:
- ✅ Making a miniature sailboat requires basic woodworking skills. (Source: SailChecker)
- ✅ There are many online tutorials and videos available that provide step-by-step instructions on making a miniature sailboat. (Source: The Spruce Crafts)
- ✅ The materials needed to make a miniature sailboat include wood, glue, paint, and fabric for the sail. (Source: Model Boat Builder)
- ✅ Miniature sailboats can be made in various sizes, from small tabletop models to larger display pieces. (Source: Model Yachting)
- ✅ Building a miniature sailboat is a fun and creative project that can be enjoyed by people of all ages. (Source: The Artful Parent)
Frequently Asked Questions
How do i cancel my contracts or subscriptions on youtube.
To cancel your contracts or subscriptions on YouTube, follow these steps:
- Go to the ‘Verträge hier kündigen’ section on the YouTube website.
- Read the instructions carefully and fill out any required forms.
- Submit the cancellation request and wait for confirmation.
- Your contracts or subscriptions will be terminated as per the provided instructions.
How can I test new features on YouTube?
To test new features on YouTube, you can follow these steps:
- Keep an eye on the YouTube website for announcements or notifications regarding beta testing.
- If a beta testing opportunity is available, visit the ‘neue funktionen testen’ section on the YouTube website.
- Follow the instructions provided to join the beta testing program.
- You may be given access to test new features and provide feedback to help improve YouTube.
What guidelines and safety measures should I be aware of when using YouTube?
When using YouTube, it is important to follow the guidelines and safety measures outlined by the platform:
- Visit the ‘Richtlinien & Sicherheit’ section on the YouTube website to familiarize yourself with the community guidelines.
- Respect copyright laws and avoid uploading or using copyrighted content without proper permission.
- Report any inappropriate or harmful content using the reporting tools provided by YouTube.
- Protect your personal information and avoid sharing sensitive data with unknown individuals or websites.
What information does the NetzDG Transparenzbericht provide?
The NetzDG Transparenzbericht on YouTube provides information on how the platform handles illegal content and user complaints in compliance with the German Network Enforcement Act (NetzDG). It includes details on the number of complaints received, actions taken, and the overall transparency of YouTube’s content moderation policies.
Will the copyright for YouTube content expire in 2023?
No, the copyright ownership for YouTube content is not set to expire in 2023. The statement refers to the copyright ownership by Google LLC, which remains valid. The specific copyright duration for content on YouTube may vary depending on the applicable laws and the rights of the content creators.
How does YouTube work?
YouTube is a video sharing platform where users can upload, watch, and interact with a wide variety of videos. Users can create their own channels, subscribe to other creators, and engage with content through likes, comments, and shares. YouTube operates through a website and mobile applications, allowing users to access videos and features from various devices.
About the author

Leave a Reply Cancel reply
Your email address will not be published. Required fields are marked *
Save my name, email, and website in this browser for the next time I comment.
Latest posts

The history of sailing – from ancient times to modern adventures
History of Sailing Sailing is a time-honored tradition that has evolved over millennia, from its humble beginnings as a means of transportation to a beloved modern-day recreational activity. The history of sailing is a fascinating journey that spans cultures and centuries, rich in innovation and adventure. In this article, we’ll explore the remarkable evolution of…

Sailing Solo: Adventures and Challenges of Single-Handed Sailing
Solo Sailing Sailing has always been a pursuit of freedom, adventure, and self-discovery. While sailing with a crew is a fantastic experience, there’s a unique allure to sailing solo – just you, the wind, and the open sea. Single-handed sailing, as it’s often called, is a journey of self-reliance, resilience, and the ultimate test of…

Sustainable Sailing: Eco-Friendly Practices on the boat
Eco Friendly Sailing Sailing is an exhilarating and timeless way to explore the beauty of the open water, but it’s important to remember that our oceans and environment need our protection. Sustainable sailing, which involves eco-friendly practices and mindful decision-making, allows sailors to enjoy their adventures while minimizing their impact on the environment. In this…
November 1, 2018
Make a Toy Sailboat
A sailing science activity from Science Buddies
By Science Buddies & Ben Finio
Flip or float? Built a tiny boat that can really set sail--with the help of a little physics.
George Retseck
Key concepts Physics Forces Weight Buoyancy Gravity Center of mass
Introduction It's time to set sail! Even if you don’t live near a lake or ocean, you will get to do some sailing in this science activity as you build your own toy sailboat. But first you have to make sure your boat doesn’t capsize! Are you up for the challenge?
Background Do you remember playing with toy boats in the bathtub—or have you ever been on a real boat? Boats can float because of buoyancy. At the same time they are pulled down by the force of their own weight (caused by gravity) they are pushed up by the buoyant force, which is equal to the weight of the volume of water they displace. (You can find a more detailed explanation of buoyant force in the “More to explore” section.) Some boats are made of materials that are less dense than water, meaning they have less mass per unit volume. These materials will always float. Other boats, however, are made of metals such as steel, which are much denser than water. So how do they float? They can because they’re hollow, so there is a lot of empty air space inside the boat’s hull. The average density of the boat (including both the metal and the air) is lower than the density of water.
On supporting science journalism
If you're enjoying this article, consider supporting our award-winning journalism by subscribing . By purchasing a subscription you are helping to ensure the future of impactful stories about the discoveries and ideas shaping our world today.
Boats don’t just need to float—they also need to stay upright and avoid capsizing, or flipping over. To do this they need a low center of mass, meaning their weight is concentrated toward the bottom of the boat, not the top. That might seem like it would be a problem for sailboats, which have very tall sails that stick way up into the air. How do they stay balanced with so much mass concentrated way up high? They do so with another part called the keel, which is on the bottom of the boat. (If you’ve only ever seen a sailboat from above the water, you might not even know the keel existed!) The keel is a big part under the boat, shaped like a fin, which serves two purposes. It holds the ballast, or heavy weight, that helps lower the boat's center of mass. It also helps prevent the boat from being blown sideways by the wind. In this project you’ll see how a keel can help keep a sailboat from flipping over and help it go straight.
Three wine corks
Two rubber bands
Several screws or nails
Waterproof material, such as craft foam, wax paper or paper milk carton to make a sail
Aluminum foil
Sink, bathtub or a large container you can fill with water (The container should be deeper than the length of your nails/screws.)
Preparation
Fill your container with water. Make sure the water is deep enough so you can vertically submerge your longest nail/screw.
Line up three corks (side by side, not end to end).
Use two rubber bands to hold the corks together, forming a “raft.”
Poke a toothpick into the center cork, so it sticks straight up. This is your boat’s mast (the part that holds the sail).
Cut a square of your thin waterproof material to make a sail. It should be about six centimeters square.
Poke the toothpick through opposite ends of the sail (near the edges) to hold it in place.
You’ve made your first sailboat! Put it in the water. What happens?
Blow on the sail from behind. What happens?
Now make a skinnier boat by removing the rubber bands and the two outer corks. Keep the sail in place. Depending on how you attached the sail initially, you might need to rotate it 90 degrees.
Put your new sailboat back in the water. What happens?
Uh-oh! Your sailboat probably tipped over! That’s not good. To fix it, try adding a keel. Carefully stick a nail or screw into the bottom of the boat, directly opposite the sail.
Try putting the boat back in the water. Does it stay upright this time?
If your boat doesn’t stay upright, keep adding nails or screws (in a straight line with the first one) until it can float without tipping over.
Now try blowing on the sail again. What happens? Does your boat move in a straight line?
Right now, your keel is made of one or more nails/screws, but they are not connected to one another. Cut a rectangular piece of aluminum foil and tightly wrap it around the nails/screws to make a fin shape.
Put your boat back in the water and try blowing on the sail again. What happens this time? Does it go straight?
Extra: Try making a bigger sail and using part of a wooden skewer for the mast instead of a toothpick. How heavy does your ballast need to be to balance the boat with a bigger sail? Hint: Try attaching a horizontal nail/screw to the bottom of your keel to act as ballast. That way you don't have to keep poking more nails/screws into the cork.
Observations and results Your first sailboat was probably pretty stable because it was very wide (made from three corks). When you removed two corks to make it skinnier, however, your sailboat probably became unstable and tipped over. It’s similar to standing with your feet tightly together instead of spread out slightly—it’s harder to balance. When you added nails/screws to the bottom of your sailboat you lowered its center of mass and made it more stable. Individual vertical nails, however, don’t do a very good job pushing against the water—the water can flow right around them. That means the keel doesn’t do a good job making the boat go straight. If you blew on the sail, your boat might have curved off to one side or spun in circles. When you wrapped the nails in aluminum foil you made the keel more like a fin. It can cut through the water very easily in one direction, but it provides a lot of resistance against the water in the other direction. That makes it easier for your boat to move forward, and harder for it to move sideways. This is why real sailboats can be long, skinny and have tall sails—the keel prevents them from tipping over and helps them go straight!
More to explore What Is Buoyant Force? , from Khan Academy Buoyant Science: How Metal Boats Float , from Scientific American DIY Toy Sailboat , from Science Buddies Shipping Science: Building a Boat That Can Carry Cargo , from Scientific American Science Activities for All Ages! , from Science Buddies
This activity brought to you in partnership with Science Buddies

- Skip to primary navigation
- Skip to main content
- Skip to primary sidebar

DIY Watercraft Projects » 20 DIY Boat Ideas: Homemade Ideas For Kids And Real Time Use
20 DIY Boat Ideas: Homemade Ideas For Kids And Real Time Use
Published: May 31, 2021 · Modified: Jul 26, 2021 by Luke Allison · This post may contain affiliate links · This blog generates income via ads
Welcome to an amazing DIY guide that will show you 20 boat ideas that you can use to make a real and toy boat for yourself and your kids. This DIY is full of guides that will make the building task less stressful, all you have to do is to follow the steps and instructions correctly and you’ll be on your merry way to a wonderful boat-making time.
Without further ado, let’s begin. Here are 20 DIY Boat Ideas you should definitely check out!

Table of Contents
1. Homemade Pontoon Boat
Here is a pontoon boat idea, you’ve probably heard of this boat before, it is super effective and can be done with a few simple materials. This is a homemade pontoon boat that requires some metal pipes, welding, and a few other supplies to make the boat durable in water.
2. How To Make Boat Using PVC Pipe
The creator made this using PVC pipe, it was super easy to build and it didn’t cost much. The PVC pipes that the creator used are pretty large and are also durable. The creator also used a 42cc 2-stroke engine at home and it worked perfectly.
3. DIY Boat From Plastic Bottles
Unlike the first two video guides on my list above that are more realistic, this particular guide will teach you how to use plastic bottles to make a boat. It seems impossible, because of the questions on everyone’s mind, ‘how will the boat float?’ Well, it did and it can work for you too.
4. DIY Simple Boat With Plastic Barrel
To start this video guide, you'll need two 200L drums, cut them into 2 equal pieces, and use some wood planks to frame the sides and hold all the pieces of the drum in place. You’ll also need wood for the paddle. This project is quick and easy to perform. There are a few other steps to take before you are certain that this can float on water, check the video to learn more.
5. DIY Sponge Boat Craft For Kids

Unlike the first 4 guides on my list, this particular boat is not meant for swimming in real waters. This is a boat craft for kids. It is super easy to make and it doesn’t cost much for the materials, and the making process is fast and easy.
Click for more details
6. DIY Stem Boats For Students

Here is another guide with similar boat ideas, but this is now a bit advanced in the craft category. This can even be used as your child's science project. It’s super easy and simple to build.
7. DIY Duct Tape Kayak

There are a lot of things that are wrong with this guide, but it’s simple to build so far. The creator used duct tape to make the body of the boat. This won’t be solid, it might stay on the water for a while, but it's still a super easy guide regardless.
8. DIY Survival Boat

This guide is pretty simple, you’ll be turning a mattress into a boat. It’s easy, cheap, with homemade materials and tools. The making process is effortless and requires a few hours of your day, and you'll be done.
9. How To Build A Boat Out Of Pine Wood
This video guide will require an expert woodworking skill level to be able to make the boat that the creator made with a few pinewood boards. After using a table saw, a planer, and a few other machines for woodwork projects, the creator made an outstanding boat that is worth the stress, although it’s pretty small, you can use the idea to make something bigger.
10. How To Build A Boat Out Of Plywood
This is another woodworking project, but this one is simpler and doable by anyone with the right woodworking tools, regardless of their skill level. The creator started by cutting pieces of 6mm plywood, then onto the framework, and the bottom part and you’re good to go.
11. How To Make A Sailboat Out Of Styrofoam
Is it possible to use styrofoam to make a boat? This video tutorial guide has made it possible. You can now take a boat from a few materials like wood, styrofoam, screws, and a few tools. The boat floated pretty well, and it’s perfect if you want to go fishing. It also has a sail that you can use to navigate the direction of the boat.
12. Instant Canoe In A Can
Here in this video guide, the creators want to use a can spray foam to make a boat. It’s possible and it worked, the only downside is that it’s not airtight, so the water will just pass through any gap on the foam. This project is also time-consuming because you have to wait for the foam to dry before you continue. The creators also made this foam by spray over an existing boat for the foam to take the shape of the boat mold.
13. How To Build A Wooden Boat

This guide is a great guide to follow if you want to make a sturdy wooden boat for yourself. The creator made 2 skiffs for the boat: the front skiff, and the back skiff. Then when all the woodworking build was done, the creator assembled both skiffs to form one whole boat.
14. DIY Simple Boat

This should be the best boat idea on this list that works and looks great on the water. The creator used some wood plywood sheets, silicone sealant, gorilla glue, latex paint, Sandpaper, screws, paracord, and a few other woodworking tools. The making process is super easy to follow, and also fast if you’re an expert woodworker.
15. How To Make A Quick Boat

This boat idea can pass for a standard boat for boat race due to the way it’s built. This was made with a few plywood boards, and other woodworking materials, and tools. This guide also has a lot of images that will show you how to make them from start to finish. You’ll also need some fiberglass tape, stainless steel screws, waterproof glue, and other essential supplies.
16. DIY Motor Boat Toy

If your kid is bored and needs a boat to play with, here is an amazing guide that will teach you how to make a small safe motorboat toy. The making process is super easy and doable for even your kids, but they should be supervised because of the use of a motor and battery.
17. DIY Electric Boat At Home
This project is only to direct you through the electrical making process and not to make an entire boat from scratch. You’ll need a 24v 250w motor and a speed controller grip. You can check the link in the video description to learn more and see where the creator bought he’s from.
If you don’t have electrical knowledge, you have nothing to be afraid of, the guide is pretty easy to follow, with the right electrical tools at your disposal, you’ll be done in no time.
18. Building Boats From Plastic Drums
The creator of this guide made this boat from plastic drums, and a few other supplies. The making process is super easy to follow and you’ll need a few tools to work with. The creator made the frame from metal square pipes, before cutting a plastic drum to make the body of the boat.
19. How To Make A Big RC Boat
This is not a real boat as the name implies, it’s an RC boat, and it’s pretty big. The making process requires a lot of measuring and cutting for all the pieces of the wood board to fit in perfectly.
20. How To Make A Candle Powered Boat Toy For Kids
This project is simple and easy to make. This can even be done by your kids but the boat is not durable, and can not go on for a long time. It’s a candle-powered boat, meaning you need to construct it in such a way that the boat will move as the candle is lit up and it propels other smaller mechanisms under the small toy boat.
That’s all we have for you today, the guides are simple and easy to follow, and not that expensive. Most of the real boats made can’t last for a long time, so you need to pick the ones that suit your needs.
Nevertheless, it’s good to have the idea of how to make a boat real quick in case you've met in a situation where you need a boat on a matter of urgency. Thanks for your time, bye.
Reader Interactions

Ask Me Anything Cancel reply
Your email address will not be published.
Save my name, email, and website in this browser for the next time I comment.

Effective learning for science, math, and language
- Newsletter Sign up
- The Latest from Thriving STEM
- Hire Christy to help your child
Friday, April 14, 2017
How you can make a toy boat that really floats.

How to put together your own toy bottle boats

- Pre-heat your glue gun
- Start by cutting one of the bottles in half. You'll make two boats.
- Glue the two caps on the end of each half of the bottle
- Cut out two sails from the second bottle.
- Glue the sails on the craft sticks, and the craft sticks to the bottom end of the boats.

What children learn from playing with toy boats

More toys to make from water bottles
4 comments:.
My husband and daughter could spend hours playing with homemade boats. Using recycled items is so creative!
I could too! I'd love to see some of their designs.
I love this idea, which is so easy and the little ones learn so much by just doing simple STEM projects like these. Awesome ideas :)
Thank you! Yes, I agree that for the little ones (and often bigger ones) simple is better.
I can't wait to hear what you have to say! Thanks for sharing.


Wooden Toy Boat

Introduction: Wooden Toy Boat

This was my first attempt at making a traditional wooden toy boat. A friend needed it for a kids' workshop she was running and it was great excuse for a fun afternoon in the shop.
Step 1: Make the Template

I installed the "Bezier Spline" plugin for SketchUp and used that to create a template that I would use for cutting out the basic shape of the boat. I printed it out and used a spray adhesive to glue it to a 2" thick piece of recycled wood that I had laying around. I like the Scotch brand repositionable adhesive. The nozzle never gets gummed up like some others that I have tried and it's easy to peel it up and stick it back down if you aren't sure exactly where you want it to go.
Step 3: Rough Cutting

I have a tabletop miter saw that is pretty handy for projects like this. It's a small table saw and miter saw in one. I used the table saw on top to rip the board to width and then popped it open and used the miter saw underneath to cut it closer to shape.
Step 4: Shaping

I built a simple jig a while back so that my belt sander can either lay on its back or be turned on its side with a little platform for sanding straight edges. (I got the idea from seeing this post by John Heisz on the IBuildIt.ca forums.) My sander is a Maktec that it came with a mounting bracket to make this a lot easier to do.)
So with the sander turned on its side, I was able to smooth the edge into shape.
Next, I used a rounding-over bit with a bearing on my router table to soften the edge of the base a bit more. Then went back to the belt sander, this time with it on its back, to get the final shape of the bottom of the boat. I imagine that this could be also be done with a hand plane but it worked out pretty well this way, albeit with a lot of dust.
The router table, for anyone who is interested, just pops in and out of my Black & Decker Workmate. I was really happy to discover that a 2x4 sits in the gap perfectly, so it has been really easy to build a whole bunch of modules that can fit easily and securely on there.
Step 5: The Top

I printed a second template and cut out the middle to make the top of the boat. I put this on a piece on 1/2" plywood and cut it out with a jigsaw. I drilled a few holes in the middle to make things easier when cutting the curves. Then I put it back on the router table with the same round-over bit to smooth the inside.
I glued it to the bottom part and tacked it with a couple of nails, then did the outside edge of the top on the router table Since there was a bearing on the router bit, I didn't have to worry about taking off too much. With a little more sanding, it came out nicely.
Note that while putting the top piece on at this point made it easier to shape it, it made it much more difficult to paint. At the very least, I probably should have painted the inside edge, That way I wouldn't have had to muck about with the masking tape later on.
Step 6: Painting

With masking tape and some patience, I did the top. Then flipped the whole thing over and used a spray lacquer for the bottom. I'm not thrilled with the glossy look though. Next time, I would use matte for sure.
Step 7: The Mast

I used a drill bit about the same diameter as my dowel and pressed the end of dowel against it to get a bit of a curve so they would fit together without a gap. Then I started with a tiny pilot hole and worked up through a couple of drill bits so make sure I wouldn't split the dowel with the screw. I used a countersink so the screw would sit nicely in the hole and together with a little glue, it held really well.
I put a piece of masking tape on the drill bit when I drilled the hole to insert the mast. This helped ensure that I drilled to the correct depth. I didn't glue the mast in. I got a pretty good friction fit and it could be taken apart if needed.
I also drilled tiny holes in the ends of the dowels for thread to go through to hold the sail but as you can see, I ended up sewing a sail that slid over the mast after the first one came off a few times. Maybe next time, I will make the sail out of stronger stuff and use grommets in the corners.
This was a fun project to do and using what I've learned and a lot of what I still have to learn, I hope to make another one with my own kids (more hand tools, less power tools). I never actually tested this one in the water (it was meant to be ornamental) so it should be interesting...

Recommendations

Text Contest

Paper and Cardboard Contest

Green Future Student Design Challenge

Category : Government buildings in Moscow Oblast
Federal subjects of the Russian Federation:
Subcategories
This category has the following 6 subcategories, out of 6 total.
- Fire stations in Moscow Oblast (3 C, 8 F)
- Gorki-9 (1 C, 7 F)
- House of Moscow Oblast Government (24 F)
- Inspectorate of the Federal Tax Service No. 17 for Moscow Oblast (2 F)
- Novo-Ogaryovo (2 C, 143 F)
- Town halls in Moscow Oblast (7 C, 17 F)
Media in category "Government buildings in Moscow Oblast"
The following 8 files are in this category, out of 8 total.

- Government buildings in Russia by region
- Buildings in Moscow Oblast by function
- Uses of Wikidata Infobox
- Uses of Wikidata Infobox with no topic
Navigation menu
IMAGES
VIDEO
COMMENTS
Build a toy sailboat from simple materials in this hands-on science activity. View written instructions on the Science Buddies website at https://www.science...
Line up three corks (side by side, not end-to-end). Use two rubber bands to hold the corks together, forming a "raft." Poke a toothpick into the center cork, so it sticks straight up. This is your boat's mast (the part that holds the sail). Cut a square of thin waterproof material (see materials list - don't use regular paper) to make a sail.
Build a toy sailboat from simple materials in this hands-on science activity, then add a keel to help it go straight. View written instructions on the Scienc...
Making a miniature sailboat maximizes creativity: Building a miniature sailboat allows individuals to express their creativity and craftsmanship while creating a functional toy or decorative piece. Gathering the right materials and tools is crucial: The quality of the miniature sailboat depends on using the right materials and tools for each ...
Procedure. Line up three corks (side by side, not end to end). Use two rubber bands to hold the corks together, forming a "raft.". Poke a toothpick into the center cork, so it sticks straight ...
Step 5: Sanding the Pieces. In order to make the pieces fit better we need to sand the points off of the edge pieces and the 3 inch pieces with the bevel cut. For the edge pieces, sand the point until it looks like the edge piece in picture #1. Sand off about 1/2 an inch. Do this for all 4 side pieces.
Step 11: Putting It Together Pt.II. Gently place the base of the ship onto the taped water bottles, so that the point of the bow is in between the caps. Step 12: Creating the Sails Pt. III. Lace a chopstick through the holes of 2 cardboard tube pieces, so that the pointed side is away from them. Do the same for the other chop stick, except only ...
Description. Kids' imaginations take the helm with this LEGO City Sailboat (60438 building set for kids ages 5 and up. Designed for play and display, this toy boat features a tall mast with a printed sail, a cabin and boat's wheel. The set also includes 2 minifigures and a dolphin toy for imaginative role play and storytelling.
Step 1: The Base. Transfer a pattern of a sailboat onto a piece of wood and cut it out on the bandsaw. Give it shape on the beltsander by holding the boat at an angle. I used some scrapwood for my sailboats, so they are all different sizes. The dimensions of my pattern for the boat:
This LEGO sailboat set for kids 7+ years old features a toy boat with a flexible sail, a finish-line build, an island and 3 mini-dolls ; With this LEGO Friends playset, kids build the sporty sailboat Hope and imagine beating a world-record time for sailing around the globe
5. DIY Sponge Boat Craft For Kids. Unlike the first 4 guides on my list, this particular boat is not meant for swimming in real waters. This is a boat craft for kids. It is super easy to make and it doesn't cost much for the materials, and the making process is fast and easy. Click for more details.
Welcome to Seaworthy Small Ships. Meet the new captains, Alice, a sailor and experienced science educator, and Julius, a full-sized boat builder. Although landlocked in Colorado, both Alice and Julius are passionate about water, boating, and the learning that comes from hand building. Continuing the legacy begun by founders, all traditional ...
10 Pcs DIY Wooden Boat Kits Wooden Sailboat to Paint Decorate Unfinished Wood Blank Craft Model Boat Toy Sailboat Building Activities for Kids DIY Projects Handmade Gift Birthday Party School. 2.5 out of 5 stars. 3. $21.99 $ 21. 99. Typical: $23.99 $23.99. FREE delivery Thu, May 2 on $35 of items shipped by Amazon.
Hello everyone!Welcome to this new miniseries! In Prepare Yourself For Christmas I will show you how you can make quick and simple, last minute Christmas Gif...
Rocks to add a little weight to the bottom of the boats. Pre-heat your glue gun. Start by cutting one of the bottles in half. You'll make two boats. Glue the two caps on the end of each half of the bottle. Cut out two sails from the second bottle. Glue the sails on the craft sticks, and the craft sticks to the bottom end of the boats.
10 Pcs DIY Wooden Boat Kits Wooden Sailboat to Paint Decorate Unfinished Wood Blank Craft Model Boat Toy Sailboat Building Activities for Kids DIY Projects Handmade Gift Birthday Party School. 2.6 out of 5 stars ... Third Generation Upgrade Queen Anne's Revenge Sailboat Building Kits Family Puzzle, Watercraft Desk Decor Gifts for Women Men, 180 ...
Step 1: Make the Template. I installed the "Bezier Spline" plugin for SketchUp and used that to create a template that I would use for cutting out the basic shape of the boat. I printed it out and used a spray adhesive to glue it to a 2" thick piece of recycled wood that I had laying around. I like the Scotch brand repositionable adhesive.
In 1938, it was granted town status. [citation needed]Administrative and municipal status. Within the framework of administrative divisions, it is incorporated as Elektrostal City Under Oblast Jurisdiction—an administrative unit with the status equal to that of the districts. As a municipal division, Elektrostal City Under Oblast Jurisdiction is incorporated as Elektrostal Urban Okrug.
I wanted to make a summer project. I wanted to be fun and if possible to combine playing in the sea. So I made this toy boat out a few scrap spruce pieces an...
share alike - If you remix, transform, or build upon the material, you must distribute your contributions under the same or compatible license as the original. You may select the license of your choice. Captions. English. Add a one-line explanation of what this file represents. Items portrayed in this file depicts ...
Elektrostal is a city in Moscow Oblast, Russia, located 58 kilometers east of Moscow. Elektrostal has about 158,000 residents. Mapcarta, the open map.
In this tutorial, you will learn 4 Amazing electric DIY boats. Hope you enjoy the videos.Required Materials: DC motor, battery, switch, wood piece/PVC board....
Subcategories. This category has the following 5 subcategories, out of 5 total. G. Gorki-9 (1 C, 3 F)