
How to Use Yacht Varnish? (A Step-by-Step Guide)

Are you looking for a way to give your boat a polished, professional finish? Yacht varnish provides a layer of protection and a beautiful shine that wont fade over time.
In this step-by-step guide, well explain what yacht varnish is, the benefits of using it, and how you can apply it to your boat.
Well also discuss preparation, application, drying, and sanding between coats, so you can be sure your boat is looking its best.
So, if youre ready to learn how to use yacht varnish, lets get started!.
Table of Contents
Short Answer
Yacht varnish is a protective coating used to seal and protect wood surfaces on boats.
To apply yacht varnish, start by sanding the wood surface with a fine-grit sandpaper.
Then, apply a thin coat of the varnish with a brush, working in long, even strokes.
Allow the varnish to dry for 24 hours before applying a second coat.
Finally, sand the surface with very fine sandpaper before buffing it with a soft cloth.
What is Yacht Varnish?
Yacht varnish is a specialized wood finish designed to protect outdoor wood surfaces from moisture and UV damage.
It typically consists of a blend of resins, oils, and solvents that provide a tough, yet flexible coating, which is ideal for protecting boat decks, outdoor furniture, and other wood surfaces that are exposed to the elements.
Yacht varnish also provides a glossy, attractive finish that enhances the beauty of the wood.
Unlike paint, yacht varnish does not completely cover the wood, allowing the natural grain of the wood to show through.
It is also relatively easy to apply and maintain, making it a popular choice for marine and outdoor wood surfaces.
Benefits of Yacht Varnish

When it comes to protecting outdoor wood surfaces, yacht varnish is an excellent choice.
Not only does it protect the wood from moisture and UV damage, but it also adds a beautiful shine and luster to the wood.
Yacht varnish is a long-lasting coating that can provide years of protection under the right conditions.
It is also easy to apply and can be used on a variety of wood surfaces, including boats, decks, and other outdoor wood surfaces.
When applied correctly, yacht varnish offers many benefits.
It forms a protective barrier against moisture and UV damage, preventing fading, cracking, warping, and other damage that can occur with prolonged exposure to the elements.
The coating also helps keep the wood from rotting, which can be an issue if the wood isn’t properly sealed.
Finally, the varnish adds a beautiful shine and luster to the wood, making it look like new.
Yacht varnish is also easy to apply and can be used on a variety of wood surfaces.
It is a great choice for any outdoor wood surface, including boats, decks, furniture, and more.
It is also relatively inexpensive and can be found at most home improvement stores.
With the right application, yacht varnish can provide years of protection and a beautiful finish to any outdoor wood surface.
Preparing the Wood Surface
Before applying yacht varnish, it is important to properly prepare the wood surface.
The surface should be thoroughly cleaned and dried, and any old varnish should be removed.
Sanding the wood will also help to ensure a smooth, even finish.
It is important to use the correct type of sandpaper for the project.
For instance, a medium-grit sandpaper is suitable for most wood surfaces, while a finer grit may be necessary for surfaces that require a more delicate finish.
Once the surface is prepared, it should be wiped down with a damp cloth to remove any dust or debris.
This will help ensure a successful application of yacht varnish.
Applying the Varnish

When it comes to applying yacht varnish, its important to understand the steps involved in the process.
First, the wood surface should be clean, dry, and sanded.
This ensures that the varnish will adhere properly and will provide maximum protection.
Next, apply a thin coat of varnish with a natural-bristle brush.
This helps to ensure even coverage and minimal brush strokes.
Allow the varnish to dry before applying a second coat.
Its important to allow the varnish to dry completely before applying any additional coats.
Sand lightly between coats to help ensure an even surface.
Additional coats should be applied as needed, but always be sure to allow the varnish to dry completely before exposing the surface to the elements.
With proper application, yacht varnish will protect your outdoor wood surfaces for years to come.
Allowing the Varnish to Dry
When it comes to yacht varnish, it is important to allow the varnish to dry completely before exposing the surface to the elements.
This will ensure that the varnish is properly bonded to the wood and will provide optimal protection from moisture and UV damage.
It is best to allow the varnish to dry for at least 24 hours before applying a second coat.
The drying time will also depend on the temperature and humidity of your environment, so it is important to allow for extra time if these conditions are not ideal.
Once the varnish is dry, it is recommended to lightly sand the surface before applying a second coat.
This will help to ensure that the varnish bonds properly and that the finish is even and smooth.
If additional coats are needed, the process should be repeated.
It is important to allow the varnish to dry completely between each coat, as this will ensure that the varnish fully bonds with the wood.
For best results, allow the varnish to dry for at least 48 hours before exposing the surface to the elements.
By allowing the yacht varnish to dry completely, you can be sure that the wood is properly protected and that the finish will last for years to come.
Sanding between Coats

Sanding between coats is an important step when applying yacht varnish.
After each coat of varnish is applied and has dried, the surface should be lightly sanded to remove any imperfections.
Sanding helps create a smooth, even finish and provides more effective protection against moisture and UV damage.
It also helps ensure that the next coat of varnish adheres properly to the surface.
When sanding between coats, use a fine-grit sandpaper (preferably around 320-400 grit) and sand in the direction of the wood grain.
This helps prevent scratches and other damage to the wood.
Be sure to only sand lightly, as sanding too aggressively can damage the wood and reduce the effectiveness of the varnish.
After sanding, use a clean cloth or brush to remove any dust or debris from the surface.
This will help ensure that the varnish adheres properly and provides the best possible protection.
Once the surface is clean, apply the next coat of varnish as normal.
With proper sanding between coats, yacht varnish will provide effective protection and lasting results.
Applying Additional Coats
Once you have applied the first coat of yacht varnish, it is important to apply additional coats for the best protection.
Depending on the specific product you are using, you may need to apply anywhere from two to seven coats.
It is important to allow the first coat to dry completely before applying any additional coats.
When applying additional coats, it is recommended to lightly sand the surface between each application.
This will help ensure a smooth, even finish and allow the varnish to adhere better.
After sanding, be sure to remove any dust or debris before applying the next coat.
When applying multiple coats of yacht varnish, it is important to use the same type of brush and same technique each time.
This will help ensure a consistent finish.
For example, if you used a natural-bristle brush when applying the first coat, it is recommended to use the same type of brush for subsequent coats.
Additionally, use long, even strokes when applying the varnish.
It is important to note that you should avoid applying too many coats of yacht varnish.
Too many coats can cause the varnish to become too thick and may make the surface appear uneven.
Generally, three to four coats should be more than enough.
Once you have finished applying the desired number of coats, allow the varnish to dry completely before exposing the surface to the elements.
With proper application and care, yacht varnish will help protect your outdoor wood surfaces for years to come.
Final Thoughts
Yacht varnish is a great way to protect your outdoor wood surfaces from moisture and UV damage.
Its important to apply yacht varnish correctly in order to get the best results.
Start by preparing the wood surface, then apply a thin coat with a natural-bristle brush.
Allow the varnish to dry before sanding and applying additional coats as needed.
With proper application, you can enjoy your outdoor wood surfaces for years to come.
Now that you know how to use yacht varnish, why not give it a try on your next project?.
James Frami
At the age of 15, he and four other friends from his neighborhood constructed their first boat. He has been sailing for almost 30 years and has a wealth of knowledge that he wants to share with others.
Recent Posts
When Was Banana Boat Song Released? (HISTORICAL INSIGHTS)
The "Banana Boat Song" was released in 1956 by Harry Belafonte. This calypso-style song, also known as "Day-O," became a huge hit and remains popular to this day for its catchy tune and upbeat...
How to Make Banana Boat Smoothie King? (DELICIOUS RECIPE REVEALED)
To make a Banana Boat Smoothie King smoothie at home, start by gathering the ingredients: a ripe banana, peanut butter, chocolate protein powder, almond milk, and ice. Blend the banana, a scoop of...
What’s the Best Varnish for Your Yacht?
Varnishing your yacht is an essential part of its care and maintenance. The benefits are twofold: yacht varnish protects your boat from the elements, while also giving it a beautiful shiny finish. But with so many different yacht and marine varnishes to choose from, it can be difficult to know which one is best for your boat. In this article, we’ll run through some of the most popular types of yacht varnish on the market to help you choose the right option.
What is Yacht Varnish?
Yacht varnish is an extremely durable solvent-based coating that is designed to protect the wood that yachts are made of and stop it decaying over time. Most varnishes are made up of a penetrating oil, resin and solvent. Although most yacht varnish is applied with a brush, it is possible to buy yacht varnish spray.
Different Types of Yacht Varnish Finish
There are many different types of finish to choose from, so you’ll need to know a little about them to decide which is the best yacht varnish for you.
- Clear Yacht Varnish. A clear yacht varnish does what it says on the tin: it will create a transparent, glossy finish that does not alter the colour of the wood it is applied to.
- Matt Yacht Varnish. Using a matt coloured yacht varnish will result in a dull, non-shiny finish that does not reflect light. This can be ideal for hiding flaws or imperfections in wood.
- Yacht Varnish Satin. A satin varnish falls between clear and matt. This type of finish will create a pearl-like sheen, without being overly shiny or reflective.

Designed by Freepik https://www.freepik.com/
Yacht Varnish Brands
There are various brands that produce yacht varnish. Here are a couple of the most popular:
Screwfix Yacht Varnish
Screwfix is a retailer in the UK that sells a variety of products, including hardware and building supplies. They may carry different brands and types of yacht varnish. Yacht varnish provides resistance to water, UV rays, and other environmental elements. Yacht varnishes often contain additives to enhance their durability and performance in marine conditions.
Ronseal Yacht Varnish
A durable, long-lasting marine varnish for wood that flexes with the movement of the wood and resists peeling and cracking. This varnish is slightly more pricey than the Screwfix varnish, but gets great reviews. You can buy the Ronseal brand of yacht varnish in B&Q and other retailers.
How to Varnish Your Yacht
Varnishing a yacht is fairly straightforward, if a little time-consuming. First you’ll need to carefully sand down the entire surface that you want to varnish to get it looking smooth. Then use a soft brush to wipe off any excess dust and debris, since you don’t want it getting trapped in the varnish.
Finally, use a paintbrush to coat the yacht with varnish. Leave it to dry for the recommended amount of time on the tin, then apply additional coats as required. Always check the instructions of your varnish type, and if unsure consult with an expert before starting.
- How long does it take for yacht varnish to dry? Yacht varnish generally takes 4 – 6 hours to dry, although you should check the instructions for the specific product you’re using. You’ll probably want to do two or three coats of varnish, leaving sufficient drying time in between coats.
- Is yacht varnish good for decking? This depends on the product you choose. Some yacht varnish is suitable for decking, while others are not because they do not have an anti-slip formula.
- Is yacht varnish good for floors? Yacht varnish should not be used as an indoor floor varnish. It is difficult to dry indoors, and contains chemicals that can be toxic if it is not used correctly.
- Is yacht varnish safe for animals? Yacht varnish is solvent-based and contains toxic chemicals, which means it should not be used for varnishing animal enclosures (for example, rabbit hutches or reptile enclosures).
- What is yacht varnish used for? Yacht varnish is used for sealing and protecting wood on boats and yachts. It is also commonly used for outdoor items such as wooden doors, window frames or pergolas.
- What type of varnish is yacht varnish? Yacht varnish is a solvent-based outdoor varnish that is extremely durable. It is usually made up of tung oil and polyurethane resin.
- What is the best varnish to use on a boat? The type of varnish that is best for your boat will depend on the type of wood your boat is made from and the finish you are looking for. Tung oil varnish is a safe bet for most boats, or you may prefer to use a one-part polyurethane varnish for added durability.
- What is the difference between yacht varnish and outdoor varnish? In general, yacht varnish dries quicker and is designed for marine conditions, so it’s likely to be more durable than outdoor varnish. However, yacht varnish is unlikely to have an anti-slip formulation, making it unsuitable for decking around the home.
Looking for yacht and boat insurance ? Buy your sailing yacht insurance online at Admiral, or contact our expert team for advice.
Admiral Marine is a trading name of Admiral Marine Limited which is authorised and regulated by the Financial Conduct Authority (FRN 306002) for general insurance business. Registered in England and Wales Company No. 02666794 at 1st Floor, One The Square, Temple Quay, Bristol, BS1 6DG
If you wish to register a complaint, please contact the Compliance and Training Manager on [email protected] . If you are unsatisfied with how your complaint has been dealt with, you may be able to refer your complaint to the Financial Ombudsman Service (FOS). The FOS website is www.financial-ombudsman.org.uk

Boatbuilders
Useful links, yachts & boats we insure.
+44 (0)1722 416106 | [email protected] | Blakey Road, Salisbury, SP1 2LP, United Kingdom
Part of the Hayes Parsons Group
Which Yacht Varnish Is Best For My Boat?
Yacht varnish is a specialized type of varnish that is often used on boats. It has several advantages over conventional varnish, which is why it is becoming more and more popular among boat owners. In this guide, we will discuss the benefits of yacht varnish. We will also answer some common questions about yacht varnish. So if you are interested in learning more about this topic, keep reading!
Yacht varnish is a type of varnish specifically designed for boats. It is typically made from a tougher resin that can withstand the harsh conditions that boats are exposed to, such as salt water and sunlight. Yacht varnish also often contains UV inhibitors to help protect the wood from fading and other damage caused by exposure to sunlight. Conventional varnishes are not as durable as yacht varnish and will not stand up to the same conditions. This makes them less suitable for use on boats. However, they can still be used for other applications, such as furniture or around the garden.
Which types of varnish to use on my boat?
Marine varnish can be divided into three different types, each with its own perfect uses. Yacht owners choose to use one or all of these types for better performance.
Tung Oil-based varnish
Is the most popular type among yacht owners who take boat maintenance seriously. International Schooner or Goldspar Boat Varnish are both oil-based varnishes that coats the wood evenly leaving a smooth finish while requiring minimal preparation work before it can be applied. This only requires a couple of coats. Is advisable to lightly sand the surface between coats to achieve the highest quality glossy finish. The smooth, high gloss finish will protect teak parts from water stains and help to maintain their appearance over time! Its UV protection helps prevent mould growth too which is especially important in wetter climates. Oil-based varnish is easy to apply and can be repaired by sanding and re-oiling the wood, meaning it will last longer than other conventional varnishes. It's also easier to apply compared with water-based yacht varnish which requires no sanding or priming before application.
Water-based boat varnish
Often used on marine boats where there is not much exposure to agitation or rubbing, making oil-based varnish too heavy for use. This yacht varnish type tends to leave a thin, powdery residue that needs sanding down after drying but offers better penetration into the wood than its oil counterpart. Polyurethane boat varnish - is much more hard-wearing than oil or water-based yacht varnishes. Stronger than oil-based or water-based yacht varnish, polyurethane yacht varnish tends to dry quickly and offers an ultra-hard surface that is resistant to impact, scratching and denting. This yacht varnish type has a high gloss tough finish so it's best suited for areas of the boat that are exposed to more wear and tear. This type of varnish can also be divided into two categories as one part polyurethane boat varnish and two-part polyurethane varnish.
One Part Polyurethane Varnish
The yacht varnish that is most commonly used for yacht paint jobs. The yacht varnish offers a quick drying time and can be easily re-coated within hours between each coat. It should be noted that due to its rigidity it is not recommended to be used for painting highly flexible wooden areas as it might crack in time leaving the wood exposed to elements. Two-Part Polyurethane Varnish - is the varnish with longer working times, making it easier to apply on larger boats. It's advisable to use only one part polyurethane yacht varnish for smaller projects as two-part yacht varnishes tend to leave an unprofessional finish when applied by hand. This type of varnish is extremely tough and consists of two products mixed together. It offers very good protection from moisture and UV damage but the same as the above this is not suitable for some areas on your yacht (such as spars) and it will crack as the wood moves and will leave the wood exposed to the elements.
Is yacht varnish waterproof?
Yes, yacht varnish is typically waterproof. This makes it a good choice for protecting boats from the elements. It can also help to keep the wood of the boat looking its best for longer.
Does yacht vanishes need a primer?
No, yacht varnish does not typically need primer. However, it is a good idea to test it on a small area of the surface you are going to varnish to make sure it adheres properly. If you do decide to use primer, make sure it is designed for use with yacht varnish.
Does yacht varnish seal wood?
Yes, yacht varnish seals the wood. It forms a protective barrier that helps to keep the wood from damage and keeps it looking its best for longer.
How long does yacht varnish last?
The lifespan of yacht varnish varies depending on the brand and the conditions it is exposed to. However, it typically lasts for several years, anywhere from two to three years before you need to apply a new coat or two. Some varnishes obviously last longer than others depending on the area where they will be applied.
Which is better? Woodstain or yacht varnish?
There is no simple answer to this question as it depends on the specific application and the needs of the user. However, in general, yacht varnish is a better option for protecting wood from the elements and keeping it looking its best. It is also typically more durable than wood stain, which makes it a better choice for boats.
Why is it important to sand between coats?
It is important to sand between coats of yacht varnish because it helps to create a smooth, even surface. This makes the final coat of varnish look its best and helps to protect the wood from damage.
How many coats should I apply?
The number of coats you should apply depends on the specific product you are using and the area you are varnishing. In general, two to three coats are sufficient. However, it is always a good idea to follow the manufacturer's instructions for the best results.
What type of finish can you get?
There are three types of finish on boat varnish: gloss, semigloss, and satin. Each one has its own benefits and drawbacks, so it is important to choose the one that best suits your needs. Gloss finish is the most durable, but it is also the most reflective. This can make it difficult to see in bright sunlight. The semigloss finish is less reflective than gloss, but it is still quite durable. It is a good choice for areas that receive moderate amounts of sunlight. The satin finish is the least reflective and also the least durable. However, it can provide a more natural look to the wood. It is a good choice for areas that do not receive a lot of sunlight.
Can you paint yacht varnish over wood stain?
Yes, you can put yacht varnish over the wood stain. However, it is important to make sure that the stain is fully dry before applying the varnish. Otherwise, you may end up with a sticky mess.
How long does it take for yacht varnish to dry?
The drying time for yacht varnish varies depending on the brand and the conditions it is used in. In general, you can expect it to take anywhere from six to eight hours to fully dry. However, it is always a good idea to read the manufacturer's instructions for the best results.
Can you thin yacht varnish?
Yes, you can thin yacht varnish if it is too thick. However, you should only use a thinner that is specifically designed for use with yacht varnish. Otherwise, you may end up with a poor-quality finish.
What is the best way to remove yacht varnish?
The best way to remove yacht varnish depends on the type of finish you have. If you have a glossy finish, you can use a polishing compound. For a semigloss or satin finish, you can use sandpaper. In general, it is best to remove yacht varnish with a power sander. However, you can also remove it by hand if you are careful.
Can I apply a new coat over the existing varnish?
Yes, you can apply a new coat of varnish over the existing varnish. However, it is important to make sure that the old coat is in good condition. Otherwise, you may not get the desired results.
Does yacht varnish go yellow?
Yacht varnish is designed to keep your boat looking good as new even throughout the season's hottest and coldest temperatures. The UV inhibitors prevent yellowing, which can otherwise occur due to exposure to external factors like sunlight or rainwater on a dock; they also remain slightly soft so that it will not crack when expanding or contracting with changes throughout each year. Liquids such as engine oils may cause blistering if left unprotected by an anti-blister agent like silicone lubricant (which contains graphite).
Is yacht varnish oil or water-based?
Yacht varnish is typically oil-based. This makes it more durable and resistant to fading. However, water-based varnishes are also available. These are less durable but easier to apply.
So which yacht varnish is right for you?
Choosing the right yacht varnish depends on how much time you want to put into maintaining your boat as well as its location. We stock a wide range of varnish suitable for any type of wood on your vessel.
More articles
Independently owned company.
Copyright © 2022. Fox's Chandleries Limited. All Rights Reserved. Registered in England and Wales, Company Number 03914760, our VAT registration is 939 9732 58.
Quick links
Contact information.
Fox's Chandlery Fox's Marina The Strand, Ipswich Suffolk, United Kingdom IP2 8SA 01473 688 431
Supported payment methods
Subscribe and receive exclusive information and offers!
123 John Doe Street Your Town, YT 12345
Store Hours Sun: Closed Mon-Fri: 9:00 - 17:00 Sat: 10:00 - 13:00
What to expect at pickup
Closing at 5pm
Closing at 1pm
- THE PRINCESS PASSPORT
- Email Newsletter
- Yacht Walkthroughs
- Destinations
- Electronics
- Boating Safety
- Uncategorized
Boat Varnish 101
- By George Sass, Jr.
- Updated: November 25, 2009
ytgnov25enewsvarn525.jpg
When is it time to revarnish your exterior brightwork? I used to apply at least three coats on the trim of my 1962 Pacemaker every spring. In addition, I would make sure two coats were applied in the fall to protect the finish from the long winter ahead. Applying one coat of varnish, especially after the prep and the taping involved, is a waste of time. Make sure you apply at least two coats.
Pay close attention to any deterioration around seams and edges, or where water has been able to intrude. Do not let these spread. I had an issue around my stanchion bases, until I removed these and rebedded the bases, fighting off the moisture. If you see light areas or dead varnish, you’ll need to repair and build these back up before finish coats are applied to the entire surface.
To make this repair, the first thing you want to do is to remove the old varnish. I continue to swear by the Red Devil 1-inch scrapers. I’ve had several for decades and they work well for small tasks like seam repair. Just make sure you keep the blade sharp. Also, be careful not to mark the wood or dig too deep with the scraper.
While repairing seams or small blemishes, try to keep the area you are working with small. The object is to fair in the damaged spot with the good varnish. By keeping this area relatively small, the fairing job is much easier.
A common mistake made with this process is not having the patience to fair bare wood after you remove the old varnish. Believe me I’ve kicked myself on more than one occasion for not taking the proper steps. You want to start with 120 grit paper, then go up to a 150-sheet, and end with a 220-grit once the wood is smooth. If this is not done properly, you can be left with scratches from the scraper and sanding.
The mahogany transom on my Pacemaker would often lift at the scarf joints. In a few areas, water would penetrate and darken the joints. If your wood has a few of these dark spots, do yourself a favor, and take the time to bleach these out with a teak care product and soft pad. Make sure the area is completely dry before you varnish, or the entire process will be for naught.
After the spot is stripped, you may need to stain the area in order to blend it with the rest of the brightwork. This is more common, in my opinion, with mahogany finishes. With teak, I’ve seen people go nuts trying to “match” the finish to a uniformed look. My friend Bruce Livingston, who built Little Harbor custom sailboats, and worked with me at Grand Banks, and is now at Vicem (and they know wood) used to say the object is to “blend.” I agree. But if you’re set on staining, go with a product from the same company as your varnish.
And make doubly sure that you stir until your hand falls off. I’ve ruined my work by applying a stain, but all the pigment was stuck at the bottom of the can. So all I did was smear colorless oil. Great move, Sass.
Then it’s time to start laying some varnish on the prepped spots. What type of brush? To build coats, I go with foam brushes at this point. I can toss them after each application and save my finish brushes for the larger applications.
When applying varnish to bare wood, make sure you thin the first coat. I thin the first coat by 50 percent. Since this dries in a few hours, you can go back on the same day with a second coat, thinned by 25 percent. Do not sand after these coats.
Then, you can build the spots back with varnish and minimal thinner. Apply one coat a day and sand with a 220 grit paper, until the areas are built up to the same thickness as the surrounding varnish. Then it’s time to varnish the entire area to get the golden finish.
- More: Systems
- More Uncategorized

BoatUS Launches Online Advocacy Tool

Dock Danger

A Dream Fulfilled

3 America’s Cup Hashtags to Follow

For Sale: 2005 Ocean Alexander 64

For Sale: 2004 Burger 106 Raised Pilothouse

The Sweet Spot

Boaters Expect More Hurricanes in 2024
- Digital Edition
- Customer Service
- Privacy Policy
- Email Newsletters
- Cruising World
- Sailing World
- Salt Water Sportsman
- Sport Fishing
- Wakeboarding
- Facebook Page
- Twitter Page
- Instagram Page
- Youtube Page
What is it you're looking for?

Yacht varnish

Yacht Varnish protects outdoor wood all year long so it’s perfect for windows and doors. It’s a tough traditional varnish and resists cracking, peeling and blistering.
- Long lasting protection for outdoor wood
- Waterproof and protects from the sun
- Extremely tough – resists cracking, peeling and blistering
- Highlights wood’s natural colour
- Prevents wood from greying over time
- Protects against sun damage
- Won't crack, peel or blister
Allow us to use your location
To access tailored content on this page, enable location cookies. Review your cookie preferences and ensure statistical cookies are enabled for the best experience.

How much paint do I need?
Measure your area precisely, drop the numbers into this smart calculator and it will tell you straight away how many litres you'll need to complete your project.

Need to know
This no-nonsense varnish is extremely tough and durable, giving you a long-lasting glossy finish.
Eight hours might seem like a long time to wait between coats, but it guarantees you lasting protection and the best finish.
3 coats give you a glossy finish
Varnishes up to 16m2 per litre
Brush it on
Smooth exterior wood like doors and windows
How to use Yacht Varnish
Before you start.
Make sure your wood is dry before you begin. Choose a day that’s reasonably warm (above 10°c) and dry.
This varnish isn’t suitable for decking though.
How to prepare wood for varnishing
- You will need to remove old stain or varnish by sanding it down. Use 120 grit sandpaper and sand away the old finish.
- Wipe down the surface with white spirit and a cloth to remove the leftover dust.
If your wood is brand new, you will need to sand it to remove loose wood and clean with white spirit.
Application
- Thoroughly stir your varnish to make sure it’s smooth and there’s no lumpy bits.
- Test it on a small patch of your door. It’s clear varnish but it may still darken the natural colour of your wood so make sure you’re happy with it.
- If you are, start painting with a brush. Go in the direction of the grain and for best results, apply two or three coats. Wait eight hours between each coat.
- Before you apply your last coat, lightly sand the surface and use white spirit to remove the excess dust. This will give you a nice smooth finish. Your last coat will be dry in four hours.
Once your varnish is dry, you’ll be able to clean your door as normal. Keep on top of the dirt and grime for a friendly welcome to your home.
You can clean your brushes with white spirit or brush cleaner.
It’s easy to repair your varnish if sections of it become damaged. Simply use some sandpaper to sand down and smooth out the damaged part and then add a couple of coats so it’s good as new again.
Technical Specification
Find the right product.
Tell us about your DIY project and we’ll show you which products you need.

Find the right product for you
- Yacht Painting
- Yacht Refits
- Interior Refinishing & Varnish
(954) 327-3009
- Practical Boat Owner
- Digital edition

8 quick tips for varnishing
- April 8, 2015
Some tips and tricks to get the best finish possible when varnishing your boat's woodwork

It’s worth using the time while the boat is out of the water to varnish any woodwork you can take off the boat and give it as long as possible for the solvents to evaporate off before the boat goes back in. Here are some tips for a good finish:

1: Don’t varnish direct from the tin – decant enough for the job into a clean container and store the tin in a dust-free area

2: Use a tack cloth to wipe down the item being varnished before varnishing. After use, store a tack cloth in an airtight container

3: Warm the varnish container in a bowl of warm water to assist the flow

4: Hanging items vertically reduces the chance of dust contamination.

5: Good lighting is important. Regularly put your (dust-free) head close to the varnished surface and look along it for areas you may have missed.

6: Varnish the area to be covered in small square sections, brushing both along and across the grain. The adjoining edges will still be relatively fresh and the varnish will flow together correctly.

7: De-dust the area you’ll be varnishing in, including shelves, floors and other surfaces, to avoid dust being stirred up.

8: If varnishing teak, purge the surface oil with acetone before varnishing to help the varnish adhere
Fitting Out Guide
Varnishing Basics
A Guide to the Instructions on the Can
M any years ago, one of the big varnish manufacturers had a regular advertisement showing a cowering boat owner eyeing a brightwork project with a feigned expression of terror, and saying “Vvvvvvvvarnish?” Such fear is a common sentiment among would-be and occasional varnishers, and for good reason: Varnish provides excellent protection while showing the beauty of the wood, but it takes a consistent commitment of time and skill each year to maintain it. And achieving a good bright (aka varnished) finish in the first place requires careful surface preparation and application.
There are myriad pitfalls that can compromise the job along the way, and a lack of maintenance during the season can ruin a fine job. Paint, frankly, is a better option for those who lack the time or inclination to maintain varnish. Indeed, vast expanses of paint (cabinsides, for example) accented by bright trim will look much better than poorly maintained varnish. Varnish, however, is not only rewarding aesthetically; because it’s transparent, it also can reveal potential areas of rot that show up early as dark, discolored spots before they become a serious problem.

A block of foam insulation can be shaped to a contoured surface to create a custom sanding block.
Some great books and articles have been written on the topic of varnishing (see Further Reading at the end of this article). For those seeking a more succinct lesson than those tomes provide, all major varnish brands include on their labels a concise set of instructions. I’d wager that that’s where most of us take our initial varnishing advice. Yet, due to the space constraints of the can, these instructions are typically printed in a barely legible type size, and they leave some room for interpretation—especially for the first-time varnisher.
So, the goal of this article is to interpret the varnish can—to give a bit more depth to those instructions, without writing a book. A can might say to remove all dust. We’ll look at how we do that, and the other basics of varnishing, leaving aside tangential concepts such as two-pack systems, spray application, wood staining, and stripping of old finishes.

Preparing and Sealing Bare Wood
A ll labels will tell you the wood must be clean and dry before varnishing. But there are a few other considerations, too. Painters and varnishers have an old adage: “It’s 90 percent prep work.” Divots and unevenness in the surface will telegraph into the finish coat, so be sure to get your bare-wood surface as smooth and scratch-free as you’d like it to be when finished. If you can live with raised and uneven grain, then a thorough sanding is all it takes. But if you’d like a mirror-smooth finish, now is the time to begin working toward that.
Large, flat surfaces such as transoms and cabinsides can be sanded with sticky-back sandpaper, which comes in a roll, mounted on a hard-rubber sanding block. Alternatively, the surface may be scraped smooth with a cabinet scraper—essentially, a small rectangle of thin tool steel with a uniform burr worked into its cutting edge; when drawn across the wood surface, the cabinet scraper raises the finest of shavings. Rounded and faceted surfaces may be hand-sanded without a backing block, but achieving consistent contact between the paper and the surface can be challenging in this scenario. A better approach is to create a custom backing block from blue foam insulation. To do this, cut off a block of foam of appropriate size, form a piece of 80-grit sandpaper over the surface to be sanded, with the grit side facing out, and rub the foam block back and forth over it until the shape is transferred to the foam. You now have a shaped block to which you can apply your paper. This works especially well on long, straight facets and rounds, such as handrails, railcaps, and half-round trim.

Blisters in a varnished surface must be scraped away. The hard edges of the resulting craters must then be sanded flat before the crater is built up with new varnish. Use a backing block here; don’t create a divot by focusing your sanding efforts on the bare wood.
A quick survey of varnish labels reveals strong disagreement over what grit of sandpaper to use before the all-important first sealer coat is applied. One can I looked at specifies using 80-grit on bare wood, while another says 120. And still another recommends 180–320-grit paper. The theory of the coarser grits is that they’ll give the varnish more “tooth,” or mechanical adhesion. Lower-density woods will easily soak in the initial coat of varnish, so a finer grit is a good choice here; denser woods may require a coarser initial sanding, so extra care must be taken to sand with the grain to mask the scratches, because a fine finish requires no visible scratches in the bare wood. For most wood species, 180-grit is a good choice. The sealer coat (which we’ll cover shortly), if thinned properly, will penetrate the wood’s surface to give adequate mechanical adhesion.
Preparing Previously Varnished Surfaces
I f your task is to apply a maintenance coat or two to an intact finish, rather than to varnish bare wood, then you must first clean the entire surface of grit and dirt, and then sand it with fine-grit paper; 220–320 grit is the right choice for this. But before you get started on that task, you should survey the surface for yellow blisters. These telltale marks show where the varnish has separated from the wood, and they must be carefully scraped away to bare wood before sanding can proceed. (If the surface is littered with these blisters, or if the majority of the finish is peeling, then you must strip the entire piece to bare wood—a process we won’t cover here.) A 1″ hook scraper, filed sharp, is the ideal tool for scraping away small blisters. It’ll dull quickly as you use it, so keep a file handy, and sharpen the scraper’s blade as soon as it can no longer remove fine ribbons of varnish—which will be fairly often if you’re scraping frequently. Don’t do this sharpening on deck; the fine steel dust will rust and make a mess.

Scraped bare spots must have their edges “feathered”—the hard transition from bare wood to varnish must be sloped by careful sanding. The goal here is to gradually thin the varnish around the edges of the crater, but to not remove wood. A sanding block is recommended, and careful use of a scraper can speed things up. With the scraping and sanding done, it’s time to apply a sealer coat to the bare spots—to “spot-prime” them—and then to apply three or more “build coats” to these spots (see application instructions, below).
Folding Sheet Sandpaper
F or sanding long pieces of trim, handrails, spars, oars, and such, you’ll likely be using 9″ × 11″ sheets of paper. These should be folded and then cut into quarters. These quarters are then folded in thirds, as shown in the photograph, so that none of the grit surfaces touch. When one surface becomes clogged and no longer cuts, flip the paper over for a fresh surface. When that one is clogged, unfold and refold the paper to expose the final unused surface. This can also be done with half sheets—though for surfaces typically requiring pieces this large, you’ll likely want a sanding block.

Sanding between coats creates dust; clean it up with this three step process: (1) vacuum, (2) wipe down with solvent, and (3) wipe with a clean tack cloth.
Sanding and Dust Removal
W ith scraping and spot-priming out of the way (if you had to do it at all), it’s time to sand the entire surface. This is a step that often befuddles the novice varnisher: The goal, after all, is to build up a thick coat of varnish on the wood. This must be accomplished by applying multiple coats, and you must sand between these coats, typically, to get the later coat to adhere to the earlier one. But in the process of doing this, you want to sand away as little of the previous coat as possible. A light touch and a fine grit are required for this task. If the finish is in great shape, then use 320. If it’s beat up or requires some leveling, then use 220.
There are two exceptions to this sanding-between-coats rule. The first is a technique called “hot-coating,” whereby a subsequent coat is applied to one that’s not yet fully cured, so the two actually melt together, chemically. If you’re new to varnishing, then I suggest you stick to the tried-and-true methods outlined here, and not be lulled by the promise of less sanding. The second exception involves wood coatings specifically formulated for no sanding between coats. They save the time of sanding. And they save material, as there’s no specter of sanding away the previous coat. Sanding between coats, however, has the incidental benefit of dulling the previous coat, giving a nice sharp contrast between varnished and unvarnished areas when you’re actually applying the stuff. Unless the light is just right, you can’t always see where you’ve been when you don’t sand between coats, and thus you risk “holidays” in your finish (see “Applying the Varnish,” below). The other drawback of not sanding between coats is that you lose the chance to eliminate the previous coat’s imperfections. Sags, dust, bugs, lint, unevenness, and other sins are repaired or eliminated with each successive sanding. My caveats notwithstanding, not sanding between coats is a significant time-saver, and once you’ve mastered the art of basic varnishing, it might prove worthwhile to look into these no-sanding-required formulations.

Apply varnish by first brushing it on vertically, and then drawing it out horizontally with long, even strokes. Don’t overwork it in an attempt to make it mirror-smooth; trust that it will level out before it cures.
It seems antithetical to do all of that sanding, and then to be instructed to apply varnish only to a surface that’s clean and free of dust. But take heart: There’s an established protocol for removing dust from a surface. First, vacuum as much of it away as you can, using a clean brush attachment on your shop vacuum. If working outside, you can use compressed air to blow off the dust. Second, wipe down the surface with a rag that’s been dampened—not soaked—with paint thinner or some other solvent that won’t leave a residue. The rag itself should be clean and free of lint. The third and final step is to wipe the entire surface with a painter’s tack cloth.
Applying the Varnish
T he man who taught me how to varnish had a rule regarding time of day: He’d never begin applying varnish outside after about 2 p.m. on a summer day. Why? Because humidity on uncured varnish will dull and cloud the finished product. I had this lesson driven home the hard way several years ago when, pressed by schedule to get a coat of varnish on my mast, I did the job after work, at 5 p.m. I knew better, but I guess I thought I was invincible. Within a few hours, the dew dropped on the partially dry varnish, and the next morning the finish on the “up” surface of the mast was cloudy, dull, and textured, while the down side was clear and shiny. Cool, dry weather—classic New England fall conditions—is best, as the varnish has a chance to level out before it cures. In fact, getting your varnish done in autumn is a great way to manage your varnish maintenance, as you’ll feel like a genius for having it out of the way come the press of spring and the promise of boating weather. One word of warning on this: The short, cool days of fall typically require an indoor workspace, because the dew dries late in the day and falls early in the evening.
The first coat on bare wood is the sealer, which should be thinned adequately enough to allow it to seep into the wood before it cures. When it dries, the sealer should all but disappear into the wood; there should be no ambition to achieve a heavy gloss finish at this stage. Thinning is typically specified as a percentage of the varnish in your pot, and the range specified by manufacturers varies depending upon the viscosity of the varnish. One brand of thick-bodied varnish calls for 50 percent thinning for sealing purposes; less viscous, more forgiving varnishes are generally thinned only 10 percent.
Don’t varnish straight out of the can. Instead, pour your varnish through a medium or fine paint strainer into a clean container. This filtering step is especially important if you’re using a previously opened can, because globs of cured varnish can inhabit the rim and find their way into your finish.
Once the sealer coat has dried, it’s time to scuff it with 220-grit paper—just enough to knock down any hardened fuzz on the surface, and to dull the shine, if there is any. With this done, wipe down the surface with thinner applied to a clean lint-free rag, follow with a tack cloth, and apply the next coat. Some manufacturers will recommend that this next coat be thinned by 25 percent, while others will counsel full-strength varnish at this stage. Again, your best bet is to follow the can’s instructions.
The ideal is to not thin your varnish at all for the subsequent buildup coats, but the reality is that your brush will drag after a while on hot days or on long jobs as the solvent in the varnish flashes off. A fraction of a capful of proprietary thinner should thus be added occasionally, to make the varnish flow properly.

Good brushing technique is a matter of experience and concentration. I have good days and bad days applying varnish, probably because I do it only a few times a year. Here are some of my common pitfalls, and how I’ve come to avoid them:
Sags— It’s incredibly disappointing to look back at a surface that was varnished only five minutes ago, and to see an unfixable sag propagating down it. Varnish, you see, has a short window during which it can be worked. Once it starts to set up—to skin over—further brushing will only make it worse. Let’s consider varnishing a sailboat’s cabinsides: I like to apply the varnish in adjacent vertical bands and, once the brush has been emptied of varnish, to brush these out horizontally. This technique “meters” the varnish consistently, and avoids great sags in the middle of the surface. The place I always get into trouble when doing my cabinsides is under the half-round trim that defines the top edge of the cabin. Varnish loads up under there, and no matter how carefully I inspect the area before moving on, it always seems to release a sag or two. To avoid this, I now mask the cabinsides and varnish the trim first, and then freehand the cabinsides once the trim cures. It takes a bit more time, and some tape, but the saved frustration is worth it. If you find a sag in a cured buildup coat, scrape it away carefully before sanding for the next coat.
Dust— This is a disappointing defect, too, though I must say that a small bit of dust in the varnish seems to disappear once the boat is in the water. Perhaps it’s that our focus shifts to other things once the season is underway, or we absorb the boat as a whole, rather than as a brightwork project. Anyhow, don’t despair if you get a bit of dust in your buildup coats. The time to really be attentive to this is when applying the top coat. Varnish on a still day, vacuum, wipe, and tack the surface carefully, even wet down the shed floor if your situation allows you to do so, and use a clean brush. If you still pick up some dust, remember: This is an ongoing process, year after year. There’ll be time for perfection next season.
Holidays— “Holiday,” as you likely know, is the painter’s affectionate term for places that didn’t receive finish, and should have. They are typically a mental concentration issue, though occasionally they may be the result of inadequate amount of varnish on the brush. Be aware of them. Avoid them. And know that you’ll get better at brushing the more you do it.
Brush marks— Brush marks are the result of one of two things: Either the varnish has been overworked to the point that it was curing while being brushed, or it was applied in short, choppy strokes that began in the “wet edge.” The wet edge is the “front,” if you will, of wet varnish that’s advancing along the unvarnished surface as you apply the finish. Always complete your brushstroke into this edge, rather than originating it there. And apply it in long strokes that unload the brush evenly. Short, choppy ones will pile up the varnish unevenly, possibly leading to sags. The idea is to spread a coat of uniform thickness, one that’s sufficiently thick to shine, but not so thick that it will sag. Whatever it takes to achieve this should be done: Speed of application, a good-sized badger-hair brush (1½″ or 2″), easily spread varnish (add retarder on warm days and accelerator on cold ones), and a “feel” for the process, all help.
P eople new to varnishing often balk at the idea of five to seven coats, thinking it an excessive amount. But that’s typically the minimum required to build up a good and durable varnish finish that will last all season—again, with sanding between each coat. You’ll know you’re sanding a fresh coat too soon if the varnish gums up your paper; you must wait to sand until the varnish doesn’t do this, but rather turns to fine dust. It takes one to two coats per year to then maintain a varnished finish in a temperate climate, and more in the tropics. A few months of neglect in hot summer sun will result in a dull finish, and a little more than that will often result in cracking in the surface, and eventual peeling.
Brushes: Bristle or Foam?
B adger-hair bristle brushes are the standard for serious varnishers. They are worth their cost, because they hold plenty of varnish and release it evenly and cleanly—that is, with minimal brush marks. With careful cleaning and storage, they can be used year after year. Cleaning typically requires three rinses in clean thinner, with a twirl in a paintbrush spinner between each rinse. Then they can be soaked in kerosene or diesel and spun out before being wrapped in a clean rag and hung from a hook for the season; to use them again, soak them in thinner to wash off the kerosene, spin them out, and they’re ready to go. Never store them in a can of thinner, because remnant varnish solids will settle to the bottom of the can, contaminating the brush.
Foam brushes are disposed of after use. Their downsides are: (1) They don’t hold as much varnish as a bristle brush, so they must be dipped more often and thus long, even strokes can be a challenge; (2) they lose their stiffness after a period of time; (3) they don’t work well cutting into tight spots; and (4) they add to the solid-waste stream. Nos. 1, 2, and 3 are generally considered to be acceptable trade-offs for small jobs, or in situations where prompt brush cleaning is challenging or impossible. The solid-waste issue must be balanced against the chemical-waste issue of cleaning brushes with solvent. Neither one is zero-impact.
↵ Return to 2022 Fitting Out Guide Table of Contents
Share this article
Join The Conversation
We welcome your comments about this article. If you’d like to include a photo or a video with your comment, please email the file or link.
One thought on “ Varnishing Basics ”
One of the best articles on varnishing that I’ve read – perhaps it’s because I agree with the author’s point of view. On our boat, we’ll use a Scotch-Brite pad to scuff the varnish when we’re in the ‘build-up’ phase but we’ll block sand before we apply the final coats.
Fair winds and calm seas.
Leave a Reply Cancel reply
Your email address will not be published. Required fields are marked *
Stay On Course
More From This Issue

From The Editor
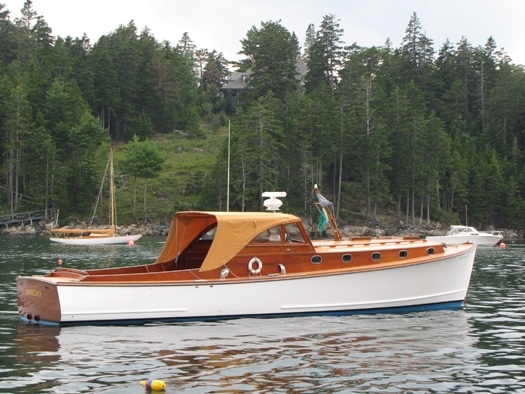
A Rainy Sunday Afternoon
I’d brought lunch and backed away from the island to float in its lee while I ate. Putting up the umbrella and taking my sou’wester off changed the sound of…
Boat Profile
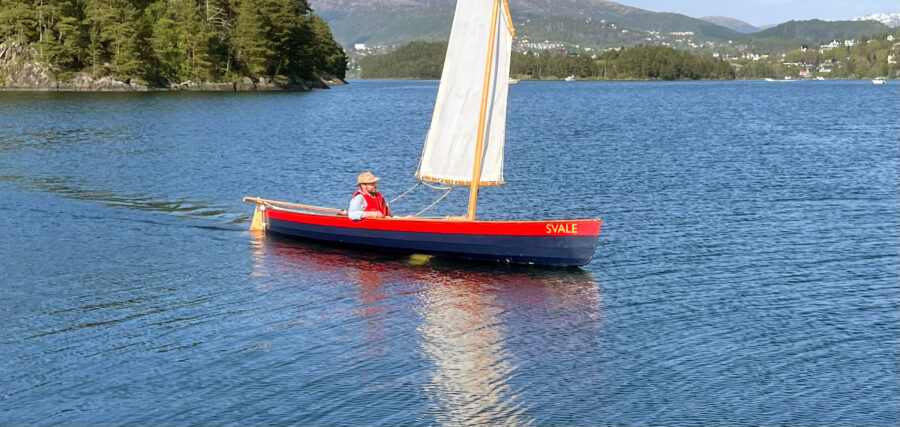
Waterlust Sailing Canoe
I fell in love with the graceful sheer and reasoned that the boat was not so big, and I would not have invested too much time, money, and energy if…

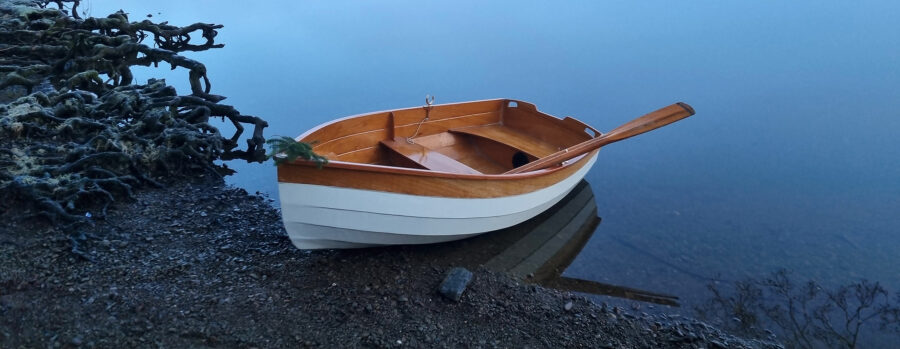
The Scout 10
The Scout 10 was developed in Port Townsend, Washington, by Duckworks and Turn Point Design. Their goal was to create “the smallest possible camp-cruising sailboat.” It had to be light…
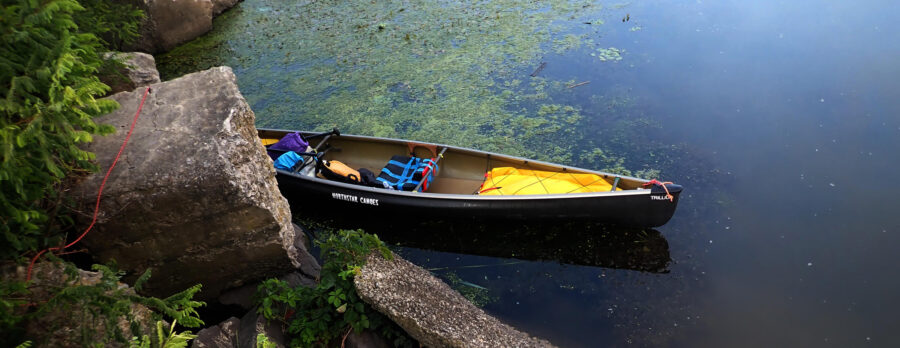
The Erie Canal by Canoe
Within three weeks I had planned my itinerary and organized my food. I was happy to see that all my gear and supplies fit in my 14′ 6″ composite solo…
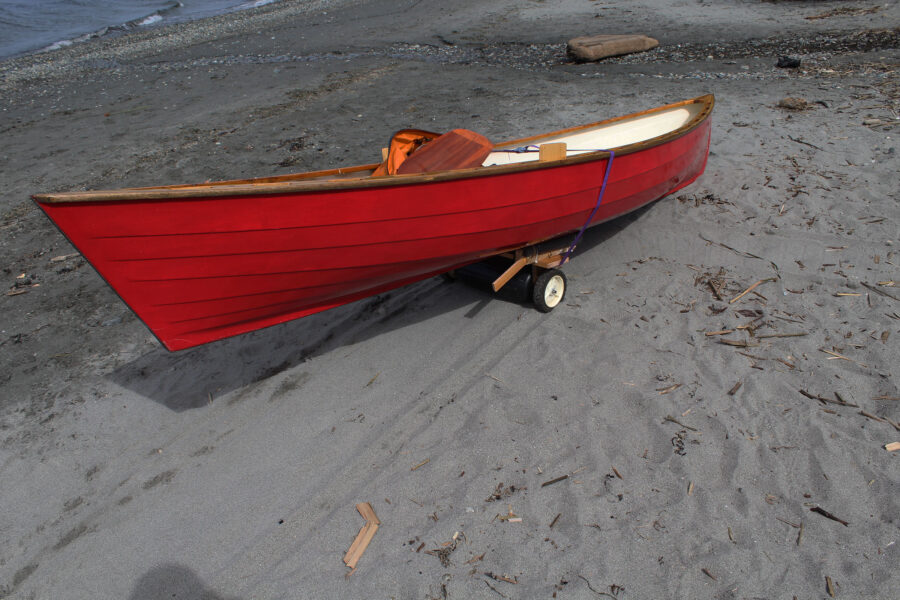
All-Terrain Carts
My canoes and kayaks don’t make it so easy for me, especially when my truck and the water are separated by stretches of asphalt, loose cobbles, and sand and I…
Product Reviews
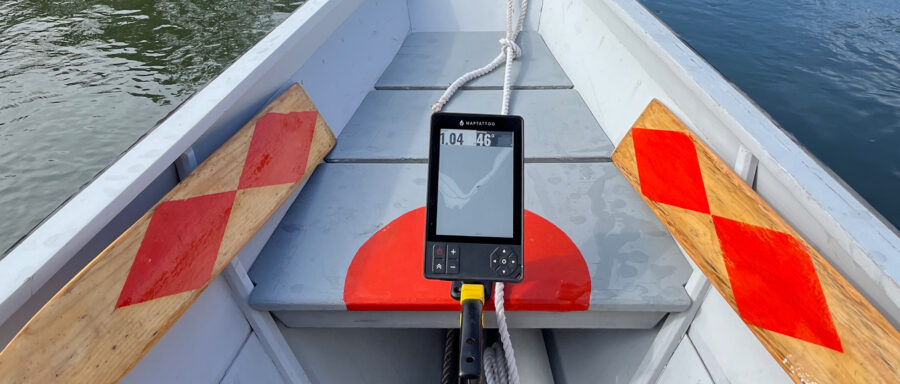
The Maptattoo was designed to address the difficulties its developers encountered using a tablet while they were participating in the 2018 Race to Alaska (R2AK). The first issue was visibility.
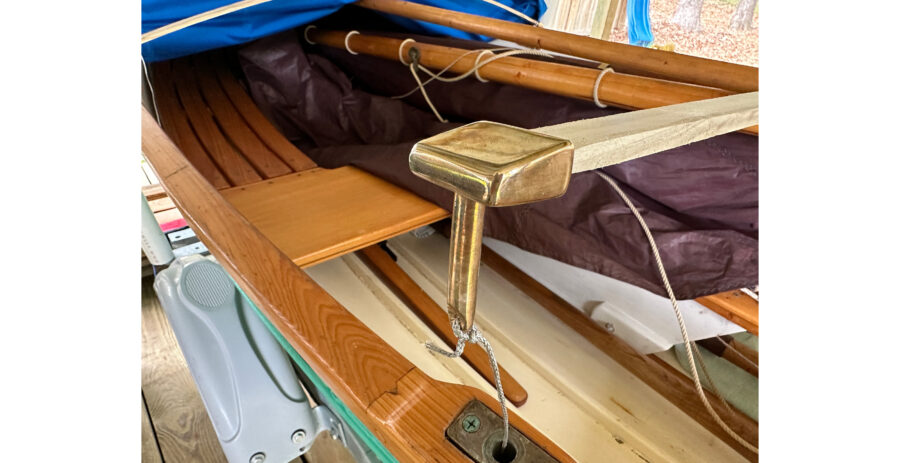
Boat Cover Batten Sockets
East Passage Boatwrights in Bristol, Rhode Island, has an innovative and beautiful solution: a batten socket that fits into a rowboat’s standard 1⁄2″ oarlock fitting, is easy to use, and…
Reader Built Boats
From the Dumpster to the Launching Ramp
When Polly came in to work one day, the boat was gone. She didn’t think much of it until a colleague told her it had been thrown out, but that…
More Fitting Out Guide
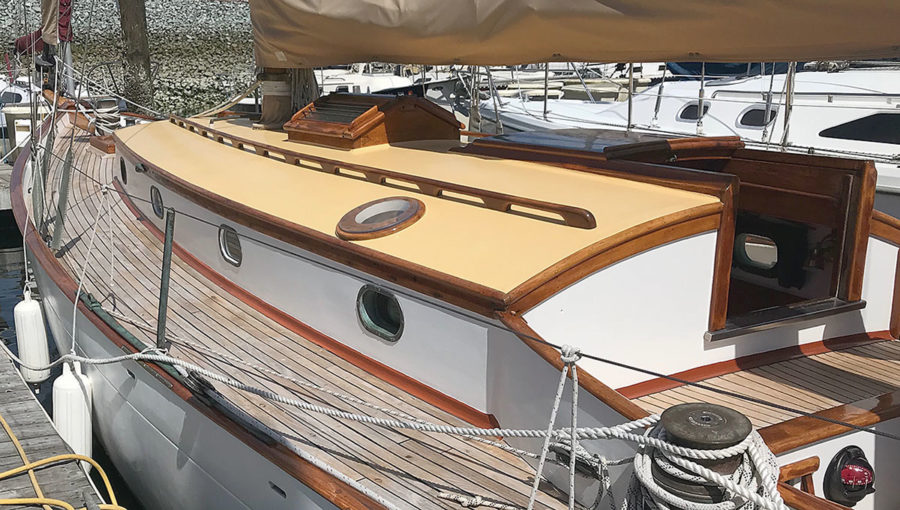
Painting SYMRA
SYMRA needed new paint on the cabin sides. That project serves as an example of how I prepare her for painting, and what can be done without tape.

Masking Tape Techniques
A paint or varnish job is only as good as the taped edges that define it. It’s important to know what types of tapes to use, how to use them,…

A Shop-Made Painting Lamp
A good finish depends on many factors, including the quality of the paint or varnish, the preparation of the surface, and the expertise of the painter. However, even with the…

Varnish provides excellent protection while showing the beauty of the wood, but it takes a consistent commitment of time and skill each year to maintain it.
Subscribe Today!
Become a subscriber today and you’ll recieve a new issue every month plus unlimited access to our full archive of backlogged issues.
Already a subscriber? Sign In
Subscribe For Full Access
Flipbooks are available to paid subscribers only. Subscribe now or log in for access.
- New Sailboats
- Sailboats 21-30ft
- Sailboats 31-35ft
- Sailboats 36-40ft
- Sailboats Over 40ft
- Sailboats Under 21feet
- used_sailboats
- Apps and Computer Programs
- Communications
- Fishfinders
- Handheld Electronics
- Plotters MFDS Rradar
- Wind, Speed & Depth Instruments
- Anchoring Mooring
- Running Rigging
- Sails Canvas
- Standing Rigging
- Diesel Engines
- Off Grid Energy
- Cleaning Waxing
- DIY Projects
- Repair, Tools & Materials
- Spare Parts
- Tools & Gadgets
- Cabin Comfort
- Ventilation
- Footwear Apparel
- Foul Weather Gear
- Mailport & PS Advisor
- Inside Practical Sailor Blog
- Activate My Web Access
- Reset Password
- Customer Service

- Free Newsletter
Valiant 40: Reshaping the Cruising Hull

Bristol Channel Cutter 28: Circumnavigator’s Choice

Hunter 35.5 Legend Used Boat Review

Pearson Rhodes 41/Rhodes Bounty II Used Sailboat Review

Best Crimpers and Strippers for Fixing Marine Electrical Connectors

Thinking Through a Solar Power Installation

How Does the Gulf Stream Influence our Weather?

Can You Run a Marine Air-Conditioner on Battery Power?

Practical Sailor Classic: The Load on Your Rode

Anchor Rodes for Smaller Sailboats

Ground Tackle Inspection Tips

Shoe Goo II Excels for Quick Sail Repairs

Solutions for a Stinky Holding Tank

Diesel Performance Additives

What Oil Analysis Reveals About Your Engine

Hidden Maintenance Problems: Part 3 – Gremlins in the Electrics

Seepage or Flooding? How To Keep Water Out of the Boat

Painting a New Bootstripe Like a Pro

Three-Model BBQ Test

Alcohol Stoves— Swan Song or Rebirth?

Living Aboard with an Alcohol Stove

Choosing the Right Fuel for Your Alcohol Stove

Preparing Yourself for Solo Sailing

How to Select Crew for a Passage or Delivery

Preparing A Boat to Sail Solo

Re-sealing the Seams on Waterproof Fabrics

Waxing and Polishing Your Boat

Reducing Engine Room Noise

Tricks and Tips to Forming Do-it-yourself Rigging Terminals

Marine Toilet Maintenance Tips

Learning to Live with Plastic Boat Bits
- Boat Maintenance
The Best Marine Varnish: Exterior Wood Finish Tests
Two-part varnishes leading in durability as long-term test reaches 24-month mark..

Like spotting land after a long passage, were glad to say that the end of our long-term exterior wood finishes test is finally on the horizon. Time, weather, and Southwest Floridas unrelenting sunshine have clearly taken their toll on the test panels over the last 24 months, and as the evaluation moves into its third year, only 19 of the original 54 test products will continue on in our survival-of-the fittest finish matchup. Given that most wood coatings are rarely expected to last longer than two years in the marine environment-particularly in super-sunny locales-its no surprise that we’ve seen more significant changes in the coatings in the last six months than we had in previous checkups.
Our search for the ideal wood finish-relatively easy to apply, easy to maintain, lasts multiple seasons, and is affordable-began in 2007 when we took a look at the different types of exterior wood finishes on the market, their pros and cons, and how easy they were to apply ( one-part varnishes , August 2007; varnish alternatives , October 2007; two-part varnishes , December 2007; teak oils and stains , April 2008). Launched in 2008, the long-term panel test aimed to determine which type of coating offers the best and longest protection and which products stand out among their peers.
We hope the comparison enables readers to decide which finish best matches their own taste, potential labor investment, and wood protection needs.
We’ve rated the test products every six months and reported on the coatings durability in the May 2009 issue ( six-month checkup ), December 2009 issue ( 12 months ), and January 2011 ( 18 months ) issues. Here, we offer the two-year report on the survivors.
How We’re Testing the Marine Varnishes
Testers applied dozens of exterior wood finishes (22 one-part varnishes, six two-part varnishes, 18 synthetics and satins/varnish alternatives, and eight teak oils and sealers) to small panels of bare solid teak. Each was assigned a number for blind judging and was applied per manufacturers instructions. If makers gave a range for the number of coats to apply, testers went with the minimum.
Initial testing rated each products ease of application and original gloss and reflective qualities. In the summer of 2008, the test panels were mounted on a wooden rack (aka: The Rack), which was set up in an unobstructed area on the roof of the PS workshop in Sarasota, Fla., to ensure that all panels received the same amount of weather exposure. The top part of each panel was covered to create a control area that testers used for comparison over time. Every six months, we disassembled The Rack and rated the panels on how well their coating integrity, gloss, and color had fared over time with constant exposure to the elements.
The test was designed as an endurance test, a fight to the finish, so we have not done any maintenance coats or touch-ups to the test panels. These products can be expected to have much longer lifespans if they are regularly maintained.
How We’re Rating the Marine Varnishes
Testers rate each panel on three long-term performance criteria: coating integrity, gloss retention, and color retention. Excellent and Good coating integrity ratings mean that no maintenance is needed; a Fair indicates that its time for a maintenance coat; Poor means the fat lady has sung, and the coating would need to be removed and re-applied. Excellent ratings are given only to those with an uncompromised coating. This time, panels with Poor and Fair- coating integrity were pulled from the test.
Color and gloss retention ratings are relative to the panels original finish. Initial gloss and ease of application are relative to the field within each coating category; these were assigned immediately after the panels were coated.
It was tougher to pick Recommended coatings at the two-year mark, as most wood finishes aren’t intended to go that long without maintenance. One-part varnishes that earned PSs recommendation this go-round were rated Fair for coating integrity (none rated better than Fair ) and had no Poor ratings. Recommended two-part systems rated Good or better for coating integrity with no Poor ratings. No varnish alternatives or teak oils/sealers were recommended at two years.
VALUE GUIDE: Varnish Alternatives
What we found.
What a difference a season makes! With the exception of a few two-part products, the test coatings had lost their sparkle at the two-year mark. Ratings slipped across the board. The UV abuse had obviously taken its toll, sucking the life out of most of the coatings, particularly the clear finishes.
Those clinging to life with Fair coating integrity are still protecting the wood, but they’ve lost their looks. In the real world, all of the one-part varnish and varnish alternative test panels would be due for a maintenance coat, and some-like HMG K Type Varnish, West Marine WoodPro Plus (rebranded Epifanes Rapidclear), and Ace Spar Varnish-would be overdue.
The biggest overall decline was within the one-part varnish test group: Not a single one rated better than Fair for coating integrity or gloss retention, and nearly half of the test field was retired after this rating round. Just six months before, eight of the 19 products rated Good for coating integrity and six rated Good for gloss retention. In 12 months, seven dropped from an Excellent coating integrity to a Fair.
The one-part varnishes offering the most protection after two years are Detco Crystal, Le Tonkinois Vernis, and Pettits Z-Spar Captains 2067. However, their extended protection comes with tradeoffs: Detco rated only Fair for application, Le Tonks gloss started to slip after one year, and Pettits 2067 started losing its original color after 12 months.
One hardware store varnish has surprisingly held its own over the long haul: Minwax Helmsman Spar Urethane. At half the cost of the Recommended one-part varnishes, Minwax slacked in the color retention department, but it has proven its multi-season durability.
Four of the nine varnish alternatives have been voted off The Rack after two years, and none performed well enough to earn our recommendation for two-year wood protection.

The Cetol products are still at the head of the pack, albeit a somewhat mangy-looking pack. The cloudy, opaque look of the Cetol Marine and Marine Light products may not appeal to everyone, but the fact they’ve maintained their color for more than a year is a good example that higher-solids finishes tend to offer better UV protection.
The Cetol Natural (with gloss) test panel fell from a Good coating integrity six months ago to being dropped from testing. Its performance mirrors what we’ve seen in the field: Give it a little loving once a year with a scrubby pad and a fresh coat, and it’ll last the long haul.
Its taken two years, but the two-part varnishes are finally starting to show their age. Surprisingly, the first products to be dropped from this group are two that performed well in past PS tests: Bristol Finish and Honey Teak. This is likely because the life of a wood finish in Florida is always going to be shorter than in our past test locales in New England.
The other two-parts are still holding up well, with Interlux Perfection and Nautiking Nautithane offering uncompromised protection and better-than-expected gloss after 24 months. Perfection has been reformulated since the test began and is now sold as Perfection Plus.
The temporarily discontinued (since 2009) Smiths Five Year Clear has also proven to be a top-notch finish, but its not available at this time.
While HMG Acrythane XSC didn’t earn our Recommendation this time, it was a top 18-month finish, it still looks good, and it costs less than the Nautithane.
Conclusions About Exterior Varnishes
After two years of testing, we’ve come to accept that perhaps there’s no Holy Grail of exterior wood finishes. It would appear, unfortunately, that we can’t have it all: easy to apply, easy to maintain, long-lasting protection, and a budget-friendly price tag. The reality is that, like much in life, wood protection is all about compromise and balancing your needs with your wants.
There’s no one-size-fits-all solution, and the boat owner who finds gratification in the wet, glossy look of a two-part varnish borne of painstaking preparation and careful application will weigh our test data much differently than the one who regards brightwork maintenance as a masochistic endeavor. For the latter, we recommend seeking out a varnish alternative (easy to apply, easy to maintain) that suits your tastes. With modest maintenance, the Cetol products with gloss overcoats have proven to be the most durable.
For areas where slippery-when-wet coatings wont do, Cetol Natural (without gloss overcoat) or our top-pick teak oil, Star brites Tropical Teak Sealer (classic teak) should be considered. The Star brite will need to be reapplied every three or four months.
If you’re looking for a harder, more abrasion-resistant finish that’ll make it past the year mark, check out the top one-part varnishes like Detco Crystal or Pettits Z-Spar Captains 2067. Boat owners in sailing areas that see less sunshine than our Florida test site should also consider Pettits Flagship 2015 or Captains 1015. One-part varnishes require a little more work upfront and quick attention when they are scratched or dinged, but they also offer a more traditional, high-gloss look. The one-part varnishes in our test slipped dramatically after a year and half, so we suggest an annual maintenance coat, whether they look like they need it or not.
As this test has shown, when it comes to long-lasting protection and gloss, two-part varnishes just can’t be beat. They may be a pain to apply-and should you let the coating fail, you had better invest in a heat gun-but their durability is unmatched.
The top two-part after two years of testing was Interlux Perfection. Because we’ve not yet tested the reformulated Perfection, the top pick honors go to Nautikings Nautithane. While its price tag ($120 per quart kit) is a bit hard for most of us to swallow, Nautithane earned across-the-board Good ratings after two years.

Practical Sailor often supplements panel testing with product challenges aboard our test boats to see whether top products still earn their keep in the real world and to try out new products. Two such evaluations are our exterior wood finish tests.
In the January 2011 issue, we introduced a head-to-head matchup of varnish alternatives—market-newcomer PolyWhey from Vermont Natural Coatings versus perennial favorite Interlux’s Sikkens Cetol Natural Teak—that had been applied to our Cape Dory 25 test boat. For that test, we’ve just let nature run its course: no band-aid touchups, no maintenance coats, no freshwater rinses, no TLC at all.
Comparatively, we’ve been testing Cetol Natural aboard our Chesapeake Bay-based Union 36 test boat, where it was laid on with the Cetol gloss overcoat in 2008; in this evaluation, testers have applied annual maintenance coats and given the coating regular TLC. Here’s the latest on both of these tests:
PolyWhey vs. Cetol Death Match

In the fall of 2010, testers applied three coats of Caspian Clear PolyWhey to the coamings and companionway trim on the Cape Dory, which is sailed several times a week and lives on a mooring in Sarasota Bay, Fla. We also applied Cetol Natural to the boat’s toerail, and previously had applied it to the tiller and forward hatch trim.
PolyWhey is a unique wood finish that uses whey protein, a by-product of the cheesemaking process, as a binder. It’s touted as a more eco-friendly and more sustainable coating than petroleum-based polyurethanes, which can have up to 75 percent more volatile organic compounds (VOCs).
Consistently among the top varnish alternatives in PS’s tests, Cetol Natural is not as muddy-looking as its predecessors, Cetol Marine Light and Cetol Marine—like the Caspian Clear, it allows the wood’s natural grain to show and has a low gloss.
As far as application, both the Cetol and PolyWhey are quick and easy to apply, with much shorter recoat times than hard varnishes and less (or no) sanding between coats. The main difference that we found in these two finishes was with durability.
The PolyWhey turned out to be a much softer coating than the Cetol. It held up for about two months, but after three months, it was in need of a recoat, and at six months, it needed a total takedown—and Cetol had emerged as the death-match victor.
The PolyWhey on the coaming was the first to go: Where crew backs often lean against the wood, the finish was all but gone after four months. The PolyWhey on the companionway slides held on for about that long, but by six months, they were ready for a do-over as well.
The Cetol on the toerail was in need of a few touchups after six months, mostly in areas where fenders and docklines came in contact with it. But the tiller and hatch trim were still fairly well-protected almost a year after application. Although we’d recommend a maintenance coat at this point, testers plan to see how many more months we can eek out of the coating before we reach the point of no return.
Bottom line : We applaud VNC’s efforts to offer a “green” wood finish—and their creative recycling of dairy industry “trash”—but we can’t recommend it over Cetol for an exterior coating in the marine environment.

Cetol with Overcoat
Testers applied three coats of Cetol Natural with Cetol Marine Gloss overcoat to the Union in March 2008. Once a year, we scuff it up with a 3M pad, give it a freshwater rinse, and brush on a maintenance coat.
Compared to a clear, glossy varnish, it looks decent and the maintenance regimen is more realistic for our tastes and available time. However, one downside to softer, varnish alternative coatings—even those with an overcoat—is that they don’t stand up as well as hard finishes to dings and abrasion. Example: The Union’s toerail has one place in need of touching-up where a fender line wore away the finish. (See photo above.)
Bottom line : The Cetol Natural with overcoat has held up very well. While applying the topcoat may mean added effort, both our panel tests and test-boat evaluations have shown that the coating will last much longer and need fewer bandaids if the soft Cetol is protected with the semi-hard topcoat.
Teak oils and other naturally based finishes like PolyWhey, need maintenance coats every few months. Their chemical cousins, however, like Cetol, have proven they can offer good protection with only annual nurturing and the occasional touchup.
- C-Tech Marine (Bristol)
- Deft Finishes
- Le Tonkinois
- Premapro (Coelan)
- Signature Finishes
- Smith’s Five Year Clear
- Vermont Natural Coatings
- West Marine
- Woodplus Marine
RELATED ARTICLES MORE FROM AUTHOR
17 comments.
I’m surprised you didnt include Alwood from Awlgrip
Search Awlwood on the website. We have a couple reports. October 2014 (chandlery), and June 2015 issues. Download the PDFs, because the tables haven’t been loaded online yet. It is broadly comparable to Sikkens Cetol.
opps, Awlwood not alwood
All very interesting……The “bottom line” is just flush the line in fresh water.
Thank you for the great info. I am going order year of Practical Sailor.
What is your opinion of covering a 2 part varnish with a one part?
It is certainly a comprehensive test. I’ve taken the journey of sticking with one of your “good” one part varnishes, Epiphanes Wood Finish gloss 10 coats with Epiphanes final two matte finishes. I’ve been quite impressed with it over the past 8 years on both my Cape Dory Typhoon and my Alberg 30. My conclusion is, read your directions carefully and be patient through all phases of application. Teak requires a caregiver! Great read especially during this pandemic period.
Great review. Your test is useful for me because I want to buy but dont know which product is the best. I must say that I like all of those mentioned above and price is really cheap. It’s always good to hear other input.
You missed out Pettit’s Gold, a water-based varnish. I have used it, and it’s great. For long life? Too soon to tell. Cetol has mostly been a disaster, especially with the Gloss overcoat. Applying Cetol can be tantamount to vandalism.
That’s really nice post. I appreciate your skills. Thanks for sharing.
Did you continue with testing to date, I am after a product that want yellow or bloom because of constant direct sunlight. I am in the North West of Australia where the temp at it’s coolest is 30+ Celsius for a couple of months and peeks over 50 + Celsius for a lot more than the couple of cooler months.
I use Rust-Oleum 207008 Spar Varnish. So much better than those water-based varnishes. This stuff protects almost forever. We used to use this kind of spar varnish in the Navy to protect the woodwork exposed to salty air.
The Interlux Varnish became my favorite varnish on teak fixtures when I tried it out 2 years ago. This is because of the immense difference it makes in the way it lends my pulpit or anything made of teak with a sophisticated, good-as-new finish.
It’s strange that you call out Pettit Z-Spar Captains 2067 as a top performer in the conclusions, but it’s not shown in the chart. Those Pettit products that are included in the chart don’t appear to be top performers. I’m confused.
After less than a year the Bristol finish I used on my boat looks terrible and will have to be removed. The folks at Bristol are absolutely no help at all. Their disclaimer is that they know nothing about boats. I most strongly advise against using this product for marine application. I have photos taken immediately after application, two months after, and eight months after if anyone is interested. By the way, the problem manifested on well prepped old teak and well prepped new teak. Could have just been a bad batch of finish but as I said, the folks at Bristol were no help. I ADVISE AGAINST USING BRISTOL FOR MARINE APPLICATIONS
I’m certain that the analysis of marine varnish was expensive and time consuming but one area that could benefit many subscribers if it was conducted continuously. Practical Sailor is the only place that I can rely on for accurate, up-to-date information on the products I need and use.
This is an important maintenance topic to me. Maintaining brightwork is a lot of labor. This article was last updated in June 2020. I would appreciate an update. I have been using Epifanes clear high gloss varnish for the last five seasons. It gives a good finish but it needs to be touched up one a year even though my boat is under cover for six months of the year. I sail on Lake Erie.
LEAVE A REPLY Cancel reply
Log in to leave a comment
Latest Videos

Beneteau 46.1: What You Should Know | Boat Tour

How to Clean Your Sails

C&C 40: What You Should Know | Boat Review

A Simple Solution for Boat Toilet Stink
- Privacy Policy
- Do Not Sell My Personal Information
- Online Account Activation
- Privacy Manager
Most searched terms
Change language, asia pacific, middle east, india & africa, yacht varnish.

Yacht Varnish is a high gloss, clear alkyd varnish, with exceptional hardness and very good penetration properties. Gives a professional, clear finish. To be used on all wooden surfaces above the waterline.
Key features
- Contains UV filters for long lasting wood protection
- Proven long lasting performance
- Very good levelling and gloss retention
Technical details
- Product Categories Yachting Topcoats - yachting
- Technology Alkyd
- Substrate Coated surfaces Wood
Technical Data Sheets
Safety data sheets, application guides, related products.

An ultra-lightweight, two-component epoxy fairing filler for high film thickness application.
- Excellent flexibility
- Ultra lightweight
- Easy to sand

MegaFiller Deck
MegaFiller Deck is an ultra-lightweight epoxy filler with exceptional adhesion and high flexibility.
- Excellent sanding properties
- Easy to apply with relatively high thickness

Imperial is specially designed to ensure long lasting and premium hull protection for yachts.
- Premium silyl binder technology
- Service periods up to 36 months

VinylSealer
Vinyl modified sealer, aluminium pigmented for increased water resistance.
- Sealer for old antifoulings
- Fast drying
- Can be recoated with any type of antifouling
Contact us about products
Do you want to know more about products and how we can help you find the best alternatives for your project? Submit your contact details here and we'll get in touch.
I would like to subscribe to newsletters from Jotun. I understand that I can unsubscribe at any time.
By submitting this contact form, I consent to Jotun using the information entered by me to process my request. For more information, see Jotun's privacy policy .
We've received your message and will get back to you soon.
Oops... Something went wrong.
Please try again later or contact us if the problem persists.
Video modal
A video is being shown
Image modal
An image is being displayed
Brochure modal
A brochure is being displayed
Product was saved to My list .
Colour was saved to My list .
Choose your location
- Where to buy
- Inspiration
How to varnish wood
Varnish will protect wood against the elements. And - where the wood is of good quality -enhance the natural beauty of the surface.
Video instructions
Learn how to varnish wood with hempel products by following the steps shown in the video., follow our step by step instructions, on how to apply hempel's varnishes, ensure you wear suitable protective clothing, including mask and protective glasses..

Abrade the surface with sand paper to create good adhesion for the Varnish.
After abrading, rub the surface with a cloth. put on the cloth the same thinner that you will use for the varnish..

The first coat should be thinned 20% with the appropriate thinners for the Varnish, and applied by brush.
Put the chosen varnish on the boat’s surface and apply the necessary number of coats (check all the relevant information you need in the paint manual). for the best results, it is necessary to do light abrading in between coats..

Next How To

Hempel's Teak Cleaner

How to treat aluminium surfaces

How to treat teak
Product name.
IMAGES
VIDEO
COMMENTS
Varnish is a clear transparent hard protective coating or film. It is not to be confused with wood stain. ... Spar varnish (also called marine varnish or yacht varnish) was originally intended for use on ship or boat spars, to protect the timber from the effects of sea and weather. Spars bend under the load of their sails.
Spar varnish (occasionally also called boat varnish or yacht varnish) is a wood-finishing varnish, originally developed for coating the spars of sailing ships, which formed part of the masts and rigging. These had to withstand rough condition, being flexed by the wind loads they supported, attacked by sea and bad weather, and suffering from UV ...
Yacht Varnish is an incredibly durable solvent-based varnish that was originally used to on boats to protect the wood and prevent it from decaying over time. Nowadays, this type of product is more commonly used for exterior household projects, when you are looking to give timber a high-gloss finish that lasts.
Short Answer. Yacht varnish is a protective coating used to seal and protect wood surfaces on boats. To apply yacht varnish, start by sanding the wood surface with a fine-grit sandpaper. Then, apply a thin coat of the varnish with a brush, working in long, even strokes. Allow the varnish to dry for 24 hours before applying a second coat.
A clear yacht varnish does what it says on the tin: it will create a transparent, glossy finish that does not alter the colour of the wood it is applied to. Matt Yacht Varnish. Using a matt coloured yacht varnish will result in a dull, non-shiny finish that does not reflect light. This can be ideal for hiding flaws or imperfections in wood.
Apply the varnish across the grain then lay-off the varnish with long strokes along the grain. Hold the brush at 45 degrees. On large areas, a thin foam roller can be used to apply the varnish across the grain, followed immediately with a wide brush to tip it off. Again, remember to go with the grain.
Thin the first coat 50% by volume—1/2 ounce of thinner to every ounce of varnish. Thin the second coat 25 percent, the third 10 percent. Wipe off surface oil with a rag dipped in thinners. Just before varnishing, wipe teak down with an acetone-saturated rag to remove surface oil.
Polyurethane boat varnish - is much more hard-wearing than oil or water-based yacht varnishes. Stronger than oil-based or water-based yacht varnish, polyurethane yacht varnish tends to dry quickly and offers an ultra-hard surface that is resistant to impact, scratching and denting. This yacht varnish type has a high gloss tough finish so it's ...
When applying varnish to bare wood, make sure you thin the first coat. I thin the first coat by 50 percent. Since this dries in a few hours, you can go back on the same day with a second coat, thinned by 25 percent. Do not sand after these coats. Then, you can build the spots back with varnish and minimal thinner.
A traditional marine spar varnish — albeit a good one — is Interlux's Schooner Varnish. With an alkyd base, 47% of tung oil solids, and UV inhibitors to boot, this product is a well-balanced one-part product that is suitable for a variety of uses. This product can be brushed, rolled, or sprayed. Reasons to buy.
How to prepare wood for varnishing. You will need to remove old stain or varnish by sanding it down. Use 120 grit sandpaper and sand away the old finish. Wipe down the surface with white spirit and a cloth to remove the leftover dust. If your wood is brand new, you will need to sand it to remove loose wood and clean with white spirit.
When it comes to choosing yacht varnish, there seem to be choices a mile long. This makes it tempting to forego the proper know-how and pick up any can of varnish at the local store. But lest you be left with a waste of time and a complete mess, or even a safety and health risk, read on—Newmil Marine has the must-know varnish basics. Types of ...
Thin the second coat by 25%. After two or three coats apply the varnish without any thinner to a minimum of seven coats. The more coats the better the UV protection and longevity. Light sanding or the use of a Scotch Brite between final coats is highly advised. Epifanes Woodfinish Gloss.
A deep gloss finish is achieved by filling the pores of the wood, so the initial coats need to penetrate and seal the wood. The recommended method is to thin the first coat to a 50/50 ratio with thinner. Add thinner to your decanted varnish and stir very gently with a clean stick. Allow the varnish.
1: Don't varnish direct from the tin - decant enough for the job into a clean container and store the tin in a dust-free area. 2: Use a tack cloth to wipe down the item being varnished before varnishing. After use, store a tack cloth in an airtight container. 3: Warm the varnish container in a bowl of warm water to assist the flow.
M any years ago, one of the big varnish manufacturers had a regular advertisement showing a cowering boat owner eyeing a brightwork project with a feigned expression of terror, and saying "Vvvvvvvvarnish?" Such fear is a common sentiment among would-be and occasional varnishers, and for good reason: Varnish provides excellent protection while showing the beauty of the wood, but it takes a ...
How We're Testing the Marine Varnishes. Testers applied dozens of exterior wood finishes (22 one-part varnishes, six two-part varnishes, 18 synthetics and satins/varnish alternatives, and eight teak oils and sealers) to small panels of bare solid teak. Each was assigned a number for blind judging and was applied per manufacturers instructions.
Yacht Varnish is a high gloss, clear alkyd varnish, with exceptional hardness and very good penetration properties. Gives a professional, clear finish. To be used on all wooden surfaces above the waterline. Key features. Contains UV filters for long lasting wood protection;
How to varnish wood. Varnish will protect wood against the elements. And - where the wood is of good quality -enhance the natural beauty of the surface. ... Put the chosen Varnish on the boat's surface and apply the necessary number of coats (check all the relevant information you need in the Paint Manual). For the best results, it is ...
Cetol is much easier to maintain than varnish; a light rub-down at the beginning of the season and a refresher coat of the Marine Gloss should do the trick. If you've let things go for a couple of seasons, sand back gently, paying attention to any grey spots, apply a coat of Teak and then a coat of Gloss, and you should be ready to go.
Yacht varnish is used on any wooden part on the exterior of boats, and prevents the wood from getting damaged, as well as extending the life of the wood with its protective qualities. This type of varnish is marine quality, making it waterproof and durable against poor weather. Boat varnish protects wood against fading, cracking and peeling and ...
Water-resistant. For exterior wood. Recyclable tin after use. Give your furniture a long-lasting finish with our Gloss Yacht Varnish Exterior Clear 750ml. Ideal for exterior wood - this all all-weather varnish dries in 16-24 hours. It is water-resistant and flexes with the movement of the wood, helping to prevent cracking, peeling and blistering.