RC Sailboats
An overview of radio controlled sail boats and a brief explanation of scale model sailboats, semi scale rc sport, and rc racing sailing yachts. kits, rtr and scratch built..
RC sailboats can be divided up in three main categories:
- RC Sport Sail
- RC Sailing Yachts (for racing)
- RC Scale Sail

RC sport sail
Most kits and RTR (ready-to-run) model RC sail boats are best categorized as RC sport scale. This category is a happy medium between full-blown scale models and RC racing yachts.
Some have become so widely distributed that new racing classes has been formed around them. Good examples are Graupner's Micro Magic and Kyosho's Fairwind.
They are usually semi-scale of modern cruising yachts or made to resemble America’s cup sailboats.
The lower cost models come with ABS hulls, whereas the higher end models come with more durable fiberglass hulls. Drop keels, aluminum masts and Dacron sails are most common.
RC racing yachts
If you want to get into RC yacht racing there are a number of classes to choose from. Each country has a governing body ( American Model Yachting Association (AMYA) in the USA, Model Yachting Association in the UK) under the International Model Yacht Racing Union.
As with full size regattas, RC model yacht racing face some of the same issues. Entry rules for competitions typically follow depending on if the class is Open or Closed Design.
Open or Construction Class
What these classes have in common is that the boats are not identical - instead the rules are made up like a mathematical formula. The good thing that brings is that the challenge is three-fold – design, construction and sailing the course.
The disadvantage is in that the rules for some classes can be complicated. Some classes have gained in popularity precisely because the rules fro previously established classes were so hard to understand.
Examples of some popular open design model yacht classes:
- 6 Metre - M6R
- 10 rater – R10r
- 36" (36-inch)
Closed Design or One-design Class
All entries have to be the same design. Some are kits from a single manufacturer others are open to home built model boats.
- Soling 1 Meter
- Micro Magic - Graupner
- Fairwind - Kyosho
RC scale sail
We're talking about scale model sail boats that actually use its sails as the main means of propulsion. RC scale sail is called minisail in continental Europe. The vast majority of sailing scale model boats is scratch built. There are a few kits - Billings Collin Archer RS-1 comes to mind.
The prevailing problem with scaling a sailboat is that stability doesn’t scale linearly with size. The result is that model boats will always be significantly less stable than the boat or ship it was modeled after. Left as is, it may have detrimental effects on the model’s sea keeping abilities. There are ways to minimize the effect.
A smallish boat built to a large scale is more stable than a large ship to a small scale. For instance, say you can only transport a model 1m long. Building a model of an 8m cruising yacht at 1:8 scale will be more stable than a model of the USS Constitution at 1:48 scale. This is true even if they end up weighing the same and being the same length. I bet the yacht will be a much better sailer too.
Bigger is always better too, when it comes to scale RC sailboats. Try and build the biggest model you can get away with. A larger model will be more forgiving on construction techniques, materials and the weight of components. The finished model will also be faster, a better sailer and handle stronger winds than if it was built smaller.
Making considerable effort to build light is always a god habit. The higher up a part or component is located, the more important this becomes. For instance, rigging components need to be light weight.
Other factors are beam and draft (width and depth for landlubbers). A wider and deeper hull will naturally be more stable than thin and shallow.
There are two tricks to increase the stability of model boats artificially:
Add a drop keel
By adding a drop keel you can bring the center of gravity down while adding profile area. The greater under-water profile helps against drifting sideways. All sailboats drift downwind some, because the surface water moves with the wind. The lower boundary-layers of a body of water are influenced less by the wind than layers closer to the surface. Therefore, the deeper any extension of the hull is, the less drift.
Typically a boat with a drop-keel also needs a larger rudder. A good guideline is to make the rudder area 10-12% of the total submerged hull profile.
Extent the hull below the waterline
Some builders rather build the boat hull slightly out of scale than add a drop keel. The most bang-for-the-buck is to deepen the hull. Same rule apply about the rudder (rudder area = 10-12% of total submerged profile). You could technically make the hull wider, but the effect is not as great.
Any change in the submerged hull profile need to maintain the same geometric center to balance the center of effort on the sails. Naturally, if you know what you are doing, the sail and rig can be modified also.
A Final Word on Scale RC Sailboats
Generally stay away from lateen rigs, multi-hull, centerboard designs and square riggers, at least until you have become an experienced RC sailboats captain and/or builder.
Return from RC Sailboats to Radio Controlled Boats
Return to Homepage
Would you prefer to share this page with others by linking to it?
- Click on the HTML link code below.
- Copy and paste it, adding a note of your own, into your blog, a Web page, forums, a blog comment, your Facebook account, or anywhere that someone would find this page valuable.
- Plans Store
- Model Boat Books
- Model Boats Intro
- Building Materials
- Make a Hull
- Plastic Kits
Radio Control
- US Battleships
- Torpedo Boats
- Model Boats Q&A
- Model Ship Gallery
- What's New?
- Privacy Policy

By Petter Blix
Copyright 2009-2018 Building-Model-Boats.com
Trademarks belong to their respective owners
All Rights Reserved

How to Sail an RC Sailboat – Step by Step Instructions – 5 Minute Read

Affiliate Disclaimer
As an affiliate, we may earn a commission from qualifying purchases. We get commissions for purchases made through links on this website from Amazon, the Ebay Partner Network (EPN) and other third parties.
Sailing an RC sailboat is fun, but it takes some practice before you get good at it. I certainly needed it when I started! If you want to take your interest in RC model boats to another level, then you should consider learning how to sail an RC sailboat.
However, learning how to sail RC sailboats requires patience and perseverance. There are several things that you need to master before you can begin sailing. This article will teach you how to sail a radio-controlled sailboat.
Read on below to discover tips that will avoid failure in learning how to sail model sailboats, that apply to all size boats.
Step by step Instructions
How does a yacht sail, how are the sails and rudder of an rc sailboat moved, moving forward in a straight line, sailing into the wind, sailing away from the wind, final thoughts.
First, here’s a summary step by step approach to learning how to sail an RC sailboat:
- Consider joining a local club ( USA UK ) where you’ll find lots of helpful RC sailors and RC sailing events that will help you learn. You may even be tempted to get into RC sailboat racing.
- In any event, choose a day with a gentle, consistent, light wind, preferably with the wind direction towards you, just in case you lose control of your boat.
- Find a medium-sized lake or pond, and avoid rivers or the sea, where there may be strong undercurrents. A local club will have a safe sailing area. Look out for areas that may have weeds or reeds, or shallows that could strand your boat. Remember to factor in the depth of the keel, which, on most model sailing boats, is significant.
- Check you are able to sail in your chosen area – ie no prohibitions – and keep clear of swimmers, people fishing, full sized boat traffic, and wildlife.
- Avoid days when it’s busy in your sailing area with other modelers until your sailing skills are such that you can feel confident.
- Set up your RC sailboat on its stand, and check the rigging is as it should be according to the boat’s instructions. Ensure you have brought the boat battery pack charger, the batteries are charged, and you have spare AA batteries for transmitter. Turn on the transmitter, and test that the rudder control and sail servos are all working properly.
- Ensure you understand the basics of sailing, set out below, before launching your RC sailboat. Keep a keen eye on how your boat reacts to the wind, and be ready to react in turn by altering the sail angle to maintain the boat speed as far as possible.
The first thing you’ll need to know is how does a yacht sail? An rc sailboat sails just like a full size yacht. The wind energy pushes against the sails and flows over them, creating a difference in wind pressure on each side of the sail, which is translated to forward movement by the keel of the boat. Without the keel, the boat would be pushed in the direction of the wind.
To keep the yacht moving forward, the sail angle to the wind is adjusted depending on the position of the boat. Paradoxically, a sailing boat can sail into the wind, as well as with the wind. The only direction that can’t be sailed is with the wind directly in front.
The direction of the boat is adjusted by the rudder, which is at the back of the boat.
The following diagram shows the sail angles at different points of the wind:
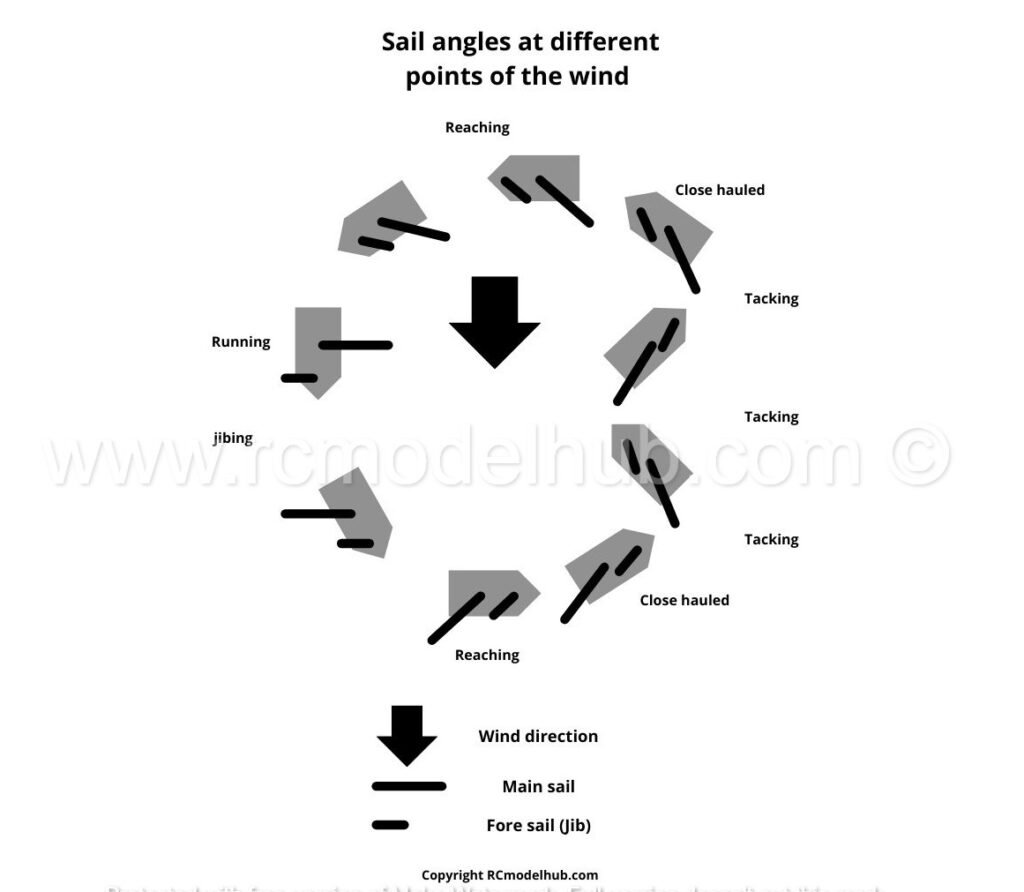
As a beginner RC sailing boat helmsman, many of these terms will be confusing to you, but they will soon become familiar.
The controls of an RC boat are explained in more detail in t his article , but basically, the hull (body) of the boat contains batteries that power servos which in turn move the rudder, the main sail, and the fore sail (the “jib”). The servos are controlled by a receiver, that takes commands from the RC transmitter which you hold in your hand. Here’s a short video that explains the transmitter controls:
How to sail an RC sailing boat
First, the basic skills. With the boat in the water, start with the wind half way between the front (bow) of the boat, and the side (beam). Keeping the rudder straight, trim (move) the sails so that they are close to the hull (close hauled) and the boat should move forward. If the wind is gusty, or very strong, move your transmitter control to let out the sails, spilling the wind, to keep the boat from keeling over.
If you’re sailing into the general wind direction, you’ll need to learn to “tack”, which involves turning the boat from a position where the wind is coming on one side of the bow, through the head-on wind, to end with the wind on its other side. This is achieved by moving the rudder to turn the yacht, whilst changing the angle of the sails to the wind – see the diagram above.
So the boat moves forward via a zig zag course.
As the boat turns into the wind, it slows, so this maneuver should be completed as quickly as possible, otherwise, the boat could get stuck with the sails flapping – this is called being “in irons”.
If the direction you wish to sail in means the wind is behind the boat, it is called running before the wind. In this case, turning the boat involves “jibing”, which is the opposite of tacking.
To change direction whilst running with the wind, move the rudder so the wind goes around the back (stern) of the boat and haul the sails in. As the boat comes round, the wind will move from one side of the sails to the other.
If this is not done smoothly, it could cause the sails to violently move in the opposite direction, possibly causing damage and maybe even capsizing the boat.
So those are the basics of learning how to sail an RC sailboat. As I’ve said above, the best way to refine your skills is to get out on the water and practice.
if you have any interest in remote control sailing but aren’t sure where to begin, use the step-by-step guide above to learn how to sail an RC sailboat. Once you’ve mastered the basics, you can move on to the exciting world of racing sailboats.
If you’re still considering your first RC beginner sailboat, take a look at our article on beginner RC sailboats , or for the more adventurous, consider building your own RC sailboat from a kit. More about that here .
Image credit Nick Kinkaid
About the author
It all started with a line controlled spitfire 50 years ago….
That turned into a life long interest in models, in particular radio controlled models, but I’ve only got back into it since I’ve been retired. As a result a lot has changed, and I’ve been happily starting afresh, researching into the hobby and finding answers to the questions all beginners have when starting out.
I hope you find some answers to the queries you have, and go on to enjoy all aspects of this fascinating hobby.
Latest posts
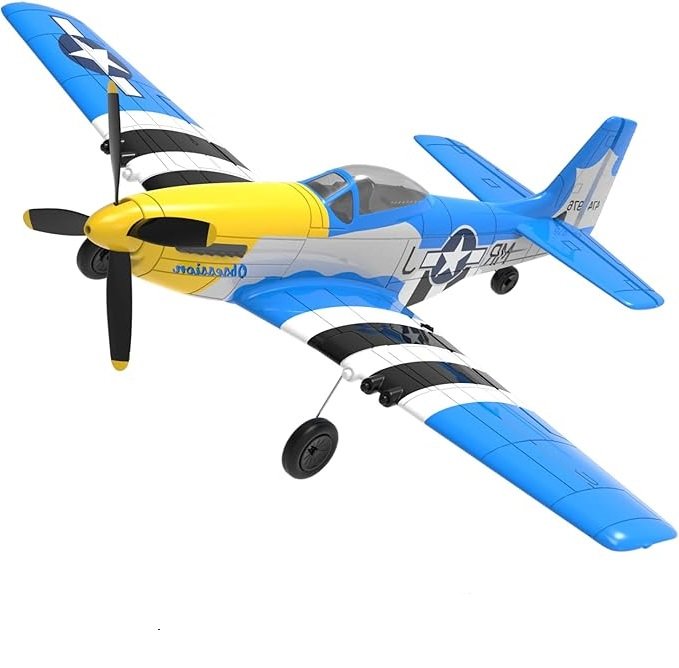
VOLANTEXRC P51 Mustang RC Plane Review: A Beginner’s Dream?
I was thrilled when I discovered the VOLANTEXRC RC Plane. This 4-channel WWII RC Airplane, specifically the P51 Mustang model, is truly a beginner’s dream come true. With its ultra-stable Xpilot gyro stabilizer system and 3-level flight control system, it’s incredibly easy to fly, whether you’re a novice or an experienced flyer. The impressive 2.4…
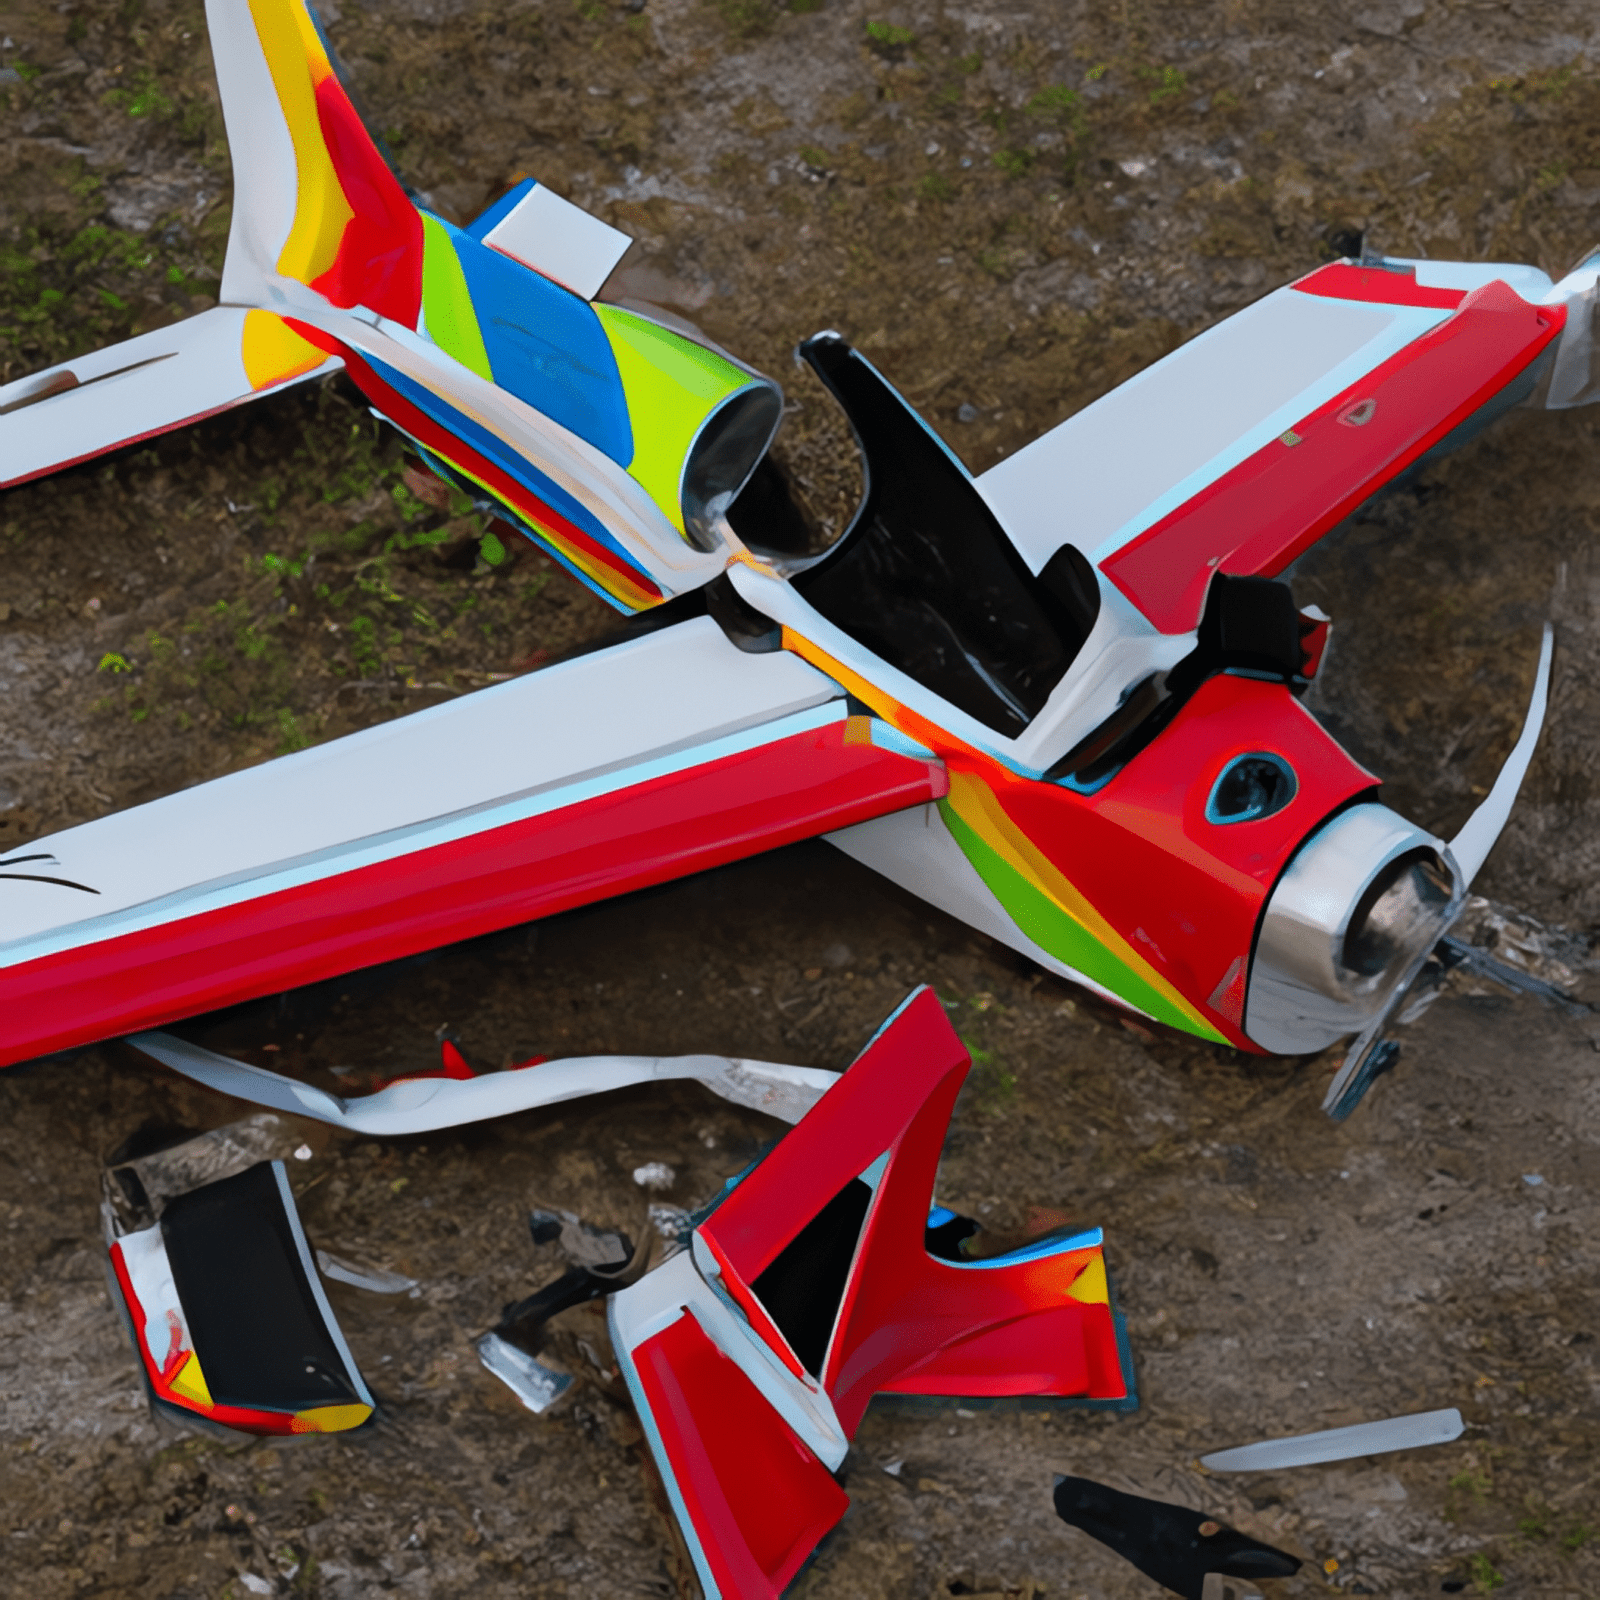
RTF RC planes with SAFE technology: No More Crashes?
RTF RC planes with SAFE technology have revolutionized the world of remote control aviation, offering a new level of ease, control, and safety for both beginners and experienced hobbyists. What a change from my early days of flying RC planes, when you fully expected to come home with your plane in bits! These innovative aircraft…
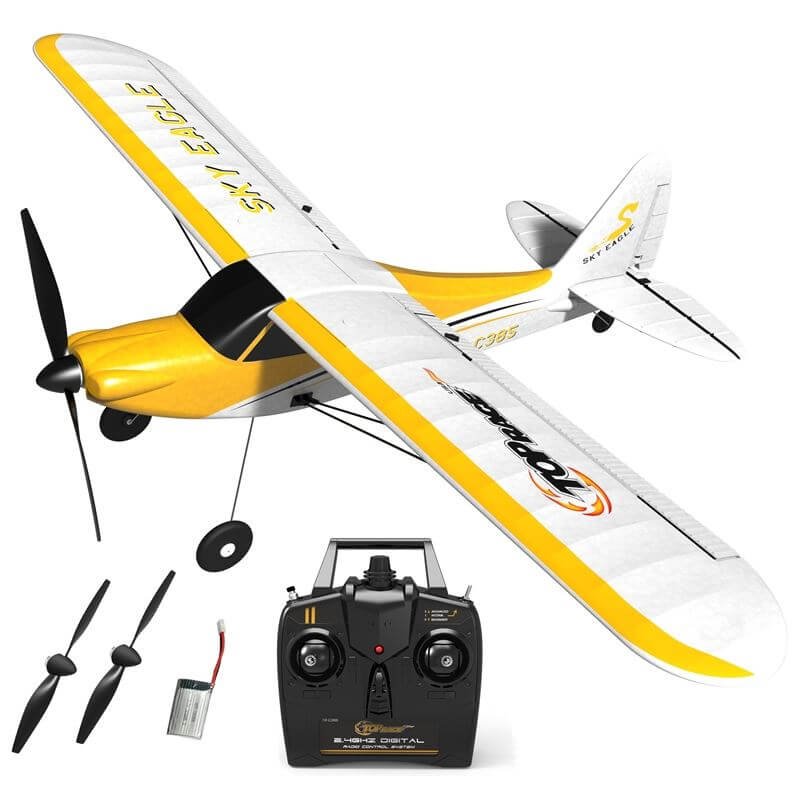
Top Race RC Plane TR-C385 Review: Stunt Flying Delight
I recently had the chance to test out the Top Race 4 Channel RC Plane TR-C385. It surpassed all my expectations. Designed for adults and older kids, this ready-to-fly airplane offers an exhilarating stunt flying experience. With precise control and maneuverability, thanks to its 4-channel system, this RC plane is a great starter or intermediate…
A Guide on How to Make Your Own RC Boat
This down-to-earth guide is for anyone who wants to know how to make a RC boat . It explains what parts, tools, and steps you need to follow to create your model. It’s much easier than most people think it is with an orderly approach. The first step is to decide what type of boat you want to build. The following sections break down the different boat types for consideration.
Before You Build Your RC Boat
There are several considerations before you choose an RC boat. First, you need to decide what type of vessel you want to construct. Next, is the type of hull, and then the power system. Let’s walk through each of these so that you can make well-informed decisions.
The three types of RC boats are:
- Scale boats
- Racing boats
Try to avoid anything that’s too difficult if you’re new. There’s plenty of time for complex models later.
#1 Scale RC Boats
An RC scale boat replicates a real-world vessel as much as possible—only smaller. There is no fixed scale. The finished model can be palm-sized or so big you need a trailer to transport it. It’s the close attention to details that gives these mockups their wow factor. RC modelers can build scale boats from kits or scratch, hence the term scratch building. More on that later.
#2 RC Racing Boats
RC racing vessels can be sailboats or speedboats (powerboats). These models are fast and agile on the water and used for fun or serious competitions. Your boat choice depends on purpose and expectations. Racing boats fall into categories based on their power systems and type of hull. Some racers are only for smooth surfaces whereas others can ride the waves on choppier waters.
#3 RC Sailboats
Fans of radio-controlled sailboats make them for racing or leisure. It’s the latter that appeals most to those at the entry-level. The designs can be simple, which makes them great projects for novice builders. These wind-powered vessels typically have one or two sails controlled by winch servos. A second servo controls the steering and drop-keels (retractable fins) for extra stability.
OK, so that’s the three popular types of RC boats to build. There are many sub-categories to each, but at least you have a starting point. Again, keep designs simple if it’s your first project.
Types of RC Boat Hull
Now let’s look at the four hull types. It’s important to know about hulls and how they work. The idea is to choose one based on your experience level and the kind of water you intend to drive or sail on.
The 4 RC boat hull types include the following:
- Hydroplanes or hydro
- Monoplanes, also mono or V hulls
- Catamarans or cat
- Tunnel hulls
#1 Hydroplane Hull
The hydroplane hull is made for speed, typically on flat water, and thus suited for racing RC boats. They’re fast, agile, and able to make tight turns. This type of hull is best suited for advanced users. Below is an example of a ready to run (RTR) preassembled hydroplane to illustrate.
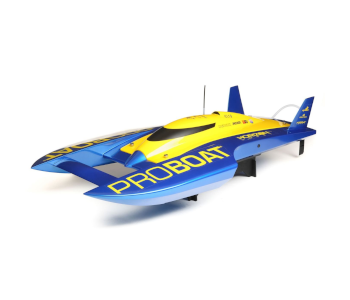
Pro Boat UL-19 RTR Brushless Powered Hydroplane
#2 Monoplane Hull
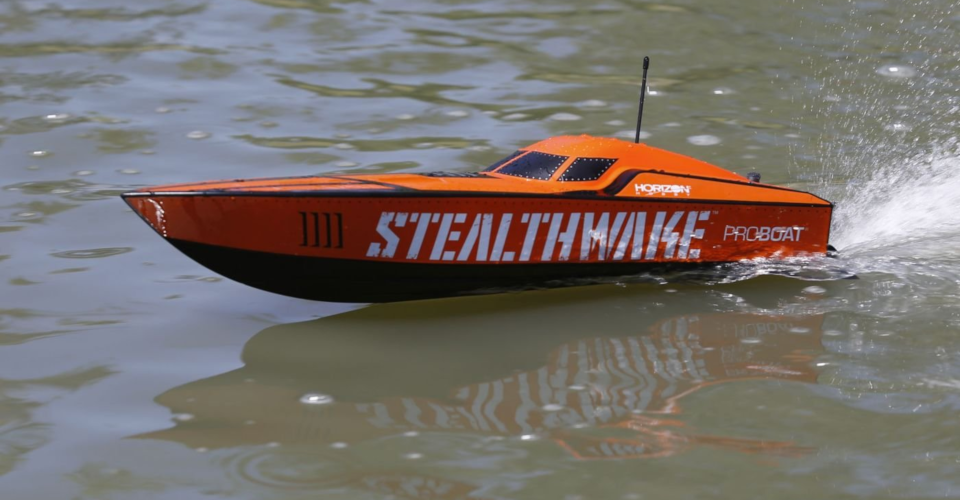
Monoplanes are the right choice for driving boats on choppy water and over waves. They’re fast too, though not as fast as hydroplanes. These are V-shaped hulls that can be either deep or shallow. The stability of a deep-V design makes them a much better choice for newbie racers. Below is an example of a ready to run (RTR) preassembled deep-V monoplane to illustrate.
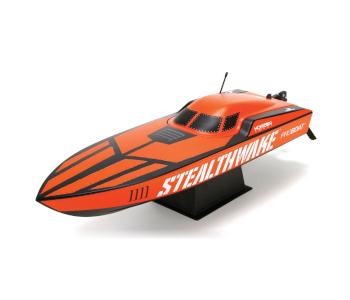
Pro Boat Stealthwake RTR Brushed Powered Deep-V
#3 Catamaran Hull
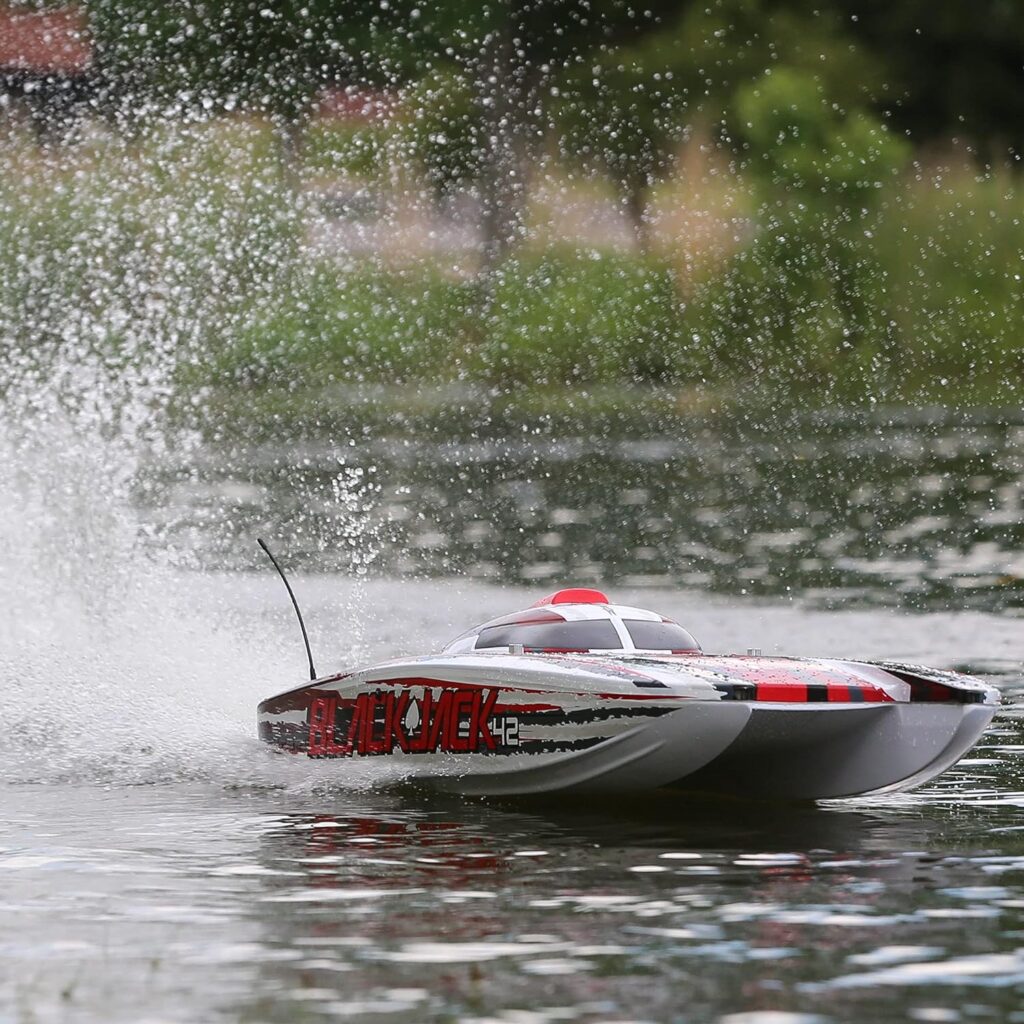
Real-world catamaran or cat hull designs are typically for off-shore race boats. They have two outer projections called sponsons and a tunnel through the center. These hulls are faster and handle better than other types. Cats are an ideal choice for rough water because of the extra stability. The downside for that added stability is an increase in drag.
Below is an example of a ready to run (RTR) preassembled catamaran to illustrate.
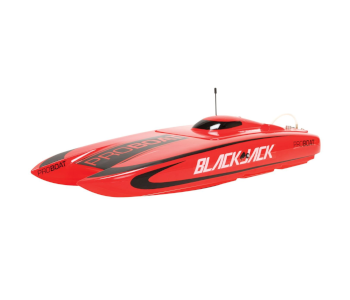
Pro Boat Blackjack RTR Brushless Powered Catamaran
#4 Tunnel hulls
Tunnel hulls are the slowest of the four but still nippy. They do handle well and are the perfect choice for driving on shallower water. These types of boats have two planing hulls that allow the craft to rise upward and glide or skim over the surface. The tunnel hull design has a solid center that traps air. Below is an example of a ready to run (RTR) preassembled F1 Tunnel hull powerboat to illustrate.
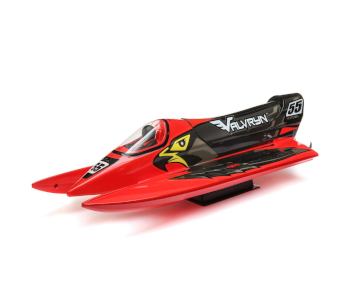
Pro Boat Valvryn RTR F1 Self-Righting Tunnel Hull Powerboat
RC Boat Power Source Options
Next, we need to look at ways to power your new RC boat. There are three options here, namely:
- Electric power (battery)
- Nitro power
#1 Electric Powered RC Boats
Battery power is the most common fuel source. It’s also the cleanest and needs little maintenance. Electric-powered R/C boat motors are much faster than they used to be. They also enjoy better run times and quicker charging than earlier models. Battery power is quieter than gas too, and that allows more choices on where you can play. It’s wise for newbie RC boat builders to opt for electric.
#2 Nitro Powered RC Boats
Nitro powered RC boats are driven by something called a glow engine and a special fuel mixture. The fuel uses a blend of nitro-methane, methanol, and oil, usually the castor variety. The mix ratio varies depending on the engine. Nitro boats are quite fast and well-protected from water thanks to a hydrostatic lock. These engines produce realist sounds and smoke.
Nitro-fueled engines are an excellent choice if you love to tinker, but terrible if you don’t. They need lots of tuning and regular maintenance. The engines are also very loud compared to electric.
#3 Gas Powered RC Boats
Gas-powered RC boats are big and powerful, but they’re also incredibly noisy. Using gas for a model rewards it with long running times on a full tank of fuel. However, it can be a messy business, and the engines do need regular maintenance. They’re easy to operate once set up, though, and they require less tuning that nitro. Powerful gas engines are also useful for driving on rough water.
The rest of this guide looks at the logical steps on how to make an RC boat.
RC Boat Kits Vs. Scratch Building
RC boat kits are an excellent choice for the raw novice as they’re the jigsaws of the modeling world. Everything you need to build the boat structure is in the box. A decent kit should come with detailed instructions. It shows you how to construct the model using steps and illustrations. Look for user reviews if you’re not sure. Some kits have vague instructions or suffer from poor translations.
Look for helpful online video tutorials instead if the instructions are bad. YouTube is the best place, but there may be others. Kits are not so easy to find for RC boats, and the choices are few compared to scratch building plans. Another option is to learn to build by the kit-bashing route (see next)
The Kit (Model) Bashing Route
Kit-bashing is an excellent progression toward scratch building. It works by creating an RC boat using the parts and components from commercial kits. The idea is to create a unique RC model boat from these pieces or use them to customize an existing project. The bashing approach is hands on. It teaches you all about scale modeling in a fun and enjoyable way.
Consider kit-bashing if you’re an RC fan who happens to have a bunch of spare parts sitting in boxes. RC enthusiasts are usually reluctant to throw stuff out with old or broken models. Ask others if they can donate some parts if you’re a total newbie.
Below are a few books to consider on RC model boat building, upgrades, and maintenance.
Building and Racing Radio Control Sailboats
EDITOR’S RATING: 4.8/5
This book makes an enjoyable read for anyone into radio control sailing. It uses a step-by-step format to show the reader how to get started. There are chapters on selecting a model sailboat; building from kits, and scratch building. It also shows how to install radio systems, sails, and winches, etc. It’s not a cheap book, but it will last you a lifetime once you have it.
Electric RC Boat Upgrade & Maintenance
EDITOR’S RATING: 4.7/5
A boat builder’s job is never finished. Enthusiasts love to tweak and tinker their models, and that means upgrades and maintenance. This book is for beginner to intermediate level RC’ers.
Model YACHT Construction and Sailing – Made Cheap and Easy!
EDITOR’S RATING: 4.4/5
This is a fun book aimed at folks who are not yet sure whether they want to build an RC boat or not. It gives step-by-step illustrated instructions on how to make a micro-sized RC sailing yacht. The entire process uses household tools and shouldn’t cost much more than ten dollars.
The Beauty of Scratch Building
RC boat kits have their place, but most beginners use them as stepping stones to scratch building. After all, a kit is not unique to you, but a custom model built from scratch most definitely is.
Scratch building is the way forward if you have the time and patience. There are many boat plans and blueprints around for free download or a nominal fee. Building an RC boat from scratch gives you total freedom to be as creative as you want. That means you can produce a model that no one else has. It can save you money too, but it can also take a long time depending on the model and modeler.
Where to Find RC Boat Plans
Below are examples of the type of RC boat plans and building formats available. Join an RC forum and ask for help if you can’t find the plans you want via the search engines.
RC Groups Forums
RC model building is a social pastime where people swap ideas, give advice, and share tips. The RCGroups forum is an excellent place for all the above. You can browse for free, but you need to join to search. There are many threads (discussions) on this site for RC boat plans and RC building.
Plans to Make an Easy & Fast RC Boat!
This site has downloadable RC speedboat plans. It also has 19 online stepped instructions on how to build the boat. Everything is on one scrollable page with large photos to support the text. There’s a discussion going on at the end of the page with some useful feedback from visitors.
RC Cabin Cruiser Plans
These plans are ideal for entry-level scratch builders. The boat is mostly balsa wood, and the tools needed to construct the model are basic. The cost at the time of writing was around $8.
Electric Ski Cruiser
These plans are for Build a radio control electric racing boat. They include notes and full-sized printed plans. It’s a personal project, but you’re free to modify the plans and tweak the model as you wish.
The Right Tools for the Job
Make sure you have the right precision tools to build your RC boat. Proper tools make the work so much easier and more enjoyable. The wrong tools make the job frustrating, and you risk damaging the model or yourself. There are plenty of decent kits at reasonable prices. Look at what you already have, and then make a list of what you need extra.
The examples below show basic, intermediate, and pro-level options, though there are many others. Try not to skimp here as high-quality tools will last a lifetime.
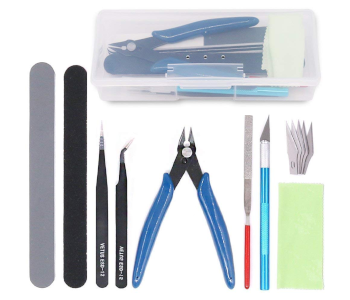
Rustark 9 Piece Gundam Model Toolset | Basic Kit
EDITOR’S RATING: 4.5/5
The Rustark 9 piece Gundam model toolset is a basic kit that costs only a few dollars. It’s a lightweight kit that comes with a plastic storage box. The tools include:
- 1 x side pliers
- 1 x manual model tools file
- 1 x penknife
- 5 x spare blades
- 1 polishing cloth
- 2 x double-sided polished bar
- 2 x tweezers
Remember, this is only a starter pack that doesn’t cost much money. You may want to invest in the higher-quality, more comprehensive toolkit if you decide to embrace RC boat building.
Hobbypark 11-in-1 Pro RC Box Set Tools | Intermediate Kit
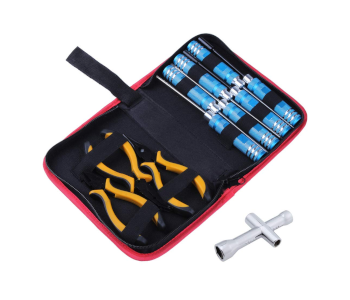
The Hobbypark 11-in-1 Pro Box Set contains some essential tools for RC model builders. The high-performance metal used is durable and long-lasting. This set includes the following items:
- 1 x hex screwdriver 1.5mm
- 1 x hex screwdriver 2.0mm
- 1 x hex screwdriver 2.5mm
- 1 x box spanner 4.0mm
- 1 x box spanner 5.5mm
- 1 x Philips screwdriver 0#+
- 1 x slot screwdriver 1#-
- 1 x pliers (needle-nose)
- 1 x pliers (diagonal)
- 1 x Pliers (ball link)
- 1 x Hexagon Sleeve Wrench (4/5/5.5/7mm)
This kit is ideal for building, maintenance, and repair. It doesn’t include saws or drill bits, though.
X-ACTO Hobbytool Set Deluxe 30 Piece Set | Pro Kit
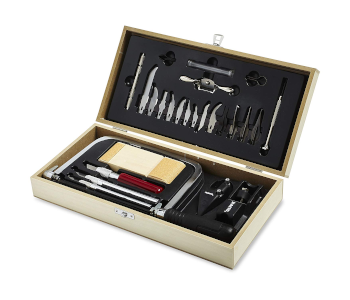
The X-ACTO Hobbytool is a 30 piece, high-quality modelers toolkit. It has precision tools to saw, whittle, cut, and carve a variety of materials. The set includes the following items:
- 3 x X-ACTO knives: #1/2/5
- 11 x X-ACTO blades: #2, 7/11/13/16/17/19/22/24/26/28
- 1 x jeweler’s screwdriver
- 1 x block plane
- 1 x block sander
- 1 x spokeshave
- 1 x balsa stripper
- 2 x routers
- 1 x pin vise
- 3 x drill bits
- 1 x coping saw (includes blade)
- 1 x wood storage box
These are three examples of the toolkits available, but there are many others. It can be hard for the first-time builder to know what they need for their radio control model. Proper preparation makes everything so much easier, so ask in RC forums if you need some guidance.
Other Tools to Consider
There are a few other tools to consider. A building board to lay your plans on, to work, and organize parts as you build is essential. This board is not your workbench—it goes on top of it. The board can be whatever size and material works best for you, and you can make your own or buy a purpose product. Again, seek help from fellow modelers if you’re unsure.
You may need electrical devices depending on the type of boat you build. There are various other things too. Here’s a breakdown of some potential tools and items to consider.
Most homes will at least have some of the tools needed for RC model boat building. Find out what you need extra and get everything prepared before you start to build.
How to Build Your Firsts RC Boat
I use a basic RC vessel here to illustrate the building basics. It’s a broad approach and doesn’t refer to any particular model. The principles are similar for most boat building. Despite that, size, complexity, and skill level will differ between projects. The model below is a simplistic electric-powered vessel. I base this example on sourced parts, so there are no tutorials on how to make individual pieces.
The parts of your RC boat from rear (R) middle (M) to front (F) are:
- Servo horn (R) servo rod (R–M) servo (M)
- Battery (R)
- Receiver (F)
OK, now let’s look at how it all goes together.
Choose the Hull
The hull of your boat is what everything else works around. You may want to make one or buy a ready-made product that fits your design. Either way, choose a hull right at the start of the project. Refer to the ‘types of hull’ section if you need a recap.
The Electronics
The hull and electronics are the most expensive items on an RC boat builders list. Despite that, they don’t have to cost the earth, especially if you start with a toy-grade project. The electronics include:
- Rechargeable battery
- Battery charger
- Radio system (transmitter/receiver)
Attach the motor
The motor goes at the bottom rear of the model boat, usually under where the battery sits. Fix it in place using purpose modeling glue and then attach the prop.
Waterproof the boat’s openings
It’s time to waterproof the boat’s opening (hatch). It’s a vital step as water always finds a way in if there is one. There are different approaches to this, and no two boats are the same. However, the favorite way is to build a wall around the opening. It’s what we call ‘coaming’ in the RC world, and it’s a raised edge that surrounds the open hatch.
Balsa strips work well for coaming—which must be slightly proud of the boat’s deck. You can then build a simple removable hatch to seal the opening. Model boat builders use all kinds of creative ways to seal the openings. Seek help on one of the forums if you need guidance.
Attach the steering servo
Servos come in many different shapes, weights, and sizes, but they all work the same basic way. A servo’s arm should correspond precisely with the transmitter’s stick or slider movements. The servo is necessary for steering your RC vessel, and it goes in the hull towards the front of the boat.
There are various ways to install the servo into the hull. The three most common are:
- Double-sided tape
- Glue directly to the bottom of the hull
- Glue wood blocks inside the hull and screw the servo to the blocks
The first two options are okay if you build a cheap, toy-grade product as a first experiment. Option 3 is a better approach for costlier, high-powered boats. You can also make a purpose servo mount with brackets and screws for added security. This way you can access and remove the servo easily should you need to replace or maintain it.
Attach the boat’s rudder
You can make the boat’s rudder or buy one. You must take it apart to install it if you purchased a rudder assembly. Make a note of the parts and how they go together as you strip it down.
The rudder goes at the back of the boat, fastened outside its hull. You need to drill a hole for the rudder tube on the model’s center line just behind the prop. The trick here is to use a drill bit that’s only slightly larger than the pipe. This is where your precision tools come in handy. Here are the remaining steps assuming the above went as planned.
- Place the servo horn on the top of the rudder tube
- Use a screw to secure the servo horn
- Attach the servo rod with Z-bends at both ends
That’s it. Your rudder assembly should now be in place and ready to go.
Attach the battery pack
You model RC boat is now ready for its battery pack, and there are two main options here. One is to glue the rechargeable battery to the bottom of the boat’s hull. The downside to gluing is that the battery becomes fixed. That means you must wait for it to charge before you can use the boat again.
Velcro is a better method if you want to be able to swap batteries over. Glue one piece of quality Velcro to the bottom of the hull and the other to the battery. Space might be tight, so make sure the servo rod doesn’t make contact. Now connect the battery cable to the power plug.
Attach the receiver
Now it’s time to glue the receiver into place. It goes at the front (the bow) of the boat.
Seal the boat
You can waterproof your RC boat using various sealants depending on the material used. Some modelers like to waterproof the inside and outside to be extra safe. For wood hulls, Z-Poxy Finishing Resin Adhesive is a popular choice. ABS hulls do better with a clear waterproof silicone like DAP . Ask on forums if you’re unsure, and let others know some details about your boat and its materials.
Good luck with your next project.
Leave a Reply Cancel reply
Your email address will not be published. Required fields are marked *
Sign me up for the newsletter!
How to make a rc sailboat
Make a rc sailboat.
After two weeks at the Wooden Boat school I had finished the ruff-in of the hull, mast, electronics and sub deck ready to start the final assembly.
Here you see the 1/16 inch plywood sub-deck has been removed. I have added ribs to help support the shape of the sides.
Here you see, that all the ribs are in place, I have added epoxy to unify and strengthen the hull.
Fair the hull but don't spend a lot of time on it right now.
Establish the center lines this is when I shape the keel and ballast.
Take pictures and use the black & white mode to help see any fluctuations in the keel.
Try different exposures
A PVC pipe building support makes a big difference for accurate work. It's important to have complete & easy access to the hull at this point.
I use epoxy to seal the underside of the deck, two coats, while it's tacky I apply thickened epoxy to the deck beams and sheer.
Lay the decking from the outside toward the king plank.
To get a deck to look right do not only look at where the points meet but also the trailing edge of the plank. You may need to trim each side of a deck plank to keep both sides of the deck even.
Don't rush!
The design of the deck is completely up to you;-)
You may like contrasting wood or a reproduction look like this?
Finished deck ready for three coats of epoxy.
I put the epoxy finish on before the hatch combing. I think it makes it easer to get a smooth finish.
Three coats of epoxy ready to complete hatches.
Needs buffing to improve the look and feel.
Plywood mold to glue hatch frames together with.
Plywood jig in use
Plug removed and windows fitted to the frame.

Occasional ruminations, experimentations, and observations on the art and nonsense of building wooden radio control sailboats. Thanks for visiting!
Search This Blog
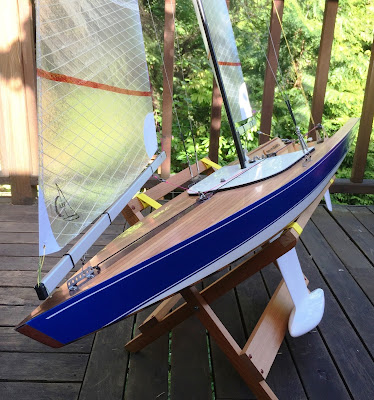
How to get started making wooden rc sailboats.
Post a Comment
Popular posts from this blog, iom sailboat stand, iom rig box (iom sail box) plans, a wooden "alternative" iom rc sailboat, iom alignment and measuring jig (updated).
- Vanquish 65
- Mini Maniac
- RG65 Appendages
- Maniac MK II
- IOM Appendages
- Marblehead Class
- Marblehead Appendages
- RT65 Ragnarok
- RT65R Armageddon
- RC65 Adrenaline
- ST65 Sowelu
- Mini40 / F48 Class
- Nightmare X
- Nightmare MK VIII
- MultiOne Class
- FireDragon 1000
- DIY Sail Winch
- Rig Building

- Search Search Search …
- Search Search …
Building Instructions
How to Build Your Boat
Once you've received your 3DRC Boat, learn how to build using our almost-race-ready kit.
Download Building Instructions Now
3D RC Boats Soling One Meter Instructions
View our 1-minute video tutorial to get started.
Soling 1 meter build tutorial part one.
View part one of the 3DRC Boats Soling 1 Meter build to learn how to install the keel trunk and rudder assembly.
Soling 1 Meter Build Tutorial Part Two
View part two of the 3DRC Boats Soling 1 Meter build to learn how to install the transom and deck.
Soling 1 Meter Build Tutorial Part Three
View part three of the 3DRC Boats Soling 1 Meter build to learn how to finish the assembly.
Soling 1 Meter Mast Rig Build Tutorial Part One
View part one of the 3DRC Boats Soling 1 Meter mast rig build to learn how to begin assembling your mast rig.
Soling 1 Meter Mast Rig Build Tutorial Part Two
View part two of the 3DRC Boats Soling 1 Meter mast rig build.
Soling 1 Meter Mast Rig Build Tutorial Part Three
View part three of the 3DRC Boats Soling 1 Meter mast rig build to learn how to complete your mast rig for sailing.

Return to RC Sailboats
RC Sailboat – Getting Started

RC Sailboat in Calm Wind – This is relaxing, but when that wind picks up….
An RC Sailboat (RC – Radio Control) as you may or may not expect, uses the exact same controls as a full size sailboat. If you’ve been lucky enough to pilot a full size sailboat, then you should have no problem with an RC Sailboat.
One of the unique characteristics of an RC Sailboat is it’s one of the few RC’s that operate using renewable energy for its main power source. This means you don’t need large, expensive batteries or gasoline to power it.
If you are completely new to RC Sailing, it is recommended to read through some of the terms at the bottom of the page, or if you are looking for a quick refresher. Once that is out of the way, we can look at the different options available in order to get hooked. Or what we mean here is more involved, you get the idea.
Depending on either how much time you may have or your building skills may determine how you get more involved with RC Sailboats. First we will consider the easiest way to get in to the hobby.
There are many RTR (Ready to Run) RC Sailboat s available that makes it a very easy transition in to the hobby. Typically RTR includes everything you would need to start sailing except for maybe some disposable batteries. AA are the most common.
The boats are classed most commonly by Length where the general rule for RC Sailboats is they come in lengths less than 30 inches, a length of one meter, and larger lengths up to 2 meters. Due to being an all around performer the One meter class is the most popular, largely from the ability to perform very well on the water and look awesome from land. It is also large enough to see as you sail it 50-100 feet away.

RC Sailboat – Vela One from Aquacraft
The number one recommended RC Sailboat for someone new to the hobby yet desiring one that is both competitive, RTR and a larger size, being in the one meter class, for ease of visibility is most definitely the Aquacraft Vela One. This hull performs well, is super easy to get sailing and is large enough to sail from a good distance. Expect this hull to excel.
40″ Hull Length and a 79″ Mast Height, Wow! All control system components come included in the 2.4 GHz System.
If you desire a less expensive high performing hull the perfect beginner Sailboat is the Aquacraft Paradise Sailboat. This boat will teach you the basic skills of sailing your own boat and perfecting the skills to become profecient in sailing. The hull length is 26″ and the mast height is 50.” At this size, it is quite visible at close to medium distances away from the sailor. All radio equipment comes include with this RC Sailboat with very little Setup required to start sailing.

Aquacraft Paradise Sailboat
Common Parts of an RC Sailboat
There are 7 common components that are found on nearly all RC Sailboats. The 7 common parts consist of the hull, mainsail, mast, boom, jib, keel and rudder. The hull is the main structure of the boat that contains all the other parts within it. Typically found in the center of an RC Sailboat on the under side of the hull is the keel. The keel is responsible for holding the hull straight during forward motion. The difference between a full size boat and our RC Sailboat is that the keel you would find on an RC Sailboat contains a weighted bulb at the very bottom that assists in stabilizing the hull under heavy wind conditions. The mast is located relatively close to the center of the hull and points directly up from the boat. The boom is positioned 90 degrees from the mast and helps support the mainsail which is attached to the boom and the mast. The mainsail is responsible for capturing the majority of the wind energy to propel the boat forward whereas the jib is a smaller sail commonly near the front of the boat that serves the purpose of capturing extra power to propel the hull forward.

RC Sailboat – Common Parts
How an RC Sailboat works
An RC Sailboat works by either capturing or redirecting wind energy to propel the boat forward. This is accomplished by the Sailor of the boat placing the sail in the proper direction to catch the wind and at the same time providing a constant heading for the boat to travel in. Steering on the hull is accomplished by controlling the rudder. An input signal on the radio is sent to the Sailboat and this is converted into motion that operates the rudder. The Sailboat controls are powered by a small battery that only operates the control system. This is better explained in the RC Sailboat controls page and also the how to Sail page. (coming Soon)
Radio Control Info Articles
- 3D Printing (2)
- General Electric (44)
- General Radio Control (12)
- Patreon Posts (101)
- RC Airplanes (6)
- RC Boat (3)
- RC Cars/Trucks (19)
Recent Articles
- RC Calc Sheet V24.06 Released – SoC Calculator June 3, 2024
- RC Battery Sheet V24.06 Released – New Battery Added June 3, 2024
- RC Calc Sheet V1.026 Released – Added Traxxas XO-1 May 5, 2024

Introduction: RC Boat

How to make an easy and fast RC Boat!
Step 1: The Plans
Here you have the boat plans in .dwg and .pdf format.
Download the .PDF plans if:
- You don´t know how to use AutoCAD yet.
- You don´t have a laser cutting or CNC machine.
Attachments

Step 2: Materials Needed

Build the boat:
- 3 and 5 mm plywood panels.
- Coping saw.
- Sand papers.
- Polyester resin.
- White glue.
- Red, black and white paint.
- Inkjet with white and decal sheets.
Electronics:
- 15kg servo.
- CNC Coupling.
- 200A brushless ESC.
- 115 mm Rudder Shaft.
- HB 3650 Brushless motor.
- 3 channel receiver.
- FS-CT6B transmitter.
Step 3: Cutting the Pieces

- Resize the .PDF as you wish for making a bigger or smaller boat. This model is 900mm long.
Tip: Under 550mm boats built with this plans tend to submerge when the lake is choppy. Be careful!
- Print the pieces in white paper sheets and stick them on the 3mm panel.
- Draw the contour of the pieces with a pencil into the plywood.
- Dettach the papers and cut the panel following the lines you have done before.
Note: Don´t cut Half of Deck pieces until you have read Step 6.
Step 4: Hull Bottom

- Glue the bottom pieces to the transom.
Tip: Sand down the inner parts of the bottom pieces before for creating a strong glued joint.
- When the trasom glue has dried up, put the bow sections together.
Tip: Glue four semi-spheric wooden sticks as bilge keels. They will help the boat going straight at high speeds and rolling less.
Step 5: Hull Sides

- Repeat the Step 3 process with the side pieces.
Notice the extra lenght added to the rear pieces for hiding the rudder.
Step 6: Deck

- Join the Half of Deck paper sheets together with cellophane tape or draw the contour of one piece and later the other one with the same sheet.
- Decide the cockpit size and cut the deck squared gap with a cutter. It may vary depending on the motor and batteries you are going to use.
Tip: Don´t make a big gap. The deck is straight until it reaches the yellow line. Exceeding it may cause problems when fitting the cockpit.
Step 7: Waterproofing the Boat

Polyester resin is a good sealer and adds extra strenght to the structure. Without it boats tend to dissasemble while crashing or after a few days touching the water.
- Mix it with two catalyst drops in a can. Pour it inside the boat and spread it over all surfaces and joints.
Step 8: Motor and Rudder Mount

- Attach the rudder shaft to the transom with four screws.
- Cut another 5mm piece. The servo support must have four drilled holes.
- Cable ties are a simple way of making a servo keep its place. Pass them through the holes.
Tip: Install a rubber bellow enclosing the servo bar. Avoid water to seep in!
- Make a 5mm plywood motor mount. We are using the HB 3650 Brushless Motor.
- Align the motor with the 4mm propeller axis and glue the mount to the bottom pieces.
Tip: Seal the axis and bellow with lithium grease. Without it water could flow inside the hull easily.
Accessories as trim tabs and turn fins can be bought or made using aluminium plates.
Step 9: Cockpit Brackets

- Make an U structure using thin plywood sheets and squared sticks, the cockpit must fit in the gap.
- Glue four screws to it. Their nuts won´t let the cockpit fly off while moving.
Tip: An easier yet effective way of sealing it is making the last picture´s four corner sticks frame. When you have the cockpit in place and the boat ready to sail, paste electrical tape on the cockpit-hull junction.
(The last picture is another boat, its Instructable will be ready soon!)
Step 10: The Cockpit

This model´s cockpit is made out of fiberglass.
- Give shape to a polystyrene sheet using sand papers. This is going to be the mold.
- Wrap it in plastic. This will help to separate the final pieces.
- Add fiberglass strips soaked with resin all around the mold.
- When dry, apply more soaked strips to put the upper and lower cockpit together.
(In the newest models I use another technique to make the cockpits, I will explain it soon)
Step 11: Add Some Extras

- Add four squared sticks to the finished cockpit. Make sure they fit the lower U structure!
- Drill four small holes to let the screws pass trought the cockpit.
- Air intakes look nice and help to cool down the electronics and the motor. But be careful with the watertight!
Tip: For small models don`t make gaps for the intakes, just glue them to the wood panel.
Step 12: Closing the Hull

- Glue the upper and lower hull together.
- Sand down the projections of the upper hull.
Tip: If they are big, use a cutter first to help you.

Step 13: Decorative Spoiler

A non functional spoiler sounds weird.
These boats don´t run fast enough to make it work properly, so it is more like an extra accessory.
Step 14: The Boat´s Base

To avoid paint scratches or rudder dents a 5mm plywood stand should be built.
Tip: Make it waterproof or fix the pieces together with another glue. White glued parts tend to separate while in contact with water.
Step 15: Base Painting

White paint is used as base. The spoiler looks great in red.
Step 16: Extra Painting

The boat´s appearance will be better if we add extra colours as red or black.
Design your own scheme to make yours an unique boat in the world!
Step 17: Adding Decals

- Search on the Internet logos you like or create your own ones. Paste them in a Microsoft Word tab.
- Print them on decal sheets. You may have to change the inkjet settings before printing.
Tip: For Epson inkjets you should change the paper type to Epson Photo Paper Glossy or Premium Glossy. Results may vary depending on the sheet quality, the ink type and the printer model.
- Apply some varnish layers to the sheet. If the ink makes contact with water, decals will smudge. Be careful!
- Inmerse the decals in a plate with water one by one. Paste them to the boat and dry them with paper.
Step 18: Varnish the Model

Apply 2 or 3 varnish layers to the boat.
You can add more to the decal areas to be sure they are not going to move or smudge. Safety first!
Step 19: Ready to Run

- Install the battery, the ESC controller and the receiver.
- Put some cloths inside the boat to soak up water if cracks appear.
Our RC Boat is now finished!

First Prize in the Water Contest

Recommendations

For the Home Contest

Puzzles and Games Contest

Paper and Cardboard Contest


Here’s What You Need For Building An RC Boat (Tips & FAQs)
RC Boat enthusiasts tend to move from pre-made boats to self-made ones. It gives them the freedom to choose between customizations and materials. As challenging as it appears, it is possible to create RC boats yourself, from simple to complex models. If you’re planning on making your own, you must be wondering what you need to make it.
Building an RC boat requires some necessary components and a handy tool set. There are 7 main components needed to create the engine and the vessel. A battery charger and remote controller are required to complete the set. You can choose between BYOB (Bring Your Own Boat) kits or building a DIY boat from scratch.
Seeing the kind of RC boats enthusiasts and hobbyists can create is impressive. Based on first impressions, it can seem like a challenging task, but you can build your own RC boat too! This article will summarize all the components needed for an RC boat and weigh the better way for you to make one.
9 Essential Parts You Need To Build Your RC Boat
Whether you’re using a Build Your Own Boat (BYOB) kit or building from scratch, most components and requirements for the process are similar.
Note: Unless you’re personally customizing your boat, it should come out looking and working the same way as any other commercially bought RC boat.
The components mentioned below are what you need to source if you’re going to DIY your RC boat. These parts will already be inside if you’re purchasing a BYOB kit.
Depending on the company and size of the kit, you can choose between a simple or complicated boat model.
For RC boats, parts can be divided into internal and external components. Each piece and its function are explained below:
The central power system in an RC boat is the motor. It is available in two types, brushed and brushless.
See my article for the best RC boat brushless motors and what to consider when buying .
A brushed motor is cheaper but relatively slower. Whereas brushless motors are in different price ranges and provide the most speed.
You should choose your motor based on who will use the boat, where you will use it, and how fast you’d like your boat to go.
See my article: How To Size An RC Boat Motor: A Helpful Guide
The servo is the internal component responsible for balancing and steering the boat.
It is present with the other electronic components inside the hull. The servo works in sync with the transmitter, carrying out the movements.
You can find servos in any shape or size to fit your boat.
3. Rechargeable Batteries
The rechargeable battery is present onboard the RC boat. You should carefully consider what type of battery you should use because each battery has a different performance.
The most common ones used are Ni-MH and Lithium-Polymer batteries. Lithium-Polymer batteries provide consistency throughout the run-time, while Ni-MH ones don’t.
4. Body (Bottom, Hatch, and Hull)
The body of an RC boat includes 3 sections.
The lower half is the bottom area submerged underwater. All the electronic components are contained in the hull region. Lastly, the waterproof top hatch protects the components and shuts the hull.
Note: When deciding on the size of the boat, you should closely consider the measurements for each body part.
5. Propeller
The drive system of the boat is the propeller.
The motor provides electrical energy, through which the propeller spins and creates a thrust. Based on the efficiency and force of the thrust, the boat speed is determined.
Propellers come in many blade shapes, materials and sizes. You should buy your propellor based on the total length of the boat and the number of propellers you’ll use.
Check out my article: 2 Prop Or 3 Prop For Your RC Boat? What’s The Difference?
And remember that when it comes to selecting the perfect propeller for your RC boat, size and shape are also vital. Wrong prop measurements can lead to decreased performance along with other issues. That’s why I’ve put together a comprehensive guide on how to measure an RC boat prop .
The steering system in the boat is the rudder.
There is only one rudder present on each RC boat. When you change directions on the remote control, it sends the command to the rudder, which moves left and right.
The rudder’s control allows you to maneuver high-speed RC boats without having them flip over.
7. Battery Charger
There are two types of chargers for your RC boat’s battery, a normal and a fast charger.
A standard charger can take up to 5-8 hours to charge your RC boat, while a fast charger can at least cut the time by half.
Note: You should avoid using random changers for your boat, as that can damage the battery. Always keep a check on the charger in case it overheats.
8. Radio System (Transmitter/Receiver)
The radio system is the Radio Frequency (RF) for both the transmitter and receiver. It is responsible for sending the remote control command to the boat.
Note: The older frequencies of 27MHz and 75MHz, have been replaced by 2.4GHz .
By using 2.4GHz, you’ll experience less conflict and interference with other remote controls and radio sources nearby.
9. Remote Controller
A controller is what gives the RC boat commands.
Typically, the controller doesn’t have to be assembled, so it doesn’t count as a component. However, if you’re creating your boat from scratch, you’ll need to buy one and ensure it works on the frequency you need.
Extra Tip: You can also add features such as a battery and range alarms to keep your boat from getting lost.
What You Should Know While Making an RC Boat?
Beyond the RC boat parts and assembly process, there are other things to remember before you start.
Make sure you have all the tools necessary for the building process, know all regulations, and put safety first.
Tools Needed For Assembly of Your RC Boat
Making an RC boat may look complicated, but it is simple if you break it into steps.
If you’re using a BYOB kit, you should read and understand the manual before you start. Make sure to carefully follow each step written.
If you’re doing DIY from scratch, find a simple step-by-step tutorial on youtube to learn from.
Before working on your RC boat, ensure you’re well equipped. Have a workspace , preferably a workbench, to spread your components, tools, and manual. Depending on the complexity of your model, have glue, screwdrivers, pliers, and tape with you.
You could buy a complete toolset (Amazon link), to make your own building kit.
Its also essential to have a selection of of different sized clamps. You will will need these to hold materials after they’ve been stuck together to dry. This clamp set (Amazon link) is ideal.
Rules For Building And Using Your RC Boat
Some official bodies can help teach you what rules and regulations apply to your RC boat. You would have to search for them according to your area or country. However, some regulations are used across the board. You should respect these rules when you choose to take up RC boats as a hobby.
The size requirement, for instance, is universal, and your boat should stay within the 24”-36” limit . Creating a larger boat will limit the areas you can use and make it harder for you to enjoy. Additionally, the size limit is applied because the boat you create shouldn’t be used for passengers , whether animals or humans.
You should ensure that your engine is safe to use . Speed will obviously be a priority when creating your RC boat, but it shouldn’t put you at risk. Make sure you have an appropriate engine for your boat size, couples well with the battery, and has a cooling system. Engine overheating is a potential danger you should be careful about.
There are strict rules regarding Fuel Emissions and Oil or Fuel Leaks. So as an owner of a Gas or Nitro powered RC boat, you should take adequate precautionary steps. Don’t overflow the fuel tanks, and avoid using faulty RC boats.
Due to the environmental threat, most companies consider Electric RC boats safer and prefer to produce them.
Safety Precautions
Being safe throughout the process must be your priority.
For anyone under 16, adult supervision is advised. Using a BYOB kit is simple, and most are designed for children 14 years and up. It is safe, but inexperienced children can get hurt or make mistakes.
DIY boat projects are only recommended for pros or those with long-term experience with wood, electronics, and building objects.
Be careful when using tools. Avoid substituting simple tools with other gadgets. If your screwdriver works fine, you don’t need to use a drill to work faster.
You should also avoid using random items to get the job done. For example, school craft glue is not a trustable adhesive and shouldn’t be used on internal or external components.
Don’t try to experiment with electric components. Please listen to the safety guidelines mentioned in the manual and avoid using shortcuts. When dealing with batteries, motors, and their wirings, you should use a trusted source to follow. You can ask a technician or electrician for advice or help if it’s too complicated for you.
What’s Better? BYOB Kits vs. DIY
Choosing between BYOB kits or DIYing your boat is your call. If you feel you’re in a position where you can invest so much energy, money, and time into building a boat, you can opt for DIY. However, if you’re newer to the concept of building one yourself or don’t want too much of a hassle, you can buy BYOB kits.
To better understand the two options, the tables below weigh the pros and cons of BYOB kits and DIY.
Here are the advantages and disadvantages of using BYOB kits:
Here are the advantages and disadvantages of doing DIYs from scratch:
This video gives you a quick run-through of building an RC boat from scratch. After watching, you will have an idea of what you are getting yourself involved in;
It is important to be realistic about the fact that both ways of making your own RC boats have some disadvantages. It is up to you to decide which seems like the easier or more feasible route for you.
The Best RC BYOB Kits
You can find BYOB kits in toy shops, hobby shops, or online. They aren’t very difficult to find. Unless you’re looking for a specific design or model, it should be easy for you to choose a kit based on its difficulty level.
The prices of BYOB kits can significantly vary because they depend on the company and model type.
There are five great options for you to choose from in the list mentioned below, based on your requirements. They are in ascending order based on price levels:
1. Big Swamp Buggy Boat Kit
This is the cheapest Bring Your Own Boat kit on the list.
This 31” boat comes with
- The needed wood for the vessel
- One measured foam tape
- And one sealed hardware bag
- It also comes with assembly instructions.
On the website page, the model clearly lists some hardware meant to be purchased separately. Additionally, the controller and transmitter aren’t in the kit either.
The Big Swamp Buggy Boat Kit is available for $130 at Horizon Hobby.
2. Toys Hobbies ZT Model AB04501
The kit comes with all the necessary components .
The boat is made of plastic and has beginner-level assembly skills required. The max speed mentioned is 25km/h , which is understandable as it comes with a brushed motor .
The only materials you would need outside the kit are batteries for the remote control and glue to stick the boat together.
The Toys Hobbies ZT Model AB04501 is available for $150 on Amazon.
3. Chris-Craft Cobra Boat Kit
A 27” wooden RC boat, the cobra kit is up in price but for a good reason.
The make and model of this boat are phenomenal. Most components are found in the kit with the instructions. The parts which need to be bought separately are mentioned on the website, but namely, they are the speed control, battery, charger, and remote control.
The Chris-Craft Cobra Boat Kit is available for $252 at Horizon Hobby.
4. ARKMODEL Vosper Torpedo Boat Perkasa

Last update on 2024-03-16 / Affiliate links / Images from Amazon Product Advertising API
One of the more expensive boats is the Arkmodel Vosper Torpedo Boat. This RC boat is meant for users of 14 years and up.
Most components, except electronic hardware and the controller, come with the kit. The model is made of plastic and can be painted to look however you choose. The kit has a 3D illustrated instructions guide to help you piece it together.
The ARKMODEL Vosper Torpedo Boat Perkasa is available on Amazon.
5. ARKMODEL PLA Navy Type 056A

The most expensive model on the list, this 36” RC boat is a massive investment.
Similar to other ARKMODEL company boats, it comes with almost all components. Some electronic hardware such as batteries, remote control, and switches are not included. It is a plastic boat and requires glue for assembly.
The ARKMODEL 1/100 PLA Navy Type 056A is available on Amazon.
See it in action;
Q. Can You Make A RC Boat From Scratch?
Yes, it is possible to completely build your own RC boat. However, it is a complicated and time-consuming process, so only professional-level hobbyists should take up the project. If you don’t want commercially available boats, you can consider buying a boat from a private maker.
Q. How Long Will It Take To Make Your RC Boat?
It depends on what kind of boat you’re creating. If it’s a simple BYOB kit, it could only take 1-2 hours. For more complex models, you can stretch the time according to the number of extra steps. Any DIY boat can take months to create, but it depends on its size and the number of features you’ll add.
Q. Can Someone Inexperienced Build A RC Boat?
If you’re using the BYOB kits, then experience with RC boats is not necessary. You can start with a simple model and eventually work on more complex versions. However, you are responsible for learning about the regulations and safety precautions when building or using RC boats.
Q. Is It Cheaper To DIY A RC Boat?
No, creating an RC boat from scratch is definitely not cheaper. The prices for some BYOB kits can seem crazy, but doing everything yourself requires a much larger monetary investment. If you’re working with a budget, a BYOB kit would be the more economical option for you.
Final Thoughts
RC boats have many parts which come together to give you a thrilling cruise experience. When you’re creating your own RC boat, it may seem like the list of needed items is endless, but the process can be simplified. Making your own RC boat will be a memorable experience, and you’ll enjoy it more once you get the hang of it!
I hope that you found this article helpful. Here are some more articles that may be of interest;
- How To Make Your RC Boat Go Faster (Cool Tips & More)
- RC Boat Flips Over: Here’s What To Do
- Why Your RC Boat Is Not Working & How To Fix It
- Are Traxxas RC Boats Self Righting?
This awesome hobby has something for everyone, whether you like to build your RC from scratch and keep modifying till you've got it to just how you want it, to track racing. You might be out with a boat, or perfecting your skills with a plane. Are you taking some cool pics with your drone? I'm sure my site will help you on your journey.
Recent Posts
Is Your RC Car Faster In Reverse? This Might Be Why (Solved)
It's a nice weekend, and you’re outdoors pursuing your RC racing hobby. You miss a turn and go off the track. You reverse back to the track and notice that your car is faster in reverse. You may...
Most Common Reasons Why RC Car Blinks Red (And Fixes)
Red light blinking on the RC car, and the steering–working, but the throttle not working, sounds familiar? Then you’ve landed at the right place. In this guide, we’ll explain in detail why an...

- RC Cars & Trucks
- RC Airplanes & Helis
- Diecast Models
- RC Parts & Accessories
- Knowledgebase
How To Build An RC Boat: A Comprehensive DIY Guide
Remote control (RC) boats are a fun hobby for all ages. An RC boat is a model boat that is controlled from a handheld radio transmitter. The transmitter communicates with a receiver onboard the boat, allowing you to control the direction and speed of the boat. Building your own RC boat from scratch can be an enjoyable and rewarding project. This DIY guide covers constructing a small electric-powered speedboat using plywood, installing the motor, ESC, battery, and radio components, waterproofing techniques, remote control setup, testing and troubleshooting.
Materials Needed To Build An RC Boat
The hull is the main body of the RC boat. For our build, we’ll be using 1/4 inch plywood to construct the hull. Plywood is lightweight but strong – important qualities for an RC boat hull. We’ll cut out the main hull pieces from the plywood using a jigsaw. The hull design we are using is a shallow V-shape which will provide stability and some speed.
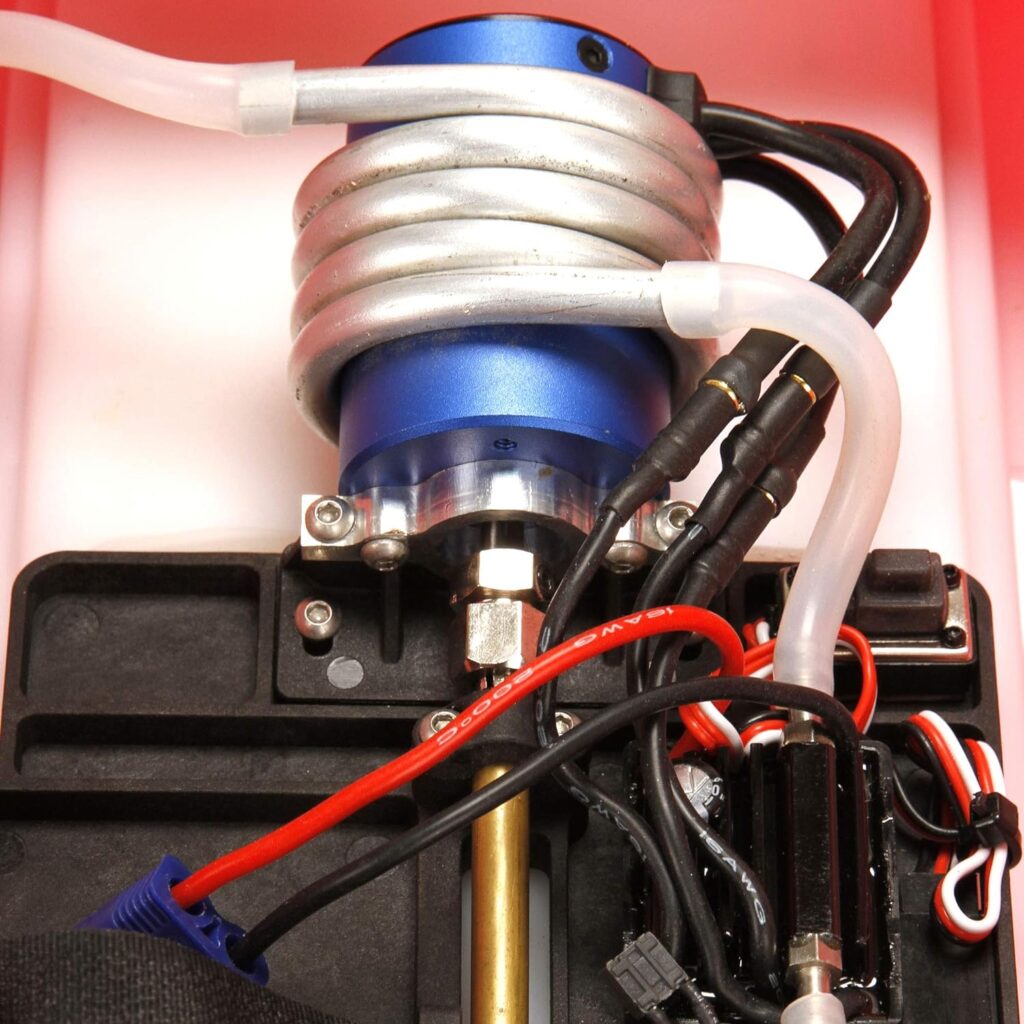
For the motor, we’ll use a small brushed electric RC motor. Brushed motors are inexpensive and provide good low-end torque to push through water. A motor in the 15-20W power range will be ideal. It will give enough power without overloading our small hull. The motor mounts inside the hull towards the back. Make sure to pick a waterproof motor.
The electronic speed control (ESC) regulates power from the battery to the motor. We’ll need a 15A+ ESC to match the motor. The ESC allows forward/reverse control and varies motor speed. It connects between the motor and receiver. An on/off switch can also be wired through the ESC.
4. Propeller
A suitable propeller helps transfer the motor’s power into thrust. We want a propeller with a low pitch and smaller diameter – 2-3 inches should work. Nylon and plastic props are flexible and safe for RC use. Match the prop size to the motor for best performance.
5. Radio Transmitter and Receiver
The radio system is what gives you remote control of the boat. A transmitter and receiver pair work in tandem – the transmitter sends signals which the receiver picks up. We’ll need a basic 4-channel radio system, with channels for steering, throttle, and forward/reverse controls.
A small 7.4V LiPo battery pack provides power onboard. Make sure the battery can deliver adequate current for the motor and ESC. The battery mounts securely inside the hull. 7.4V gives good speed from a small package.
7. Wires and Connectors
Hookup wire, bullet connectors, and servo connectors allow everything to connect properly. Make sure components use matching connectors. Use plenty of heat shrink tubing to protect connections.
8. On/Off Switch
An on/off switch on the hull lets you turn on the RC boat’s electrical system when ready to run. Wire it through the ESC. A watertight switch cover prevents issues.
9. Rudders and Steering
The rudder mounts on the stern and turns the boat left and right. A servo actuates the rudder based on transmitter steering signals. Linkages connect the servo to the rudder. Dual rudders provide maximum steering authority.
Building The Hull
1. hull design options.
There are many hull designs to choose from when building an RC boat. We’ll be using a shallow V-hull which provides good stability and speed potential. Other options like deep V-hulls, catamarans, or flat-bottom hulls have their own pros and cons. For a first RC boat, a shallow V is a good compromise.
2. Tools Needed
Building the plywood hull requires some basic tools:
- Jigsaw to cut out the hull panels
- Sandpaper to smooth and shape the hull
- Clamps to hold parts for gluing
- Carpenter’s wood glue to join all pieces
- Drill for making holes for components
- Safety gear like gloves and goggles
3. Cutting Out the Hull Parts
Using the hull plans, carefully cut out the main pieces from the plywood using a jigsaw. Cut along the inside edge of each line. Make relief cuts in corners to allow tighter turns. Sand all edges smooth. Test fit pieces together before final glue up.
4. Joining the Hull Parts
Gluing the hull requires care and precision. Have all pieces cut out and test fitted before starting. Apply carpenter’s wood glue to joining edges. Clamp pieces tightly together, checking alignment. Use painter’s tape as clamping cauls to distribute pressure. Allow glue to fully cure before removing clamps.
Once glue has cured, sand any rough spots. The basic hull shape is now complete. We’ll add details like the motor mount and rudder hardware later.
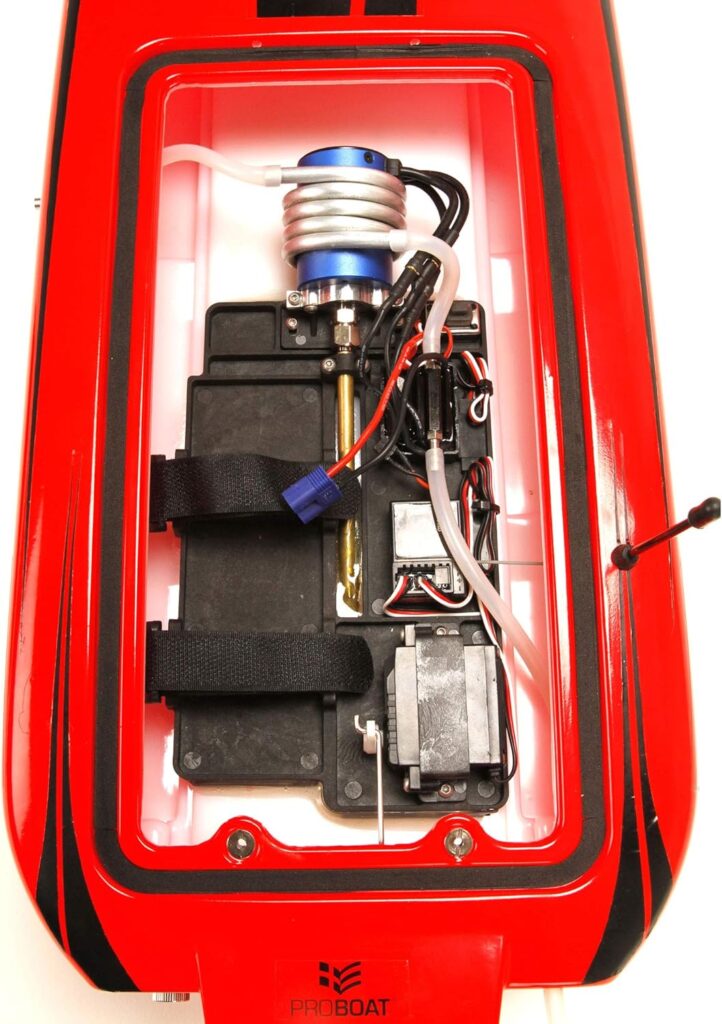
Installing the Components
1. mounting the motor.
The motor needs a secure mount inside the hull. Cut a mount plate from plywood that aligns to the motor. Drill corresponding screw holes and use waterproof screws to attach the plate inside the hull. Screw the motor tightly down onto the mount plate.
2. Wiring up the ESC, Receiver and Battery
Follow the wiring diagram to connect the ESC, receiver, battery and motor. Pay close attention to polarity. Use bullet connectors to allow for disconnecting components. Heat shrink all connections to protect from water. Run wires neatly and secure with zip ties.
3. Attaching the Propeller
Slide the propeller onto the motor shaft and tighten with the prop nut. Make sure the prop nut is on securely – you don’t want the prop coming loose! For pusher props, insert a spacer between the prop and motor.
4. Installing the Rudder
The rudder mounts to the stern of the hull. Cut a rudder mount hole in the stern and glue in the mounts. Screw the servo horn to the rudder. Connect the steering linkages from the servo to the rudder horn. Make sure the rudder moves freely.
Controls and Transmitter
1. binding the receiver to transmitter.
Before using the radio system, the receiver and transmitter need to be electronically paired or bound. This allows them to communicate only with each other. Refer to your transmitter and receiver manuals for the proper binding procedure. Typically it involves putting the receiver into bind mode and pressing a button on the transmitter while powered on.
2. Testing the Controls
Once bound, test all controls – steering, throttle, and direction. Check that the servo and ESC are responding properly to the transmitter controls. If controls are reversed, change settings on the transmitter or component. Trim controls to neutral center points.
3. Trimming and Adjusting
Fine tune the linkages and trims to get smooth, properly ranged motion. Adjust the steering linkage so rudder movement is synchronized to the steering wheel. Set throttle trim so the motor is at neutral when controls are centered. Make small adjustments until controls operate just right.
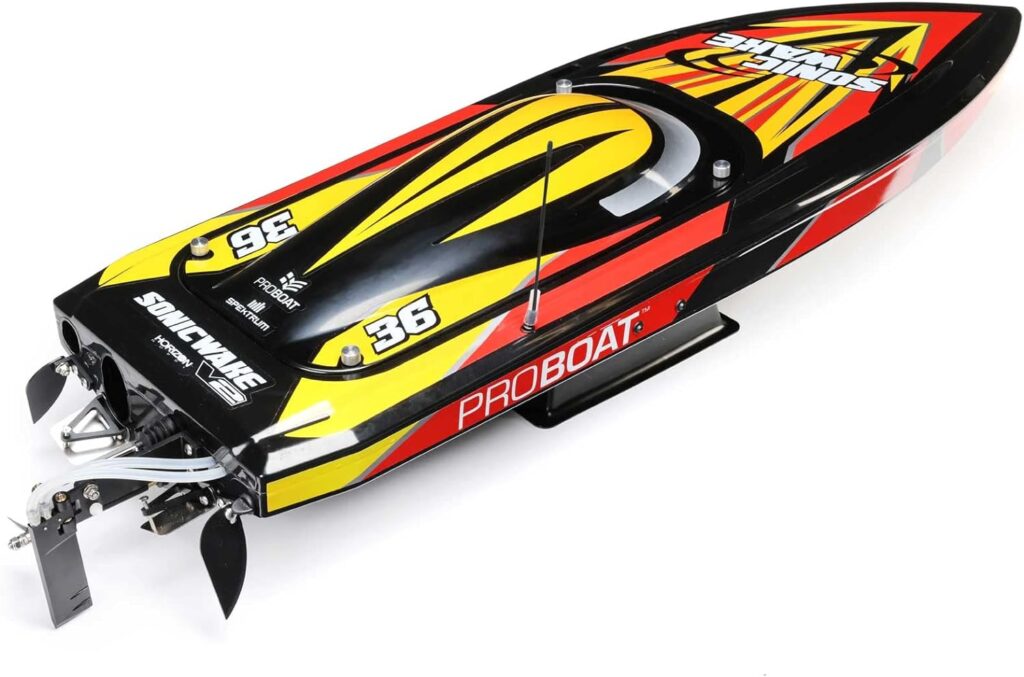
Finishing Touches
1. painting and decoration.
Now we can add some creative touches to personalize the boat. Paint the hull with colorful waterproof RC boat paint. Apply in light coats using spray paint or a brush. Add decals and designs using RC boat sticker sheets. Clear coat over paint and decals to seal and protect.
2. Waterproofing
Seal any holes and gaps in the hull to prevent water getting inside. Common problem areas include around hatches, rudder mounts, and wire penetrations. Marine epoxy or specialty RC boat sealants work well for waterproofing. Check for leaks by testing the sealed boat in water.
3. Checking All Connections
Before launching the finished boat, do a final check of all wiring connections and mechanical linkages. Look for loose connectors or gaps in sealing. Check that propeller and rudder are securely attached. Confirm the receiver and ESC are firmly mounted and wires secured. A detailed pre-run inspection prevents problems.
List of the Best RC Boats
Frequently asked questions on how to build an rc boat, 1. what type of hull is best for an rc boat.
For a first RC boat build, a shallow V-hull is often a good choice. Shallow V-hulls provide decent stability while still being fast. They handle well and are simpler to build than more complex hull designs. Fiberglass hulls are great but require molding. Plywood and composite materials like ABS plastic are easy DIY hull options.
2. What tools do I need to build an RC boat?
You’ll need some basic woodworking and hobby tools like a jigsaw, drill, sander, hobby knife, pliers, screwdrivers, clamps, wire cutters, and metric hex drivers. Useful extras include a dremel, heat gun, rotary tool, and soldering iron. Make sure to use appropriate safety gear like gloves and eye protection.
3. What is the best motor for an RC boat?
Small to mid-size brushed electric motors in the 15-25W power range are ideal for DIY RC boats. They provide enough speed and torque without overloading the hull. Choose a water cooled motor and make sure the kV rating matches your battery voltage. Outrunner brushless motors offer more power but require advanced ESC.
4. How do I waterproof my RC boat?
Use marine epoxy to seal the hull pieces during assembly. Coat screws holes and other penetrations. Seal around hatches, rudder mounts, and any openings. Choose waterproof components like sealed motors, ESCs and servos. Use heat shrink on all electrical connections. Test for leaks!
5. What battery works best in an RC boat?
7.4V LiPo batteries are popular choices, offering a good balance of voltage and capacity. Make sure your ESC can handle 2-3 LiPo cells. Hardcase LiPos hold up to crashes better. Choose a battery that can supply adequate current for your motor and components.
6. How do I control my RC boat?
You need a radio transmitter and receiver, commonly called a radio system. The transmitter has steering and throttle controls and sends signals to the receiver on the boat. 4+ channel radios allow control of steering, throttle, and reverse. They must be electronically bound to operate together.
7. What if my boat won’t steer properly?
Check the steering servo and linkages. Make sure servo responding properly to transmitter and has enough throw. Inspect rudder hinge and linkage for binding. Verify steering servo is mounted securely. Adjust steering trim on transmitter. Make sure batteries are charged. Replace defective components if needed.
8. Why does my boat run slow?
Check for a damaged propeller, debris in the motor, or waterlogged hull. Use a prop with the right pitch and diameter. Inspect motor mount and coupling for excess play. Check battery voltage and cell health. Ensure electrical connections are clean and solid. Try a higher kV motor if underpowered.
Final Thoughts
Find a suitable pond or body of water and place the boat in the water. Power it on and give the throttle a try – the boat should move obediently as you steer it around. Make note of any issues like listing, poor steering, or sluggish operation. Fine-tune trim settings and make adjustments as needed. Some tips for using your new boat – charge batteries fully between runs, rinse the boat with fresh water after use, check for loose parts and damaged propellers. Troubleshoot any problems methodically – check connections, try swapping parts, and inspect components. Building and operating your own RC boat is very rewarding. Enjoy running your creation and take satisfaction in a job well done!
Enjoyed this guide of How To Build An RC Boat? Then be sure to check out our other RC Rating guides.
- Best RC Cars Under $100
- Best RC Cars For Beginners
- Best RC Boats
- Best RC Airplanes For Beginner
- How to Stop RC Car from Flipping?
- Best RC Sailboats in 2024: Buyers’ Guide
- The Ultimate Guide to RC Car Stands
- Pinewood Derby Car Kits – How to Build Your Own Racer
- How Fast Can a Radio Control Car Go?

How to Build an RC Boat: Step-by-Step Instructables Guide
- By - Kyle Hilson
- Posted on April 17, 2023 June 2, 2023
- Posted in RC Boats
Building and operating remote control boats is an exciting and rewarding hobby for many enthusiasts. While there are many pre-made RC boats available on the market, creating your own from scratch can be a fun and fulfilling experience. Not only will you have a boat that is uniquely yours, but you will have the satisfaction of knowing that you built it yourself. However, for someone new to building RC boats, the process can seem intimidating. Fortunately, it is a relatively straightforward process that can be easily accomplished with some planning, patience, and attention to detail. In this article, we will guide you through the process of making your own RC boat instructables step-by-step, from gathering materials to testing your boat on the water. By the end, you’ll have a new toy and a new skillset to enjoy.
Materials Needed
Before we dive into the process of building your own RC boat, let’s take a look at the materials you’ll need to get started. The following are the basic materials and equipment you’ll need to build your RC boat. While some other materials may be required depending on the design, these are the essentials:
- Hull material (wood or fiberglass)
- Electric motor
- Radio control equipment
- Rudder and servo
- Electronic speed control (ESC)
- Waterproof sealing tape and adhesive
There are many great websites where you can find these materials online, such as Amazon, HobbyKing, and Tower Hobbies . You can also try local hobby or hardware stores for the materials you need. When selecting materials, be sure to choose high-quality, durable materials that will withstand the stress of operating in water. With all the necessary materials in hand, it’s time to start building!
How to make a homemade RC boat?
Making a homemade RC boat is easy and fun. With the right materials and proper guidance, you can make a fully functional RC boat at home. Here are some steps to follow:
- Choose the hull design you want based on the size of the boat you want to make.
- Gather materials such as foam board, glue, a motor, propeller, servos, and a battery.
- Begin assembly by cutting out the shapes for the boat hull and gluing the pieces together.
- Add your motor and servos to control the boat’s movements.
- Attach the propeller to the motor shaft.
- Install your battery and check that everything is functioning properly.
- Paint and add finishing touches like decals to personalize your boat.
For step-by-step video tutorials and supplies, websites like Instructables and products like the Top-notch Toys Remote Controlled Boat can be helpful resources.
Designing the Hull of Your RC Boat
Designing the hull of an RC boat is an exciting and creative process. Your boat’s hull will determine its speed, handling, and overall stability. Here are some tips to consider when designing the hull of your RC boat :
- Research the different types of hulls, such as deep-V , flat-bottom , and tunnel hulls , to determine which would suit your needs best.
- Create a basic design sketch of your desired hull shape.
- Consider the weight of your boat and how it will impact the hull’s stability.
- Choose the hull material and construction method best suited for your design.
- Remember that hydrodynamics plays a critical role in the performance of your RC boat . A well-designed hull can make all the difference in speed and handling.
If you’re new to designing RC boats , online resources like RC Groups , RC Universe , and Model Boats Magazine offer a wealth of information on hull design and building. It’s also possible to buy RC boat hulls online from stores like Banggood, AliExpress , and eBay .
Types of RC Boat Hulls
Knowing the different types of hulls and their characteristics can help you decide on the best hull for your RC boat . Here’s a brief summary of the most common types:
What is the best material to build an RC boat?
When it comes to building an RC boat, there are a few materials to consider. The best material depends on the builder’s experience level and the intended use of the boat. Some popular materials used for RC boats are:
- Balsa wood – lightweight and easy to shape, but not very durable
- Fiberglass – strong, durable and water-resistant, but can be heavy
- Carbon fiber – lightweight, strong and durable, but can be expensive
It’s recommended to do some research before deciding on a material for building an RC boat. There are several websites and forums dedicated to RC boating and building that can provide helpful information and advice. Additionally, some RC boat kits come with all necessary materials and instructions for building the boat.
Assembling the Electronics
Assembling the electronics is a critical step in building an RC boat. Here’s a step-by-step guide on how to do it:
- Install the motor in the hull as per the manufacturer’s instructions. It’s essential to balance the motor’s position, so it doesn’t affect the boat’s balance.
- Fit the propeller onto the motor shaft. Make sure it is tightly secured to avoid wobbling or coming loose.
- Install the propeller shaft and couplings . The shaft should be centered, and the couplings should be tight.
- Attach the flexshaft , which allows the propeller to rotate smoothly without interfering with the hull.
- Install the rudder . The rudder controls the direction of the boat and must be installed correctly for optimal performance.
- Add any additional sensors , such as GPS or compass , to the boat. This step is optional but can improve the control and performance of the boat.
- Install the radio control equipment , such as the receiver and transmitter .
- Attach the battery pack to the boat. The battery pack should be securely fastened to avoid shifting or damaging the boat’s balance.
- Test your boat and make adjustments as necessary.
Online stores like Hobby King, Tower Hobbies , and Amazon offer a variety of parts and tools for building your RC boat’s electronics. RC Boat Mag and RC Boat Modeler are also great websites to explore for tutorials and further information on assembling electronics.
What is Assembling Electronics?
Assembling electronics involves the process of putting together various electronic components such as resistors, capacitors, diodes, and transistors onto a printed circuit board (PCB) to create a functional electronic device.
Here are some key points to know about assembling electronics:
- Assembling electronics requires knowledge of electronics engineering, electronic components, and PCB assembly techniques.
- The process typically involves using soldering equipment to connect the components to the PCB.
- PCB assembly can be done manually or with the use of automated equipment.
- The final product can be a prototype or a finished electronic product for commercial use.
If you have an interest in electronics or want to learn more about the process of assembling electronics, there are many websites and products available to help. Some popular options include electronics hobbyist websites such as Adafruit and Sparkfun, as well as online retailers like Digi-Key and Mouser Electronics that sell electronic components and tools for PCB assembly.
Choosing the Right Radio Control Equipment
Choosing the right radio control equipment for your RC boat is essential to ensure optimal performance and precise control. Here are some factors to consider when selecting your radio control equipment:
Type of Radio Control System:
There are two types of radio control systems you can choose from:
- 2.4Ghz Radio Control Systems: These are the most popular and modern radio control systems available. They offer a more stable and reliable connection, better control, and more extended range.
- 27Mhz or 40Mhz Radio Control Systems: These are outdated and less reliable systems. They offer less control, weaker signals, and shorter ranges.
Channels refer to the number of functions the radio control equipment can control. For example, steering, throttle, and reverse are separate functions that require different channels.
Brand and Compatibility:
It’s essential to choose a reputable brand of radio control equipment to ensure quality and compatibility with your RC boat. Brands like Futaba, Spektrum , and Tamiya are popular among RC enthusiasts.
Online stores like Hobbyking and Tower Hobbies offer a variety of radio control equipment to choose from. Additionally, you can find tutorials and reviews on websites like RC Groups and RC Driver to help you make an informed decision.
What are the different types of radio control?
- Remote Control (RC) Cars : These are small cars that are powered by electricity and controlled remotely by a radio transmitter.
- Remote Control (RC) Boats : These are small powered boats that are controlled remotely by a radio transmitter.
- Remote Control (RC) Planes : These are small planes that are powered by electricity and controlled remotely by a radio transmitter .
- Remote Control (RC) Drones : These are small unmanned aerial vehicles that are controlled remotely by a radio transmitter.
If you are interested in purchasing any of these types of radio-controlled vehicles , websites such as hobbyking.com and towerhobbies.com are great resources to start with.
Advanced Tips for RC Boat Building
If you’re looking to take your RC boat building skills to the next level, here are some advanced tips to consider:
Customizing Your Hull
Customizing your hull can give your RC boat a unique look and improve its performance. Here are some ways to customize your hull:
- Adding weight to the front of the boat to improve aerodynamics
- Cutting vents in the rear of the boat to improve stability and speed
- Using hydrofoils to reduce drag and increase speed
- Incorporating a tunnel hull design for high-speed turns and stability
Upgrading Your Electronics
Upgrading your electronics can improve your RC boat’s performance and make it more efficient. Here are some electronics upgrades to consider:
- Switching to a brushless motor for increased speed and control
- Switching to lithium-polymer (LiPo) batteries for increased power and longer run times
- Adding a water cooling system to prevent your electronics from overheating
- Upgrading your radio control system for improved precision and range
There are many online stores like Amazon and eBay where you can find advanced RC boat parts and electronics . Additionally, websites like RC Universe and RC Groups offer forums and discussions where you can get expert advice and tips from fellow RC enthusiasts .
How do you flip a RC boat?
Here are some steps to follow to flip an upside-down RC boat:
- Step 1: Turn off the motor of your RC boat to avoid further damage.
- Step 2: Use a long object such as a stick or fishing rod to push the boat towards the shore or shallow area.
- Step 3: Use your hands to flip the boat over so that it’s right-side up again.
- Step 4: Turn on the motor and let any excess water drain out.
- Step 5: Test the boat to ensure it’s working properly before continuing to use it in the water.
If you need further assistance with your RC boat, websites such as RC Boats Hub and Horizon Hobby offer product recommendations and tips for maintaining and troubleshooting your boat.
Building an RC boat may seem intimidating at first, but with proper guidance and materials, it can be a fun and rewarding experience. By following the steps outlined in this article, you can build your very own RC boat that is affordable, functional and personalized. Don’t be afraid to try out new designs or experiment with different parts to take your RC boat to the next level.
Tips for Beginners
If you’re new to RC boat building, here are some tips to keep in mind:
- Start small and simple – don’t get overwhelmed with complicated designs and electronics
- Choose the right materials – quality and durability are key for your boat’s longevity
- Learn to troubleshoot – expect that there will be issues and know how to fix them
- Join a community – find fellow enthusiasts who can offer advice and support
Building an RC boat can be a challenging and educational experience that can also be a lot of fun. Not only do you get to create something from scratch, but you also get to enjoy the thrill of operating your creation on the water. Follow the steps outlined in this article, stay safe, and most importantly, have fun!

Previous Article
Next article.


IMAGES
VIDEO
COMMENTS
RC sport sail. Most kits and RTR (ready-to-run) model RC sail boats are best categorized as RC sport scale. This category is a happy medium between full-blown scale models and RC racing yachts. Some have become so widely distributed that new racing classes has been formed around them. Good examples are Graupner's Micro Magic and Kyosho's Fairwind.
Overcoming Challenges in RC Sailboat Kits. Building and sailing radio-controlled sailboats can present some challenges, especially for beginners.One of the biggest challenges is understanding the complex instructions. Moreover, setting up the radio transmitter can also be daunting as it requires technical skills. Additionally, navigating the boat can be difficult as the wind and water ...
Here I describe with photos how I built the radio-controlled RC sloop Emma, a 1meter long, 6kg model boat. Plans with instructions are available online from...
Step 1: Components. Below is a list of the material used to construct the RC sailboat, most of the items can be sourced on Amazon or a hobby website like Hobby King. Electronic Components. Qty. 1 - Arduino Uno. Qty. 1 - Arduino Nano. Qty. 1 set - RF Transceivers.
Moving forward in a straight line. First, the basic skills. With the boat in the water, start with the wind half way between the front (bow) of the boat, and the side (beam). Keeping the rudder straight, trim (move) the sails so that they are close to the hull (close hauled) and the boat should move forward.
One day build of an RC Sailboat designed to race in the 2017 PBC Annual Yacht Race.A link to a PDF of all the materials is herehttps://drive.google.com/file/...
The Beauty of Scratch Building. RC boat kits have their place, but most beginners use them as stepping stones to scratch building. After all, a kit is not unique to you, but a custom model built from scratch most definitely is. Scratch building is the way forward if you have the time and patience. There are many boat plans and blueprints around ...
I think it makes it easer to get a smooth finish. Three coats of epoxy ready to complete hatches. Needs buffing to improve the look and feel. Plywood mold to glue hatch frames together with. Plywood jig in use. Plug removed and windows fitted to the frame. Make a RC Sailboat.
this is a video that shows you some of the basics to build a sail for a modellboat.if you are interested in more information or tips and tricks let me know!b...
After building the T37 I've gone on to build Star 45's, Vintage Marbleheads, and now I've just completed an IOM. Other than the T37 there aren't that many wood sailboat RC kits out there. There are things called "short kits" though. A short kit is where you purchase a bare minimum from a company and then you supply the rest.
The more experienced the sail maker gets the better the sails work. This guide is intended to help newbies to cut heir own sails and build their own rigs. Sailmaking Tips: A piece of thin melamine board about 50x200cm is very helpful to loft the outline of the sails. Use packing paper to sketch the outlines according the class rules or a ...
PlaySTEM Voyager 400 Sailboat w/2.4GHz Transmitter (Red) Not yet reviewed. $89.99. Add to Cart. PlaySTEM Voyager 280 Sailboat w/2.4GHz Transmitter (Green) Not yet reviewed. $109.99. View Details. PlaySTEM Voyager 280 Motor-Powered RC Sailboat (Red) w/2.4GHz Transmitter.
Once you've received your 3DRC Boat, learn how to build using our almost-race-ready kit. Download Building Instructions Now. 3D RC Boats Soling One Meter Instructions. ... 3D RC Boats Soling One Meter Instructions. View our 1-minute video tutorial to get started.
There are 7 common components that are found on nearly all RC Sailboats. The 7 common parts consist of the hull, mainsail, mast, boom, jib, keel and rudder. The hull is the main structure of the boat that contains all the other parts within it. Typically found in the center of an RC Sailboat on the under side of the hull is the keel.
Step 3: Cutting the Pieces. Resize the .PDF as you wish for making a bigger or smaller boat. This model is 900mm long. Tip: Under 550mm boats built with this plans tend to submerge when the lake is choppy. Be careful! Print the pieces in white paper sheets and stick them on the 3mm panel. Draw the contour of the pieces with a pencil into the ...
RC boat kits are self-assembly model boat projects that come with all the necessary parts to build a boat from scratch. These kits include various components such as the hull, deck, motor, radio control system, battery, and propeller. The level of complexity of RC boat kits can vary from simple starter kits to highly advanced kits with complex ...
Scratch built RC sailboat. Scale 1:10.6Will sail this year. The Soling project sort of put this project on hold....
Building Your Own 1m RC Sailboat. Building your own 1m RC sailboat is a great way to dive deeper into the hobby and gain a deeper appreciation for the craftsmanship and engineering that goes into building and operating these boats. Here are some tips to help you build your own 1m RC sailboat:. Decide on the type of boat you want to build and select a set of plans or a kit that meets your needs.
Building an RC boat requires some necessary components and a handy tool set. There are 7 main components needed to create the engine and the vessel. A battery charger and remote controller are required to complete the set. You can choose between BYOB (Bring Your Own Boat) kits or building a DIY boat from scratch.
Materials Needed To Build An RC Boat 1. Hull. The hull is the main body of the RC boat. For our build, we'll be using 1/4 inch plywood to construct the hull. Plywood is lightweight but strong - important qualities for an RC boat hull. We'll cut out the main hull pieces from the plywood using a jigsaw.
Step 1: Turn off the motor of your RC boat to avoid further damage. Step 2: Use a long object such as a stick or fishing rod to push the boat towards the shore or shallow area. Step 3: Use your hands to flip the boat over so that it's right-side up again. Step 4: Turn on the motor and let any excess water drain out.